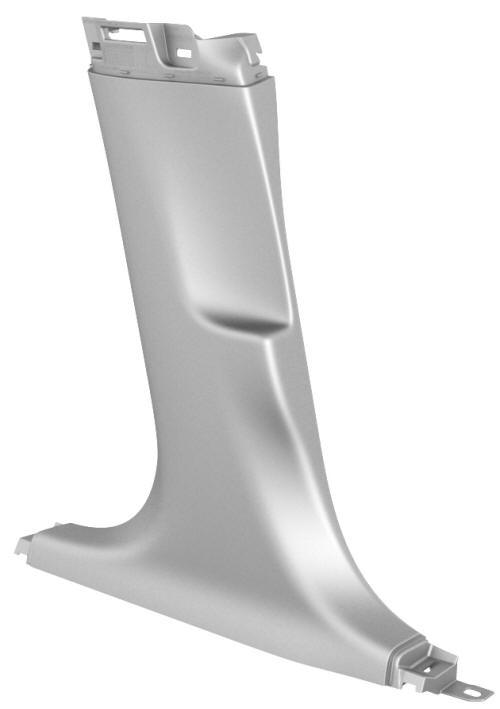
Tesla Model 3: Trim - B-Pillar - Lower - LH (Remove and Replace)
Tesla Model 3 2017-2026 Service Manual / Interior Trim / Pillar and Sill Trim / Trim - B-Pillar - Lower - LH (Remove and Replace)

Remove
- Remove the LH instrument panel end cap. See End Cap - Instrument Panel - LH (Remove and Replace).
- Remove the LH middle A-pillar trim. See Trim - A-Pillar - Middle - LH (Remove and Replace).
- Remove the LH lower A-pillar trim. See Trim - A-Pillar - Lower - LH (Remove and Replace).
- Remove the 2nd row lower seat cushion. See Seat Cushion - Lower - 2nd Row (Remove and Replace).
- Remove the LH 2nd row seat side bolster. See Bolster - Side - Seat - 2nd Row - LH (Remove and Replace).
- Remove the LH rear sill panel trim. See Trim - Sill Panel - Rear - LH (Remove and Replace)
- Remove the LH upper B-pillar trim. See Trim - B-Pillar - Upper - LH (Remove and Replace).
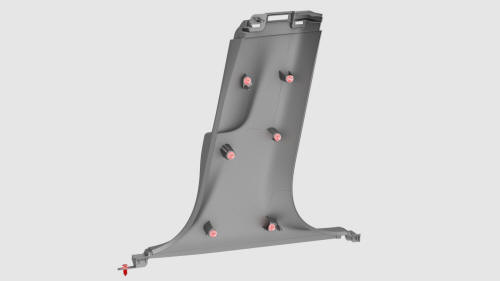
- Release the clips that attach the LH lower B-pillar trim to the body, and remove the trim from the vehicle.
Note: Remove any remaining LH lower B-pillar trim clips from the LH
B-pillar, and if the LH lower B-pillar trim is to be later installed, remove all
clips from the trim.
Install
Installation procedure is the reverse of removal, except for the following:
- If reusing the same LH lower B-pillar trim, install new clips onto the trim.
- Align the LH lower B-pillar trim bottom guide tab with the slot, engage the bottom clips, and then work upward to engage the remaining clips.
- Make sure that the door seal overlaps the LH lower B-pillar trim.
READ NEXT:
 Trim - B-Pillar - Upper - LH (Remove and Replace)
SPECIAL TOOLS
Key, Seat Belt Release, Model 3 (1133787-00-A)
Remove
Open both LH doors.
Move the LH front seat fully forward.
Use the seat belt release key to release the LH front seatbelt
Trim - C-Pillar - Rear - LH (Remove and Replace)
Trim - C-Pillar - Rear - LH (Remove and Replace) - Remove
Remove
Remove the 2nd row lower seat cushion. See
Seat Cushion - Lower - 2nd Row (Remove and Replace).
Remove the LH 2nd row seat side
SEE MORE:
Brake Lines - Master Cylinder to ABS (Remove and Replace)
Brake Lines - Master Cylinder to ABS - Remove
SPECIAL TOOLS
Flare nut crowfoot set (1079041-00-A)
Remove
Caution: Brake fluid dissolves paint. Have c
Penthouse Coolant (Drain and Refill)
Penthouse Coolant- Drain
SPECIAL TOOLS
Drive Unit Pressure Test Fixture (1053600-00-C)
Kit, Coolant Leak Test Adapters, Model 3 (1132185-00-B)
Kit, Coolant Drain & Fill Adapters, M3 (1133843-00-A)
Kit, Svc Plug, Cooling Hose, Model 3 (1135762-00-A)
Kit, Battery Coolant Drain and Fill (GSN-TL-000
© 2019-2026 Copyright www.tmodel3.com
