Tesla Model 3 Owners & Service Manuals

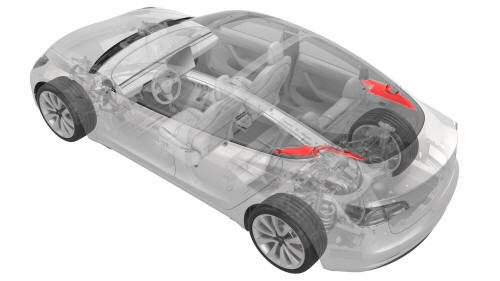
Tesla Model 3: Trim - C-Pillar - Rear - LH (Remove and Replace)

Tesla Model 3 2017-2025 Service Manual / Interior Trim / Pillar and Sill Trim / Trim - C-Pillar - Rear - LH (Remove and Replace)

Trim - C-Pillar - Rear - LH (Remove and Replace) - Remove

Trim - C-Pillar - Rear - LH (Remove and Replace)

Remove

  1. Remove the 2nd row lower seat cushion. See Seat Cushion - Lower - 2nd Row (Remove and Replace).
  2. Remove the LH 2nd row seat side bolster. See Bolster - Side - Seat - 2nd Row - LH (Remove and Replace).
  3. Remove the LH side rail trim. See Trim - Side Rail - LH (Remove and Replace).
  4. Remove the LH upper C-pillar trim. See Trim - C-Pillar - Upper - LH (Remove and Replace).

Trim - C-Pillar - Rear - LH (Remove and Replace)- Remove

  1. Release the clip and tabs that attach the LH rear C-pillar trim to the body, and then set the trim aside.

Trim - C-Pillar - Rear - LH (Remove and Replace)- Remove

  1. Remove and discard the bolt that attaches the lower seatbelt anchor to the vehicle.

Trim - C-Pillar - Rear - LH (Remove and Replace)- Remove

  1. Release the bezel clips that attach the seatbelt bezel to the LH rear C-pillar trim, and then slide the bezel off of the seatbelt.
  2. Move the seatbelt through the LH rear C-pillar trim, and then remove the trim from the vehicle.

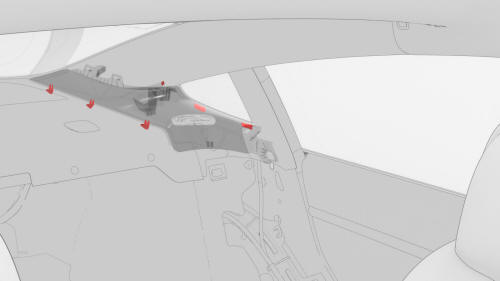
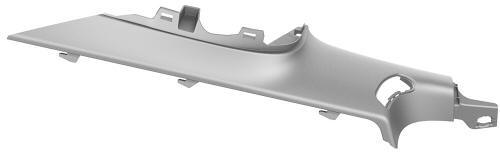
Note: Remove any remaining LH rear C-pillar trim clips from the LH C-pillar, and if the LH rear C-pillar trim is to be later installed, remove all clips from the trim.

Trim - C-Pillar - Rear - LH (Remove and Replace) - Install
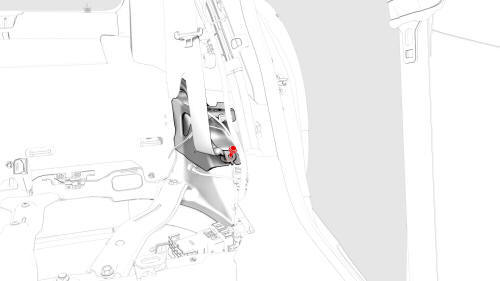
Install

  1. If reusing the same LH rear C-pillar trim, install new clips onto the trim.
  2. Move the seatbelt through the LH rear C-pillar trim.

Trim - C-Pillar - Rear - LH (Remove and Replace)- Install

  1. Slide the seatbelt bezel onto the seat belt, and then fasten the bezel clips that attach the seatbelt bezel to the LH rear C-pillar trim.

Trim - C-Pillar - Rear - LH (Remove and Replace)- Install

  1. Install a new bolt to attach the lower seatbelt anchor to the vehicle.  Torque 30 Nm

Trim - C-Pillar - Rear - LH (Remove and Replace)- Install

  1. Slide the rearmost tabs of the LH rear C-pillar trim into the body first, push the frontmost tabs toward the rear, and then fasten the clip and tabs that attach the LH rear C-pillar trim to the body.
  2. Install the LH upper C-pillar trim. See Trim - C-Pillar - Upper - LH (Remove and Replace).
  3. Install the LH side rail trim. See Trim - Side Rail - LH (Remove and Replace).
  4. Install the LH 2nd row seat side bolster. See Bolster - Side - Seat - 2nd Row - LH (Remove and Replace).
  5. Install the 2nd row lower seat cushion. See Seat Cushion - Lower - 2nd Row (Remove and Replace).

    READ NEXT:

     Trim - C-Pillar - Upper - LH (Remove and Replace)

    Remove Remove the 2nd row lower seat cushion. See Seat Cushion - Lower - 2nd Row (Remove and Replace). Remove the LH 2nd row seat side bolster. See Bolster - Side - Seat - 2nd Row - LH (Remove

    SEE MORE:

     Windshield (Remove and Install)

    Windshield (Remove and Install)-Remove Remove Open all doors and lower all windows. Open the hood. Remove the rear underhood apron. See Underhood Apron - Rear (Remove and Replace). Remove the cabin intake duct. See Duct - Cabin Intake (Remove and Replace). Remove the hood latch cover. S

     About this Owner Information

    Document Applicability Owner information is updated regularly to reflect updates to your vehicle. However, in some cases, recently released features may not be described. To display information about recently released features, view the Release Notes on the touchscreen. Release Notes are disp

    © 2019-2025 Copyright www.tmodel3.com