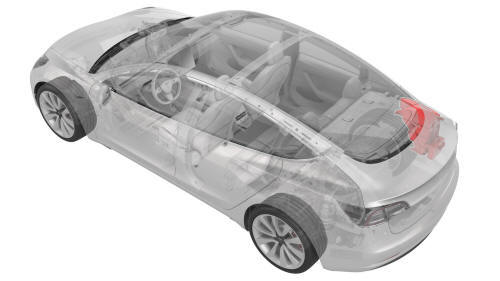
Tesla Model 3: Subwoofer (Remove and Replace)
Tesla Model 3 2017-2026 Service Manual / Infotainment / Audio System - Speakers Subwoofer Amplifier / Subwoofer (Remove and Replace)
Remove
- Disconnect 12V power. See 12V Power (Disconnect and Connect).
- Remove the RH trunk side trim. See Trim - Side - Trunk - RH (Remove and Replace).
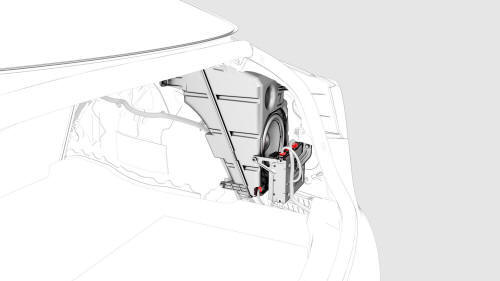
- Disconnect the electrical harness from the amplifier connectors.
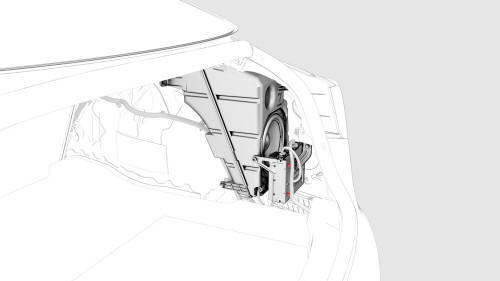
- Release the clips that attach the electrical harness to the subwoofer.
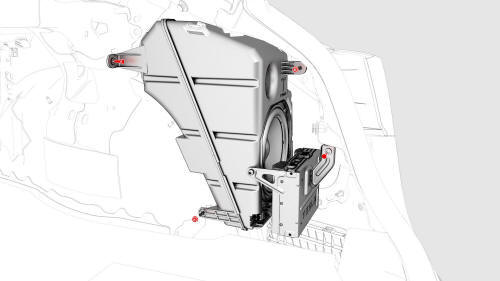
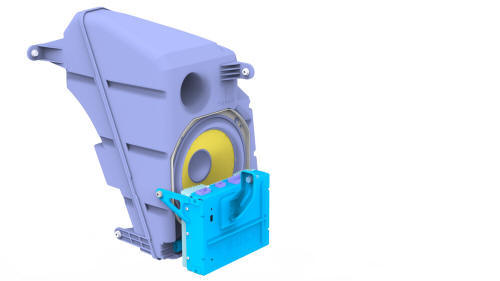
- Remove the bolts and nuts that attach the subwoofer to the body, and
then remove the subwoofer from the vehicle.
 Torque 4.5 Nm
 Torque 4.5 Nm
Install
Installation procedure is the reverse of removal.
READ NEXT:
 Tweeter - Dash (Remove and Replace)
Remove
Remove the LH and RH instrument panel end caps. See End Cap - Instrument
Panel - LH (Remove and Replace).
Remove the LH and RH mid A-pillar trims. See Trim - A-Pillar - Middle -
LH (Re
Tweeter - Front Door - LH (Remove and Replace)
Remove
Pull straight up to release the clips that attach the LH front door
tweeter assembly to the door.
Caution: Do not pull the tweeter assembly too far from the door panel,
as the tweeter
SEE MORE:
Specifications
Identification Labels
Vehicle Identification Number
You can find the VIN at the following
locations:
Touch the Tesla "T" at the top center of
the touchscreen. The popup window
displays the VIN.
Stamped on a plate located at the top of
the dashboard. Can be seen by looking
Park Assist
How Park Assist Works
Model 3 has several sensors designed to
detect the presence of objects. When driving
slowly in Drive or Reverse (for example, when
parking), the sensors alert you if an object is
detected in close proximity of your Model 3.
Objects are only detected in the direction of
© 2019-2026 Copyright www.tmodel3.com
