Tesla Model 3: Wiper Blades (Adjust)

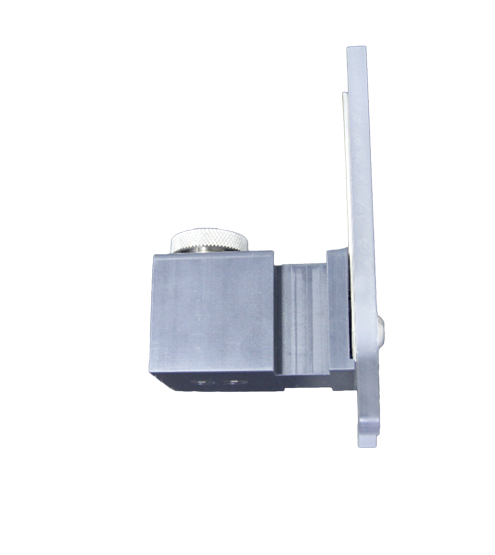
SPECIAL TOOLS
Adjustment
- Using the touchscreen, put the wipers in "Service Mode".
- Clean the wiper blades and the windshield thoroughly with isopropyl alcohol wipes, or equivalent.
- Spray the windshield with the washer jets.
- Cycle the wipers on high speed, and then inspect the cleaning pattern of the wiper blades:
- If no streaking nor chattering of the windshield is present, discontinue this procedure.
- If streaking or chattering of the windshield is present, continue to the next step.
- Remove the LH wiper blade. See Wiper Blades (Remove and Replace).
- Loosen the plate screw of the wiper adjustment tool, so that the measurement plate rotates freely.
- Loosen the thumbscrew on the tool, and slide the tool onto the end of the LH wiper arm.
- Tighten the thumbscrew and make sure that both plastic points are resting on the windshield.
- Check the wiper arm angle, and use a wrench to rotate the tool as necessary to set the correct angle. Adjust the wiper arm angle to -0.5 (+/- 4).
- Remove the tool from the wiper arm.
- Install the wiper blade. See Wiper Blades (Remove and Replace).
- Repeat step 5 to step 11 for the RH wiper arm.
- Using the touchscreen, remove the wipers from "Service Mode".
- Spray the windshield with the washer jets and verify operation. If streaking or chattering still persists, replace the wiper blades and repeat this procedure.
READ NEXT:
 Wiper Blades (Remove and Replace)
Note: This procedure was formulated
using a release candidate or production model. Follow safety requirements and
use extreme caution when working on or near high-voltage systems and compone
Horn - High Tone (Remove and Replace)
Remove
Remove the rear underhood apron. See
Underhood Apron - Rear (Remove and Replace).
Remove the cabin intake duct. See
Duct - Cabin Intake (Remove and Replace).
Remove the hood latch cover
SEE MORE:
Car Status
Overview
The touchscreen displays the status of Model
3 at all times. What you see depends on
whether the vehicle is:
Parked (shown below).
Driving
Charging
When Model 3 is parked, the status area
shows the gear, estimated range, and an
overhead view of the car with buttons you can
t
Spoiler - Rear (Retrofit using Jig)
SPECIAL TOOLS
Kit, Spoiler Alignment, M3 (1479070-00-A )
Procedure
Clean the installation surface of the spoiler with isopropyl alcohol
(IPA) wipes, and allow it to dry before continuing.
Note: Clean any moisture or contaminates that might be present from
rain or vehicle washing, otherwise
© 2019-2026 Copyright www.tmodel3.com
