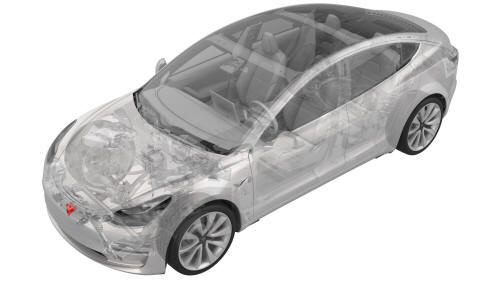
Tesla Model 3: Horn - High Tone (Remove and Replace)
Remove
- Remove the rear underhood apron. See Underhood Apron - Rear (Remove and Replace).
- Remove the cabin intake duct. See Duct - Cabin Intake (Remove and Replace).
- Remove the hood latch cover. See Cover - Hood Latch (Remove and Replace).
- Remove the underhood storage unit carpet. See Carpet - Underhood Storage (Remove and Install).
- Remove the underhood storage unit. See Underhood Storage Unit (Remove and Replace).
- Remove the LH and RH front wheels. See Wheel (Remove and Install).
- Remove the front aero shield. See Panel - Aero Shield - Front (Remove and Replace).
- Remove the front fascia. See Fascia - Front (Remove and Install).
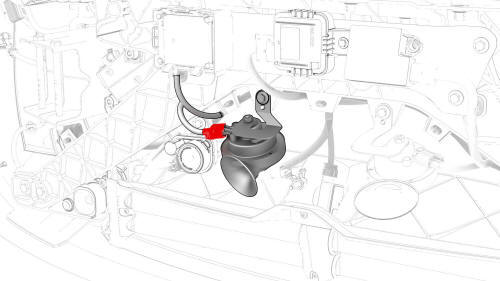
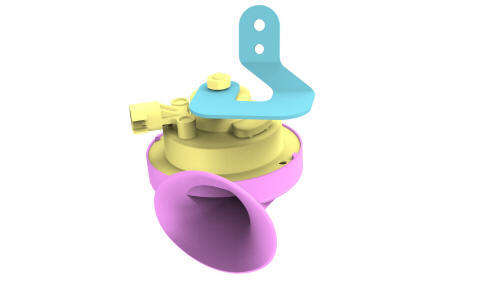
- Disconnect the electrical connector from the high tone horn.
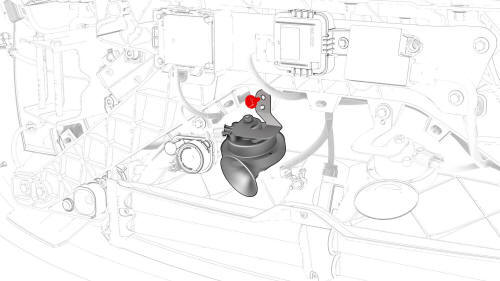
- Remove the bolt that attaches the high tone horn to the carrier, and
then remove the horn from the vehicle.
.jpg) Torque 9 Nm
Torque 9 Nm
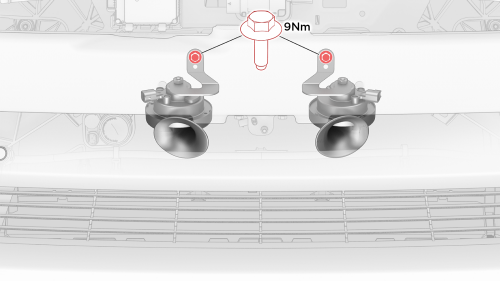
North America
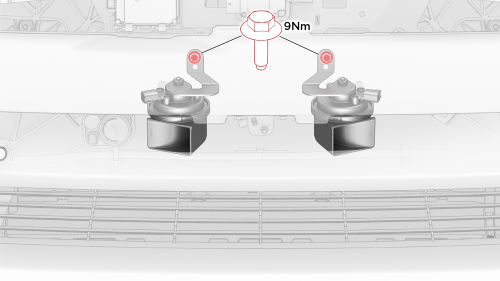
EMEA
Install
Installation procedure is the reverse of removal.
READ NEXT:
 Horn - Low Tone (Remove and Replace)
Remove
Remove the front fascia. See
Remove.
Disconnect the harness from the low tone horn connector.
North America
Remove the bolt that attaches the horn to the carrier, and remove th
Pedestrian Warning Speaker
Speaker - Pedestrian Warning (Remove and Replace)
Remove
Remove the front fascia. See
Fascia - Front (Remove and Install).
Remove the screws that attach the pedestrian warning speaker assemb
Accelerator Pedal
Accelerator (Remove and Replace)
Remove
Remove the 2nd row lower seat cushion. See
Seat Cushion - Lower - 2nd Row (Remove and Replace).
Remove the rear underhood apron. See
Underhood Apron - Re
SEE MORE:
Wiper Blades and Washer Jets
Checking and Cleaning Wiper
Blades
Periodically clean the edge of the wiper
blades and check the rubber for cracks, splits,
and roughness. If damaged, replace the blade
immediately to prevent damage to the glass
and improve visibility.
Contaminants on the windshield, or on the
wiper blades
Front Trunk
Opening/ Closing
Opening
To open the front trunk:
Ensure that the area around the hood is
free of obstacles.
Touch the associated OPEN button on the
touchscreen, double-click the front trunk
button on the key fob accessory, or touch
the front trunk button on the mobile app.
&n
© 2019-2026 Copyright www.tmodel3.com
