Tesla Model 3: Brake Fluid Check
SPECIAL TOOLS
BrakeStrip 100 Brake Fluid Test Strips (1510075-00-A)
Procedure
Caution: Brake fluid dissolves paint. Have clean towels and plenty of water standing by to wash spilled brake fluid off painted surfaces.- Remove the rear underhood apron. See Underhood Apron - Rear (Remove and Replace).
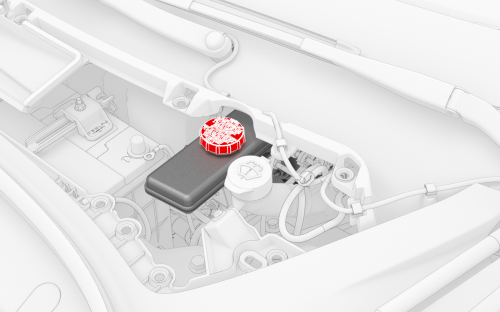
- Clean the area around the brake fluid reservoir and then remove the brake fluid reservoir cap.
- Remove the front RH pinwheel cap, if installed. See Cap - Wheel (Remove and Replace).
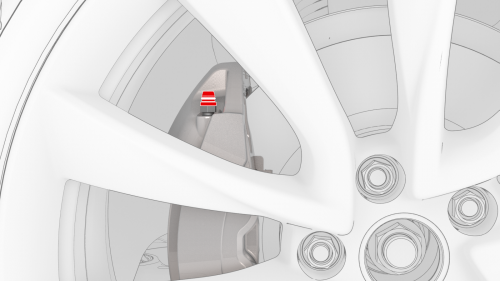
- Remove the cover from the outer brake bleed valve of the front RH caliper.
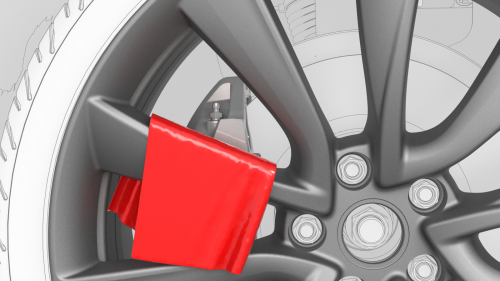
- Position a shop towel over the wheel spokes so as to protect from brake fluid.

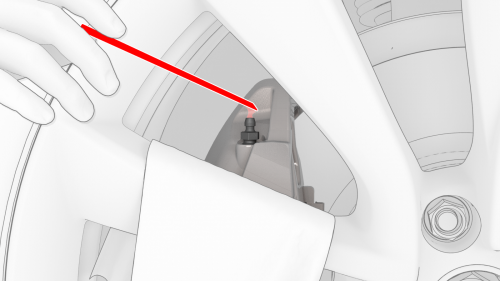
- Loosen the brake bleed valve only enough to allow a drop of brake fluid to seep out, and then close the valve.
- Remove a brake test strip from the container, and then close the container.
- Touch the square pad of the test strip to the fluid, remove the test strip from the wheel, gently shake the test strip over a shop towel to remove excess brake fluid, and start a 90 second timer.
- After 90 seconds, compare the color of the test strip square pad to the color chart on the side of the container.
- If the test strip square pad is darker than the 30 PPM color sample, a brake fluid bleed/flush is recommended.
- If the test strip square pad is the same color, or lighter than the 30 PPM color sample, it is recommended to repeat this brake fluid check in 2 years.
- Record the test strip result and recommendation into the Public Notes field of the Job Line.
- Tighten the brake bleed valve.
.png) Torque 18.5 Nm
Torque 18.5 Nm - Use the shop towel to wipe any excess brake fluid from the brake bleed valve and the caliper.
- Install the cover onto the outer brake bleed valve.
- Install the front RH pinwheel cap, if removed. See Cap - Wheel (Remove and Replace).
- Install the brake fluid reservoir cap.
- Install the rear underhood apron. See Underhood Apron - Rear (Remove and Replace)
READ NEXT:
 Brake Hose - Flexible - Front - LH (Remove and Replace)
SPECIAL TOOLS
Flare nut crowfoot set (1079041-00-A)
Remove
Cauti
Brake Hose - Flexible - Rear - LH (Remove and Replace)
SPECIAL TOOLS
Flare nut crowfoot set (1079041-00-A)
Brake Lines - 4 Tube Bundle - ABS to Wheels (Remove and Replace)
Brake Lines - 4 Tube Bundle - ABS to Wheels - Remove
SPECIAL TOOLS
Flare nut crowfoot set (1079041-00-A)
SEE MORE:
Airbag - Knee - Driver (Remove and Install)
Remove
Remove the LH center console side panel carpet. See Carpet - Side Panel
- Center Console - LH (Remove and Replace).
Disconnect 12V power. See 12V Power (Disconnect and Connect).
Remove the driver footwell cover. See Cover - Footwell - Driver (Remove
and Replace).
Remove the T20
Subframe Assembly - Front (RWD) (Remove and Replace)
Caution:
Vehicles built before March 25th, 2019 have 1st generation front
subframes. Vehicles built on March 25th, 2019 and after have 2nd generation
front subframes. When a 1st generation subframe is replaced with a 2nd
generation subframe, the 1st generation (discontinued) steering rack, if
