Tesla Model 3: Buckle - 2nd Row - Center (Remove and Replace)
Tesla Model 3 2017-2026 Service Manual / Safety and Restraint / Seatbelts / Buckle - 2nd Row - Center (Remove and Replace)
Note:
This procedure was formulated using a release candidate or production model. Follow safety requirements and use extreme caution when working on or near high-voltage systems and components.
SPECIAL TOOLS
Tool, Inductive Heating (1032900-00-A)
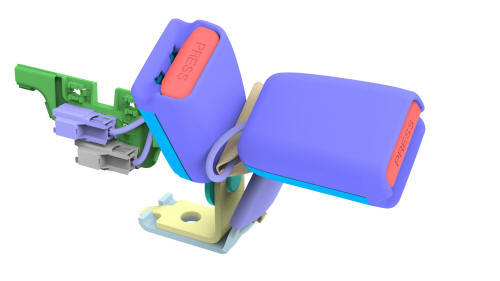
Remove
- Remove the 2nd row seat cushion. See Seat Cushion - Lower - 2nd Row (Remove and Replace).
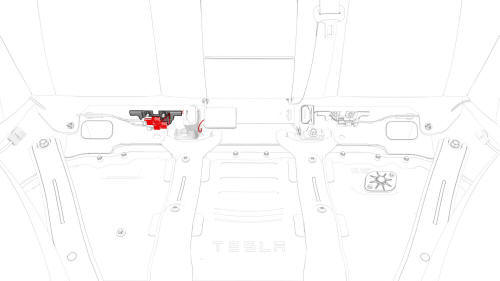
- Disconnect the RH and center seat buckle electrical connectors.
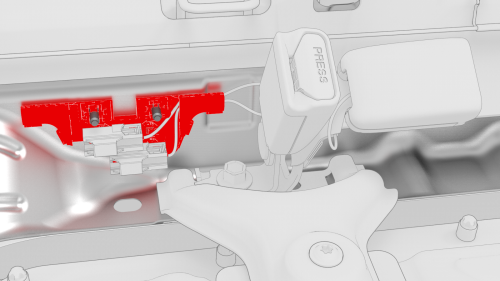
- Release the bracket that attaches the female side of the electrical connectors to the body studs.
- Remove and discard the bolt, and then remove the RH and center seat
buckles together.
 Torque 40 Nm
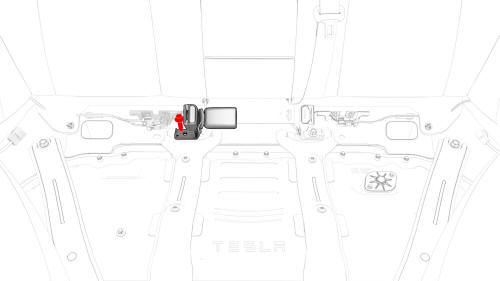
Note: If the bolt is hard to remove, use an inductive
heating tool to melt the adhesive patch material. Position the inductive heating
tool coil around the bolt, and then heat the bolt for 20 seconds. Allow the bolt
to cool down for 2 minutes, and then remove and discard the bolt.
Install
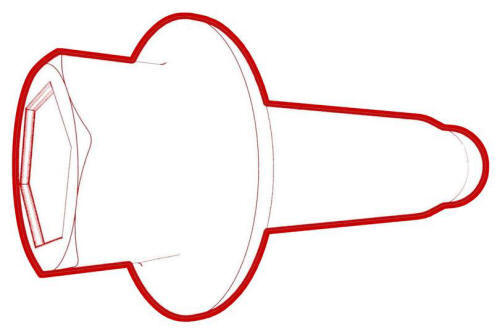
- Install new bolt that attaches the RH and center seat buckles to the
body.
Torque 40 Nm
Note: Make sure that the guide pin is aligned.
- Install the bracket that attaches the female side of the connectors to the body studs.
- Connect the RH and center seat buckle electrical connectors.
- Install the 2nd row seat cushion. See Seat Cushion - Lower - 2nd Row (Remove and Replace).
READ NEXT:
 Buckle - 2nd Row - LH (Remove and Replace)
Note: This procedure was formulated using a release candidate or
production model. Follow safety requirements and use extreme caution when
working on or near high-voltage systems and compone
Adjustable Top Loop (Remove and Replace)
Remove
Open both LH doors and lower both LH windows.
Move the LH front seat fully forward.
Release the clips that attach the LH upper B-pillar trim to the vehicle.
Tip: Release the clips at
Seatbelt - 1st Row - LH (Remove and Replace)
SPECIAL TOOLS
Key, Seat Belt Release, Model 3 (1133787-00-A)
Remove
Remove the LH instrument panel end cap. See End Cap - Instrument Panel -
LH (Remove and Replace).
Remove the LH middle A-pill
SEE MORE:
Sensor - Airbag - C-Pillar - LH (Remove and Replace)
Remove
Open all doors.
Lower all windows.
Remove the 2nd row lower seat cushion. See Seat Cushion - Lower - 2nd
Row (Remove and Replace).
Remove the rear underhood apron. See Underhood Apron - Rear (Remove and
Replace).
Disconnect 12V power. See 12V Power (Disconnect and Connect).
Remov
Brake Hose - Flexible - Front - LH (Remove and Replace)
SPECIAL TOOLS
Flare nut crowfoot set (1079041-00-A)
Remove
Caution:
Brake fluid dissolves paint. Have clean towels and plenty of
water standing by
© 2019-2026 Copyright www.tmodel3.com
