Tesla Model 3: Cap - Wheel (Remove and Replace)
Tesla Model 3 2017-2026 Service Manual / Wheel and Tires / Wheels / Cap - Wheel (Remove and Replace)
SPECIAL TOOLS
Wheel Trim Removal Tool (1044206-00-A)
Remove
- Remove the wheel cap according to the type of wheel.
- 18 inch pinwheel wheel: See step 2
- 19 inch stiletto wheel: See step 3
- Gently pull the wheel cap with both hands to release the clips that
attach the wheel cap to the wheel.
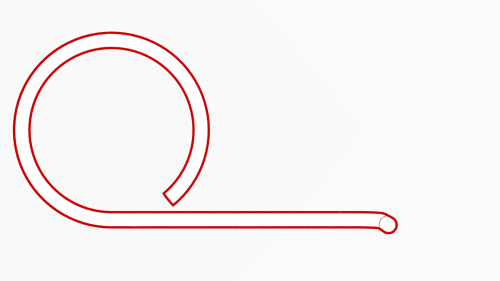
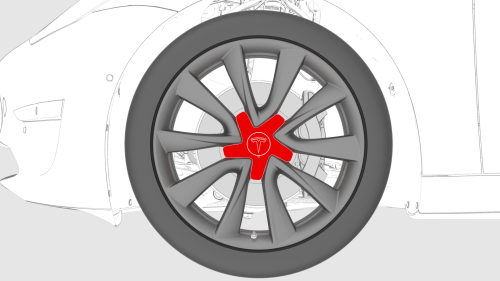
Wheel trim removal tool
Wheel trim removal tool inserted
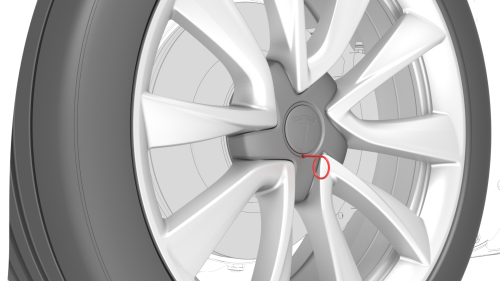
- Insert the wheel trim removal tool in the hole on the center cap, and
then pull to remove the center cap.
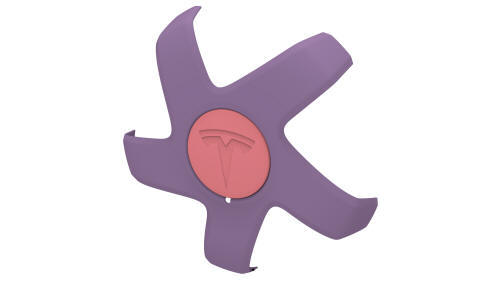
Wheel center cap
Install
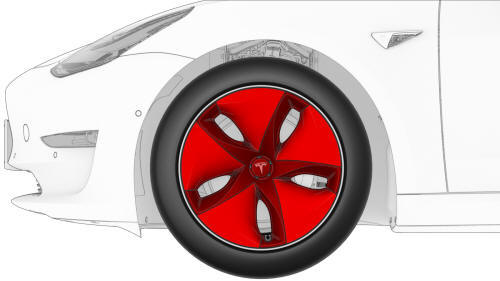
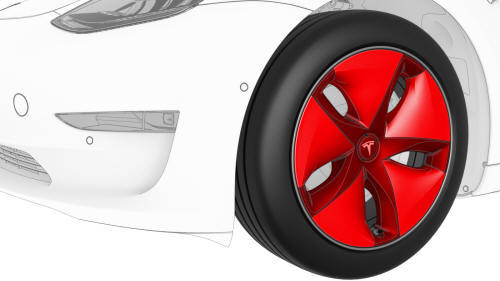
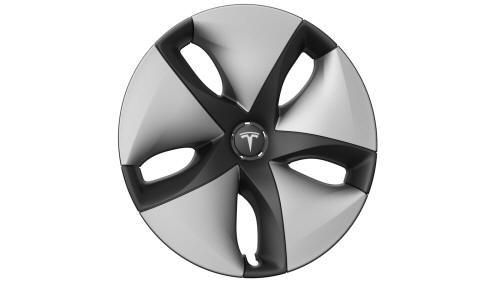
18 inch pinwheel "aero" wheel cap
19 inch stiletto wheel cap
- Position the wheel cap over the wheel with the bottom of the Tesla "T" pointing to the valve stem.
- Press the center of the cap firmly onto the wheel.
READ NEXT:
 Wheel (Remove and Install)
Caution:
Do not install base wheels onto vehicles with performance brakes, or
install performance wheels onto vehicles with base brakes. Base and performance
wheels have different offsets to accom
Tire - Front - LH (Dismount and Mount)
Warning:
Always read and understand the tire equipment operator's
manual before operating the tire changer.
Note: These instructions are based on the Hunter T
SEE MORE:
Grille - Speaker - Instrument Panel (Remove and Replace)
Remove
Remove the LH and RH instrument panel end caps. See
End Cap - Instrument Panel - LH (Remove and Replace).
Remove the LH and RH middle A-pillar trims. See
Trim - A-Pillar - Middle - LH (Remove and Replace).
Remove the LH and RH upper A-Pillar trims. See
Trim - A-Pillar - Upper - LH (
Reservoir - Windshield Washer (Remove and Replace)
Remove
Remove the rear underhood apron. See
Underhood Apron - Rear (Remove and Replace).
Remove the cabin intake duct. See
Duct - Cabin Intake (Remove and Replace).
Remove the hood latch cover. See
Cover - Hood Latch (Remove and Replace).
Remove the underhood storage unit. See
Underhood S
© 2019-2026 Copyright www.tmodel3.com
