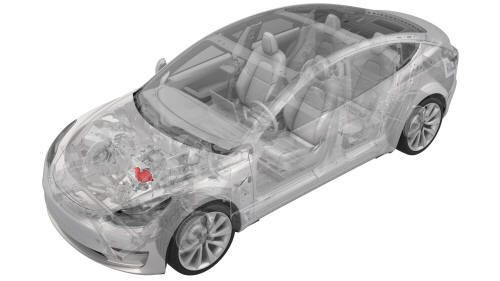
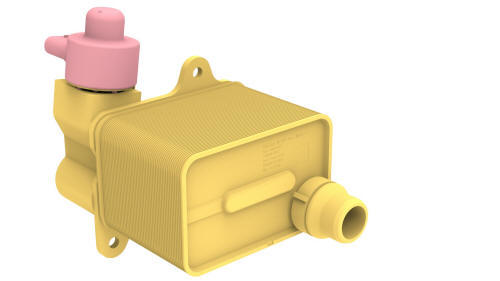
Tesla Model 3: Chiller and EXV Assembly- Remove
Tesla Model 3 2017-2024 Service Manual / Thermal Management / Refrigerant System / Chiller and EXV Assembly (Remove and Replace) / Chiller and EXV Assembly- Remove
Remove
- Remove the mid aero shield panel. See Panel - Aero Shield - Mid (Remove and Replace).
- Remove the underhood storage unit. See Underhood Storage Unit (Remove and Replace).
- Recover the A/C refrigerant. See A/C Refrigerant (Recovery and Recharge).
Note: Recover the refrigerant while continuing this procedure.
- Disconnect 12V power. See 12V Power (Disconnect and Connect).
.png)
- Disconnect the electrical harness from the coolant temperature sensor connector.
- Release the clip that attaches the electrical harness to the chiller and EXV assembly hose, and then remove the electrical harness from the hose.
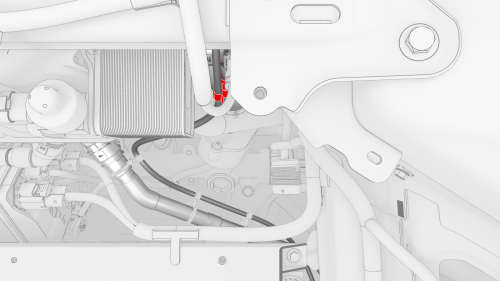
- Release the clip that attaches the battery vent hose to the chiller and EXV assembly hose, and then remove the battery vent hose from the chiller and EXV assembly hose.
- Place a coolant drain under the chiller and EXV assembly, and absorbent material under the chiller and EXV assembly hose fitting.
- Release the clip that attaches the coolant hose to the chiller and EXV assembly, and then remove the hose from the chiller and EXV assembly.
- Immediately install plugs into the male and female fittings of the chiller and EXV assembly and hose to prevent further coolant loss.
.png)
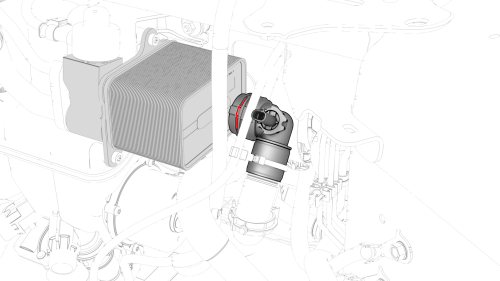
- Disconnect the electrical harness from the chiller and EXV assembly connector.
.png)
- Disconnect the electrical harness from the low pressure transducer connector.
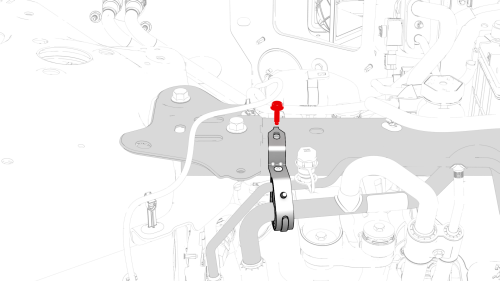
- Remove the bolt that attaches the suction/liquid line bracket to the shock tower brace, and then separate the bracket from the brace.
Note: Make sure that the refrigerant has fully recovered before continuing this procedure.
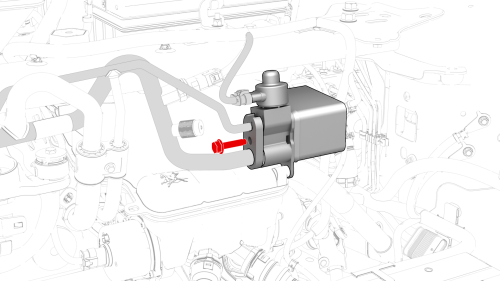
- Remove the bolt that attaches the suction/liquid line to the chiller and EXV assembly, and then remove the line from the chiller and EXV assembly.
- Remove and discard the o-rings from the suction/liquid line fitting.
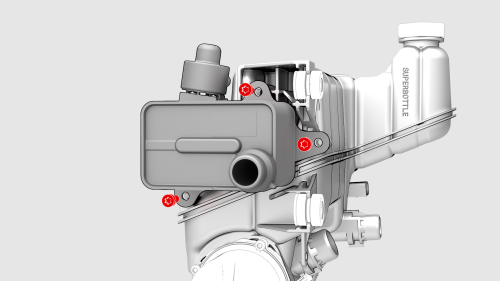
- Remove the bolts (x3) that attach the chiller and EXV assembly to the
superbottle, and then remove the chiller and EXV assembly from the
superbottle.
READ NEXT:
 Chiller and EXV Assembly- Install
Installation procedure is the reverse of removal, except for the following:
Install the chiller and EXV assembly to the superbottle, and then
install the bolts (x3) that attach the chiller and E
Compressor- Remove
Warning:
Only technicians who have been trained in High Voltage Awareness are
permitted to perform this procedure. Proper personal protective equipment (PPE)
and insulating HV gloves with a minim
SEE MORE:
A/C Refrigerant- Recovery
Prepare the AC service machine. See
Preparation.
Turn off the vehicle's climate control.
Connect a laptop with Toolbox to the vehicle.
Remove the underhood storage unit. See
Underhood Storage Unit (Remove and Replace).
Remove the caps from the A/C high pressure and low pressure ports.
C
Halfshaft - Rear Drive Unit - LH - Remove
SPECIAL TOOLS
Kit, EPB Release, Handheld (1134520-00-A)
XP-10 Power Supply, XP-10 (1129348-00-A)
Tool, Axle Extraction, Model 3 (11333
© 2019-2024 Copyright www.tmodel3.com
