Tesla Model 3: Contactor - Positive - HV Battery-Remove
Tesla Model 3 2017-2024 Service Manual / Battery System / HV Battery Electrical Components / Contactor - Positive - HV Battery (Remove and Replace) / Contactor - Positive - HV Battery-Remove
SPECIAL TOOLS
Ratchet, 1/4" Sq Dr, HV Insulated (1057602-00-A)
Ext Bar, Wobble, 1/4" Dr, HV Insulated (1057603-00-A)
Magnet, Flexible, HV Insulated, 18" (1057607-00-A)
Socket, 1/4" Dr, Deep,10 mm,Thin Wall, Insul (1133768-00-A)
Resistance meter, microohm, Hioki RM 3548 (1076927-00-A)
Warning:
Only technicians who have been trained in High Voltage Awareness are permitted to perform this procedure. Proper personal protective equipment (PPE) and insulating HV gloves with a minimum rating of class 0 (1000V) must be worn at all times a high voltage cable, busbar, or fitting is handled. Refer to Tech Note TN-15-92-003, "High Voltage Awareness Care Points" for additional safety information.
Remove
- Remove the pyrotechnic battery disconnect from the penthouse. See Pyrotechnic Battery Disconnect (Remove and Replace).
- Remove the high voltage controller. See Controller - High Voltage (Remove and Replace).
- Remove the 12V DCDC passthrough. See Passthrough - DCDC - 12V (Remove and Replace).
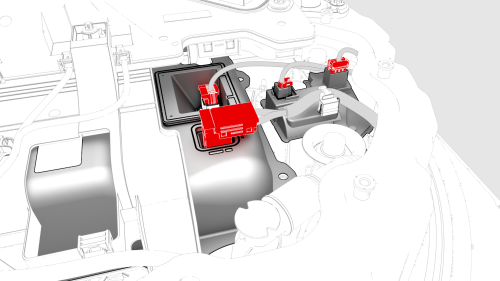
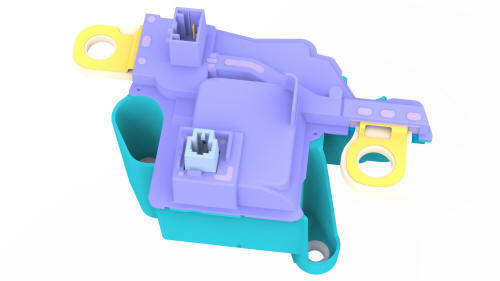
- Disconnect the electrical harness from the power conversion system LV connector and DC bus HV connector, and from the HV battery positive contactor connectors.
- Remove the insulator caps from the HV battery positive contactor.
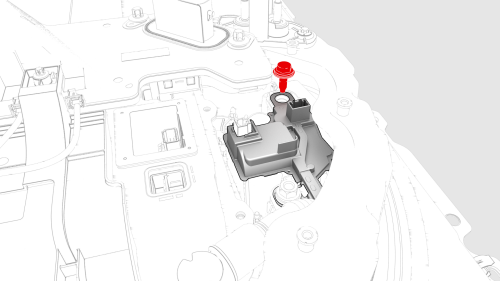
- Remove and discard the bolt that attaches the HV battery positive contactor to the positive busbar.
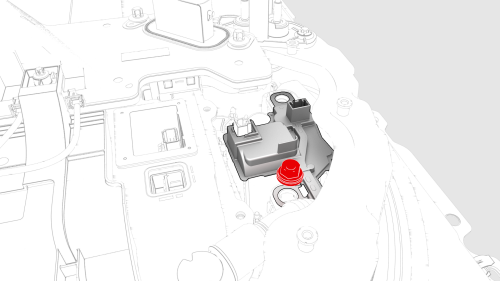
- Remove and discard the nut that attaches the HV battery positive contactor to the battery terminal.
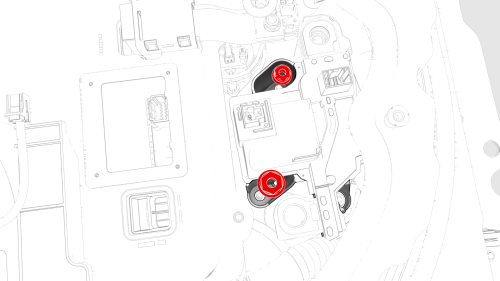
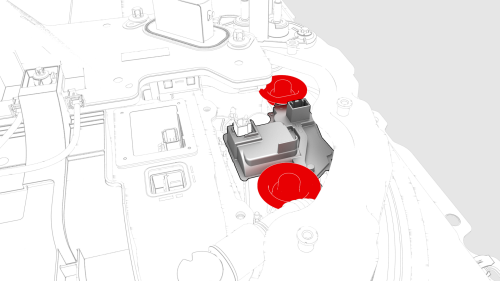
- Remove the nuts (x3) that attach the positive HV battery power switch to the penthouse.
- Tilt the rear of the HV battery positive contactor up, and then remove
the contactor from the penthouse.
READ NEXT:
 Contactor - Positive - HV Battery-Install
Install
Caution:
Replace all patchbolts.
Replace all nyloc nuts.
Use an IPA wipe to clean the high voltage mating surfaces of the HV
battery terminal, positive busbar, and the HV battery posit
Controller - High Voltage- Remove
Warning: Only technicians who have been trained in High Voltage
Awareness are permitted to perform this procedure. Proper personal protective
equipment (PPE) and insulating HV gloves with a minimu
SEE MORE:
Overhead Console - Front (Remove and Replace)
Remove
Release the clips (x2) that attach the front overhead console to the
headliner, and then lower the console from the headliner.
Caution:
To avoid damaging the headliner, do not pry against the headliner.
Insert a 90 degree trim tool near the dome light and pull downwards to releas
Load Capacity Labeling
It is important to understand how much
weight your Model 3 can safely carry. This
weight is called the vehicle capacity weight
and includes the weight of all occupants,
cargo and any additional equipment added to
your Model 3 since it was manufactured.
Two labels attached to Model 3 indicate
© 2019-2024 Copyright www.tmodel3.com
