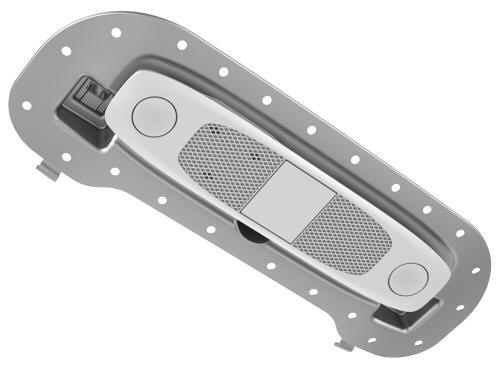
Tesla Model 3: Overhead Console - Front (Remove and Replace)
Tesla Model 3 2017-2026 Service Manual / Interior Trim / Headliner / Overhead Console - Front (Remove and Replace)
Remove
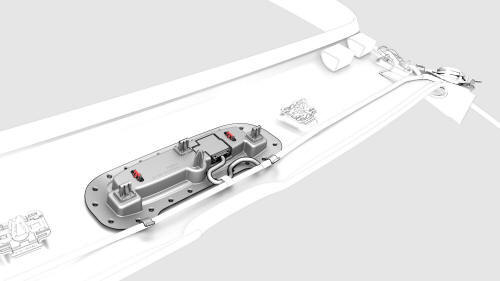
- Release the clips (x2) that attach the front overhead console to the headliner, and then lower the console from the headliner.
Caution:
To avoid damaging the headliner, do not pry against the headliner. Insert a 90 degree trim tool near the dome light and pull downwards to release the clip, and then move to the other side to release the remaining clip.
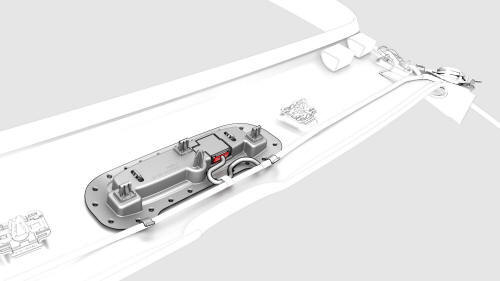
- Disconnect the electrical connector from the front overhead console.
- Remove the front overhead console from the overhead console.
Install
- Connect the front overhead console electrical connector.
- Push upwards the front overhead console into the headliner and attach it with clips (x2)
- Connect a laptop with Toolbox to the vehicle.
- In Toolbox, type "VFOHC" in the search tab.
Note: Make sure "Actions" is selected in Toolbox, if not already.
- In Toolbox, navigate to "TESTSELF_ VCLEFT_X_VFOHC" and press play.
- Use Toolbox to update the vehicle firmware.
READ NEXT:
 Overhead Console - Rear (Remove and Replace)
Remove
Release the clips (x2) that attach the rear overhead console to the
headliner, and then lower the console from the headliner.
Caution:
To avoid damaging the headliner, do not pry
Cover - Hood Latch (Remove and Replace)
Remove
Open the hood.
Release the clips that attach the hood latch cover to the body.
Tip: Grab the cover from the bottom, and then pull it
upward to release the clips.
Disconne
SEE MORE:
Autosteer
Note: Autosteer is a BETA feature.
Autosteer builds upon Traffic-Aware Cruise
Control, intelligently keeping Model 3 in its
driving lane when cruising at a set speed.
Autosteer also allows you to use the turn
signals to move Model 3 into an adjacent lane. Using
the vehicle's camera(s), t
Light - Side Repeater - Front - LH (Remove and Replace)
Remove
Raise and support the vehicle. See Raise Vehicle - 2 Post Lift.
Apply protective tape to the LH fender around the front side repeater
light.
Remove the LH front wheel. See Wheel (Remove and Install).
Remove the LH front wheel arch liner. See Wheel Arch Liner - Front - LH
(Remove an
© 2019-2026 Copyright www.tmodel3.com
