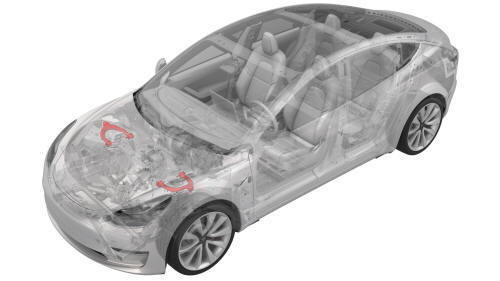
Tesla Model 3: Control Arm - Upper - Front - LH - Remove
Tesla Model 3 2017-2024 Service Manual / Suspension / Front Suspension (Including Hubs) / Control Arm - Upper - Front - LH (Remove and Replace) / Control Arm - Upper - Front - LH - Remove
SPECIAL TOOLS
Tool, FUCA Ride Height, Model 3 (1450399-00-A)
Remove
- Raise and support the vehicle. See Raise Vehicle - 2 Post Lift
- Remove the LH front wheel. See Wheel (Remove and Install).
- Remove the rear underhood apron. See Underhood Apron - Rear (Remove and Replace).
- Remove the cabin intake duct. See Duct - Cabin Intake (Remove and Replace).
- Remove the hood latch cover. See Cover - Hood Latch (Remove and Replace).
- Remove the underhood storage unit. See Underhood Storage Unit (Remove and Replace).
- Remove the LH and RH wiper arms. See Wiper Arms (Remove and Replace).
- Remove the cowl screen panel. See Panel - Cowl Screen (Remove and Replace).
- Remove the front LH wheel arch liner. See Wheel Arch Liner - Front - LH (Remove and Replace).
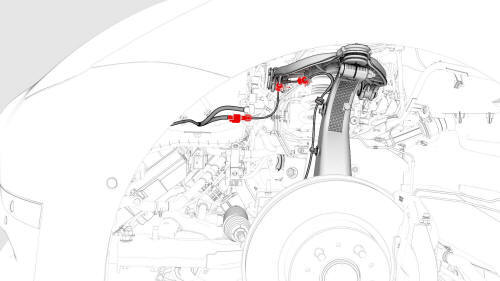
- Disconnect the wheel speed sensor connector, and then release the harness from the clips on the body and upper control arm.
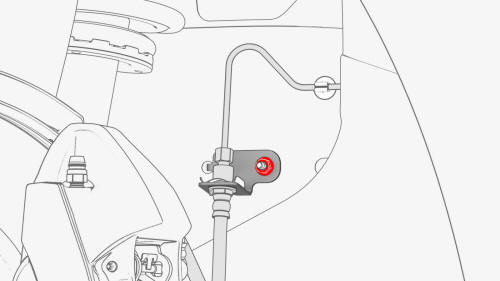
- Dual Motor only: Remove the nut that attaches the LH front jounce hose bracket to the vehicle.
- Raise the vehicle partially.
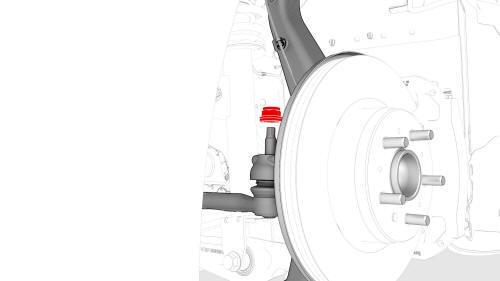
- Remove and discard the nut that attaches the LH tie rod end to the knuckle, and then remove the tie rod end from the knuckle.
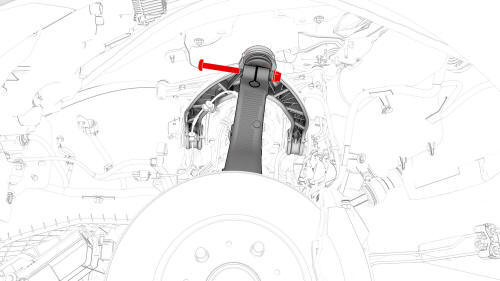
- Remove the bolt and nut that attach the upper control arm to the knuckle, and then discard the nut.
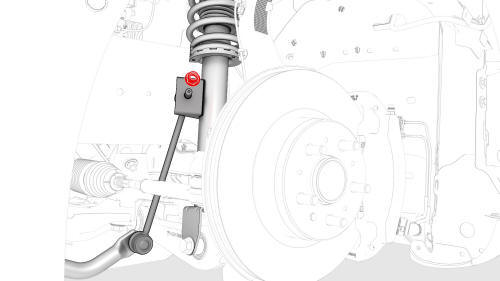
- Remove and discard the nut that attaches the stabilizer bar link to the LH front spring and damper assembly, and then move the link aside.
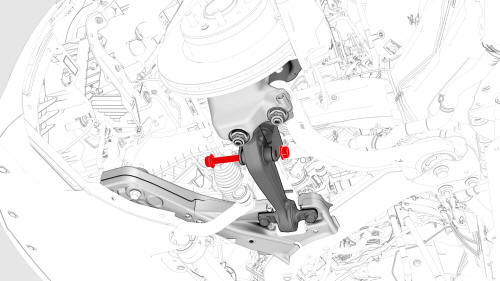
- Remove the bolt and nut that attach the LH front spring and damper assembly to the lower control arm.
- Remove the stand and lower the vehicle to a working height.

- Release the clips that attach the LH shock tower cover to the body, and then remove the LH shock tower cover from the vehicle.

- Remove the smaller bolts that attach the spring and damper assembly to the shock tower.
- Remove the larger bolts that attach the spring and damper assembly to the shock tower.
- Carefully remove the LH front spring and damper assembly from the vehicle.
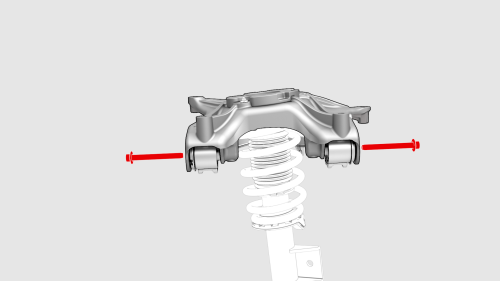
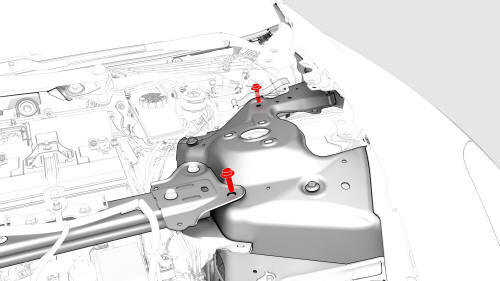
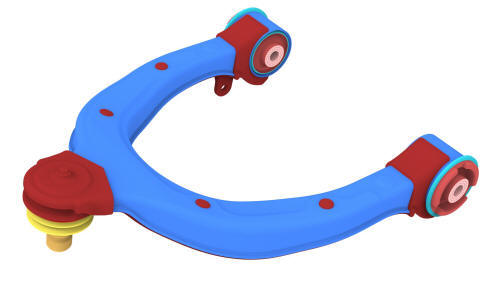
- Remove the bolts that attach the LH front upper control arm to the front upper control arm mount.
- Remove the LH front upper control arm from the front upper control arm
mount.
READ NEXT:
 Control Arm - Upper - Front - LH - Install
Install
Install the LH front upper control arm into the front upper control arm
mount, and then install and hand-tighten the bolts (x2) that attach the
control arm to the mount.
Install t
Hub - Front - LH (Dual Motor) - Remove
SPECIAL TOOLS
Card, Magnetic Field Viewer (1062500-00-A)
Remove
If equipped, remove the LH front wheel center cap. See
Cap - Wheel (Remove and Replace).
Loosen the LH front wheel lug nuts.
Caut
SEE MORE:
Penthouse Air Leak Test
SPECIAL TOOLS
Pack Enclosure Leak Tester, HV Battery (1026636-00-A)
Pack Kit, Enclosure, Leak Test, HV Battery, Complete (1140501-00-A)
Kit, Encl Leak Test Adapters, HV Battery (1144879-00-A)
Kit, Dummy Plug (1455410-00-A)
Cap, Logic Conn, Inv, 3DU (1108272-00-B)
Parent topic:
1610 - HV Battery En
Beam - 12V Battery (RWD) - Remove
Remove
Remove the 2nd row lower seat cushion. See
Seat Cushion - Lower - 2nd Row (Remove and Replace).
Remove the rear underhood apron. See
Underhood Apron - Rear (Remove and Replace).
Remove the cabin intake duct. See
Duct - Cabin Intake (Remove and Replace).
Remove the hood latch cover.
© 2019-2024 Copyright www.tmodel3.com
