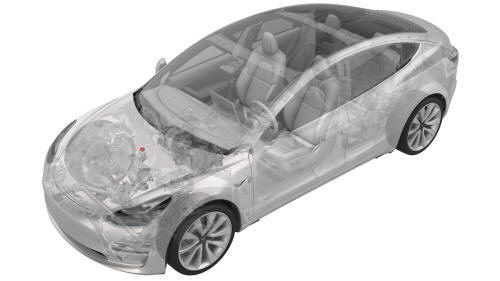
Tesla Model 3: Cooling System (Check and Fill)
Tesla Model 3 2017-2026 Service Manual / Thermal Management / Cooling System / Cooling System (Check and Fill)
Remove
- Remove the rear underhood apron. See Underhood Apron - Rear (Remove and Replace).
- Remove the cabin intake duct. See Duct - Cabin Intake (Remove and Replace).
- Remove the outer HVAC plenum duct. See Duct - HVAC Plenum - Outer (Remove and Replace).
Procedure
- Connect a laptop with Toolbox to the vehicle.
- Type "thermal" into the search field.
Note: Make sure "Actions" is selected if not already.
- Click the play button next to "PROC_VCFRONT_X_THERMAL-FILL-DRAIN", and then select Run.
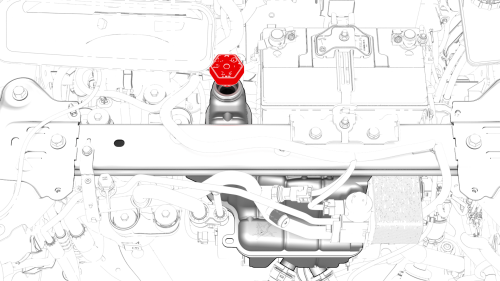
- Remove the cap from the superbottle reservoir.
- Add coolant to the superbottle, so that the liquid level is approximately 6mm (0.25 in) above the MAX line.
- Type"vcfront" into the search field.
- Click the play button next to "TEST-RESET_VCFRONT", and then select Run.
- Click the play button next to "TEST_VCFRONT_X_THERMAL-COOLANT-AIR-PURGE", and then select Run.
Note: Make sure that the drive rails are off. Turning on the drive rail will stop the routine.
Note: The test lasts approximately 10 minutes.
Note: Test will vary speeds from 3,500 to 6,500 RPM, viewable under the PT Thermal tab.
Note: If speeds hover at around 7,000 RPM, perform this procedure again.
- Inspect the coolant level in the superbottle, and add coolant so that the liquid level is approximately 6mm (0.25 in) above the MAX line.
- Install the cap on the superbottle reservoir.
Install
Installation procedure is the reverse of removal.
READ NEXT:
 Cooling System (Drain and Refill)
Cooling System - Remove
Remove
Remove the 2nd row lower seat cushion. See Seat Cushion - Lower - 2nd
Row (Remove and Replace).
Remove the rear underhood apron. See Underhood Apron - Rear (Remov
SEE MORE:
Flood Ports - 2nd Generation (Remove and Replace)
Flood Ports - 2nd Generation (Remove and Replace) - Remove
Remove
Connect a laptop with Toolbox 3 to the vehicle.
In Toolbox, click in the Search field, and then click Tools.
From the Tools menu, click Active Alerts.
Click Read Alerts and check for a BMS_a123, BMS_a151, or a BMS_a035
alert
Raise Vehicle - 4 Post Lift
DRAFT
Warning:
This procedure was derived from pre-production computer models, and
might not reflect the real-world situation. Warnings and cautions might be
missing. Follow safety requirements and use extreme caution when working on or
near high voltage systems and components. Do not redistribu
© 2019-2026 Copyright www.tmodel3.com
