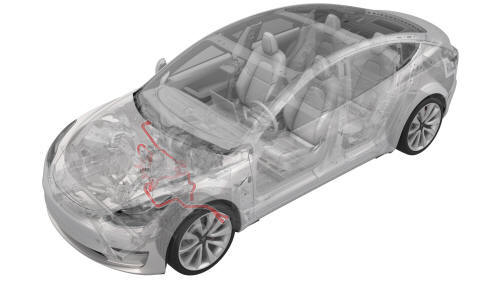
Tesla Model 3: Cooling System (Drain and Refill)
Cooling System - Remove
Remove
- Remove the 2nd row lower seat cushion. See Seat Cushion - Lower - 2nd
Row (Remove and Replace).
- Remove the rear underhood apron. See Underhood Apron - Rear (Remove and
Replace).
- Remove the cabin intake duct. See Duct - Cabin Intake (Remove and
Replace).
- Disconnect 12V power. See 12V Power (Disconnect and Connect).
- Remove the front aero shield. See Panel - Aero Shield - Front (Remove
and Replace).
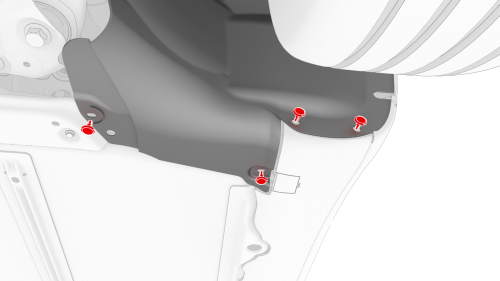
LH side shown, RH similar
- Release the push clips that attach the lower rear edge of the LH and RH
wheel liners to the vehicle for access to the coolant hose.
- Pull the LH and RH wheel liners back, and then attach the liners to the
subframe with bungee straps.
- Position the coolant drain container underneath the RH front side of the
HV battery.
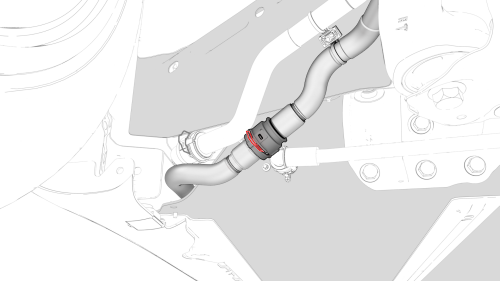
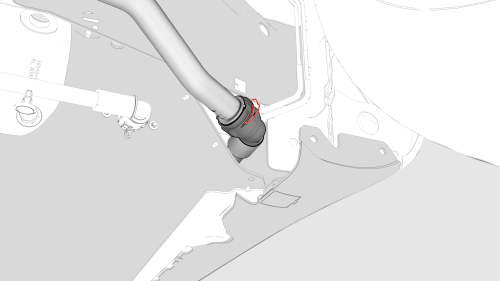
- Release the spring clip to disconnect the powertrain return hose at the
RH side of the vehicle, and then plug the female side of the hose.
- Attach a powertrain drain fitting adapter to the male side of the
powertrain return hose, and then attach a hose extension to the adapter
- Attach the hose extension to the coolant cart drain hose.
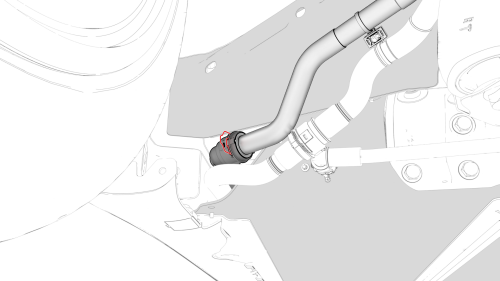
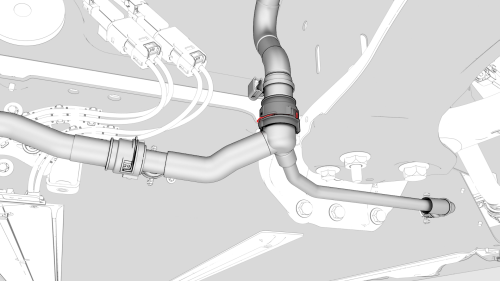
- Release the spring clip to disconnect the rear powertrain supply hose at
the RH side of the vehicle, and then plug the male side of the hose.
- Attach a powertrain flush fitting adapter to the female side of the rear
powertrain supply hose.
- Attach the powertrain flush fitting adapter to the coolant pressure
tester on the coolant cart, and then preset the pressure regulator valve.
- Attach a compressed air line to the coolant pressure tester.
Note: Make sure the valve on the pressure regulator is closed.
- Open the valve on the powertrain drain fitting adapter.
- Slowly open the valve on the pressure regulator and allow coolant to
drain out of the powertrain return hose
- Close the valve on the pressure regulator when no more coolant is
draining from the powertrain return hose
- Remove the powertrain flush fitting adapter from the female side of the
powertrain supply hose.
- Remove the powertrain drain fitting adapter from the male side of the
powertrain return hose.
- Remove the plugs and attach the spring clips (x2) to reconnect both
powertrain coolant hoses.
- Remove the powertrain drain fitting adapter from the cart drain hose,
and then remove the powertrain flush fitting adapter from the cart pressure
hose.
- Position the coolant drain container underneath the LH front side of the
HV battery.
- Release the spring clip to disconnect the HV battery return hose at the
LH side of the vehicle, and then plug the male side of the hose.
- Attach the battery drain fitting adapter to the female side of the HV
battery return hose, and then attach the battery drain fitting adapter to
the coolant cart drain hose.
- Release the spring clip to disconnect the HV battery supply hose, and
then plug female side of the hose.
.png)
- Release the clips that attach the chiller hose to the body.
- Attach a battery flush fitting adapter to the male side of the HV
battery supply hose.
- Attach the battery flush fitting adapter to the coolant cart pressure
hose.
- Open the valve on the battery drain fitting adapter.
- Slowly open the valve on the pressure regulator and allow coolant to
drain out of the HV battery return hose.
- Close the valve on the pressure regulator when no more coolant is
draining from the HV battery return hose
- Disconnect the compressed air line from the coolant pressure tester.
- Remove the battery drain fitting adapter from the female side of the HV
battery return hose.
- Remove the battery flush fitting adapter from the male side of the HV
battery supply hose.
- Remove the plug and reconnect the HV battery to battery chiller hoses.
- Remove the plug and reconnect the HV battery return hose.
- Install the clips that attach the battery chiller hose to the body.
- Remove the coolant drain container from underneath the vehicle.
- Remove the battery drain fitting adapter from the cart drain hose, and
then remove the battery flush fitting adapter from the cart pressure hose.
Cooling System - Procedure
Procedure
LH side shown, RH similar
- Release the bungee straps and install the push clips that attach the
lower rear edge of the LH and RH front wheel liners to the vehicle.
- Install the front aero shield. See Panel - Aero Shield - Front (Remove
and Replace).
- Connect 12V power. See 12V Power (Disconnect and Connect).
- Connect a laptop with Toolbox to the vehicle.
- Type "thermal" into the search field.
Note: Make sure "Actions" is selected if not already.
- Click the play button next to "PROC_VCFRONT_X_THERMAL-FILL-DRAIN", and
then select Run
- Remove the outer HVAC plenum duct. See Duct - HVAC Plenum - Outer
(Remove and Replace).
- Remove the cap from the superbottle reservoir.
- Fill a container with at least 15 L of coolant, and then place the
container into the front storage area.
- Fully submerge the coolant refill hose into the coolant container.
- Attach the vacuum refill tool to the superbottle.
Note: Use a cone shaped adapter to ensure vacuum will be pulled
from the lower chamber.
- Make sure the coolant refill valve and the air inlet valve are both
closed.
- Place the end of the overflow hose into an empty container.
- Connect shop air supply to the vacuum refill tool and set the minimum
pressure to 5.5 bar (80 PSI).
- Open the air inlet valve for 10 seconds to allow the vacuum tool to
evacuate the cooling system and create a vacuum.
- Slowly open the coolant refill valve to allow coolant to be drawn into
the coolant refill hose. Close the valve when the hose is full of coolant.
Note: This purges trapped air from the hose.
- Monitor the gauge for 30 seconds to verify a vacuum is maintained in the
cooling system.
- Reopen the air inlet valve for 3 minutes to evacuate the cooling system,
and then close the valve.
- Slowly open the coolant refill valve to allow coolant to be drawn in the
cooling system. When the gauge stops moving, close the coolant refill valve.
Note: Make sure the end of the coolant refill hose is fully
submerged during the entire process.
- Lift the coolant refill tool from the reservoir and hold above the
coolant container to allow excess coolant to drain.
- Disconnect the shop air supply from the coolant refill tool.
- Remove both coolant containers from the front storage area.
- Type "vcfront" into the search field.
- Click the play button next to "TEST-RESET_VCFRONT", and then select Run.
- Click the play button next to
"TEST_VCFRONT_X_THERMAL-COOLANT-AIR-PURGE", and then select Run.
Note: Make sure that the drive rails are off. Turning on the drive
rail will stop the routine.
Note: The test lasts approximately 10 minutes.
Note: Test will vary speeds from 3,500 to 6,500 RPM,
viewable under the PT Thermal tab.
Note: If speeds hover at around 7,000 RPM, the pumps are air
locked. Go to step 9 and perform the vacuum fill again.
- Inspect coolant level and top off if necessary.
Install
- Install the cap on the superbottle reservoir.
- Install the outer HVAC plenum duct. See Duct - HVAC Plenum - Outer
(Remove and Replace).
- Install the cabin intake duct. See Duct - Cabin Intake (Remove and
Replace).
- Install the rear underhood apron. See Underhood Apron - Rear (Remove and
Replace).
- Install the 2nd row lower seat cushion. See Seat Cushion - Lower - 2nd
Row (Remove and Replace)
READ NEXT:
DRAFT
Warning:
This procedure was derived from pre-production computer models, and
might not reflect the real-world situation. Warnings and cautions might be
missing. Follow safety requirements and
SEE MORE:
Spring and Damper Assembly - Front - LH - Remove
Remove
Raise and support the vehicle. See Raise Vehicle - 2
Post Lift.
Remove the LH front wheel. See Wheel (Remove and
Install).
Remove
Remove the rear underhood apron. See
Underhood Apron - Rear (Remove and Replace).
Remove the cabin intake duct. See
Duct - Cabin Intake (Remove and Replace).
Remove the hood latch cover. See
Cover - Hood Latch (Remove and Replace).
Remove the underhood storage unit. See
Underhood S
 Cooling System (Partial Refill and Bleed)
