Tesla Model 3: Cover - HV Probe - HV Battery (Remove and Replace)
Tesla Model 3 2017-2026 Service Manual / Battery System / HV Battery Enclosure / Cover - HV Probe - HV Battery (Remove and Replace)
Warning:
Only technicians who have been trained in High Voltage Awareness are permitted to perform this procedure. Proper personal protective equipment (PPE) and insulating HV gloves with a minimum rating of class 0 (1000V) must be worn at all times a high voltage cable, busbar, or fitting is handled. Refer to Tech Note TN-15-92-003, "High Voltage Awareness Care Points" for additional safety information.
Remove
- Disconnect 12V power. See 12V Power (Disconnect and Connect).
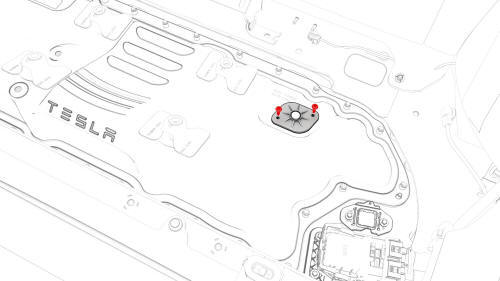
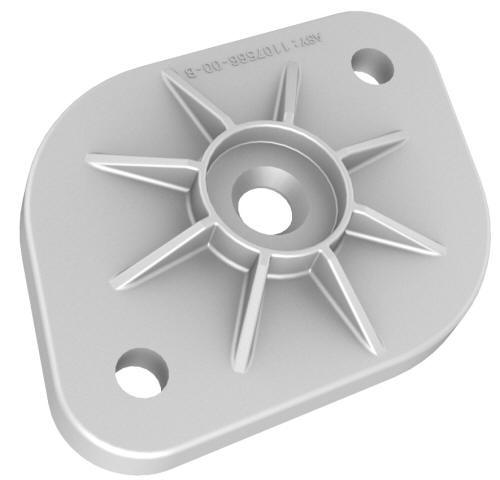
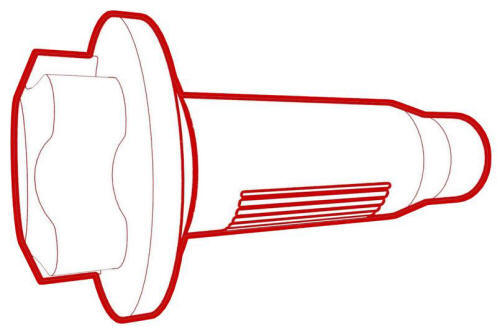
- Remove and discard the 5-lobe bolts (x2) that attach the HV probe cover
to the penthouse cover, and then remove the HV probe cover from the
penthouse cover.
Install
- Use an IPA wipe to clean the HV probe cover gasket surface, and the mating surface of the penthouse cover.
- Inspect the condition of the HV probe cover gasket, and if there is any cracking, cuts, or damage, install a new gasket into the HV probe cover.
- Install the HV probe cover onto the penthouse cover, install new 5-lobe
bolts to attach the HV probe cover to the penthouse cover, and then mark the
bolts with a paint pen after they are torqued.
 Torque 6 Nm
 - Perform a penthouse air leak test. See Penthouse Air Leak Test.
- Connect 12V power. See 12V Power (Disconnect and Connect).
READ NEXT:
 Cover - Penthouse (Remove and Replace)
SPECIAL TOOLS
Asy, Service Cover, Penthouse, Model 3 (1127845-00-A)
Skt, 1/4in Dr, 5-Lobe Torx Plus External (1059330-00-B)
Wrench, Torque + Angle, 1/4" Dr (1076971-02-A)
Cap, Logic Conn, Inv, 3DU
SEE MORE:
Glove Box (LHD) (Remove and Replace) - Install
Install
Glove box harness connectors
Bring the glove box into the vehicle, and then connect the electrical
harness to the glove box solenoid connector, the damper connector, and the
puddle light connector
Note: 2 of the electrical connectors are accessed from the bottom
of the instrument
Panel - Aero Shield - Front (Remove and Replace)
Remove
Raise and support the vehicle. See
Raise Vehicle - 2 Post Lift.
Remove the bolts (x9) that attach the front aero shield panel to the
vehicle.
Remove the nuts (x2) that attach the front aero shield panel to the
vehicle, and then remove the panel from the vehicle
Ins
© 2019-2026 Copyright www.tmodel3.com
