Tesla Model 3: Decor Trim - Instrument Panel - Main (Remove and Replace)
Tesla Model 3 2017-2026 Service Manual / Instrument Panel / Decor Trim - Instrument Panel - Main (Remove and Replace)
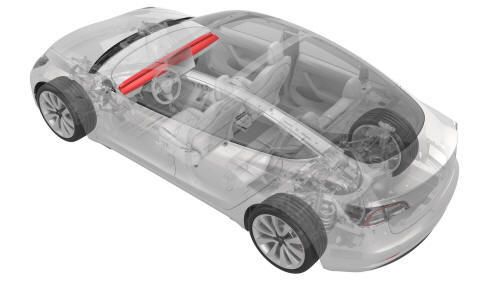
Remove
- Remove both the LH and RH air wave end caps. See End Cap - Air Wave - LH (Remove and Replace).
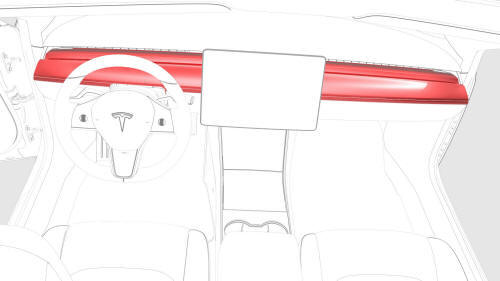
- Release the clips that attach the main instrument panel decor trim, and
then remove the trim from the instrument panel.
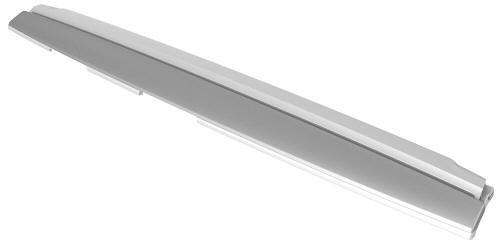
Install
Installation procedure is the reverse of removal, except for the following:
- Check for any damaged clips and replace them as necessary.
- Make sure that the instrument panel decor trim clips are fully seated to the instrument panel.
- Use Toolbox to perform an air wave functionality check to make sure the instrument panel decor trim clips are fully seated
READ NEXT:
 End Cap - Instrument Panel - LH (Remove and Replace)
Remove
Release the clips that attach the end cap
Remove the end cap from the vehicle.
Install
Installation procedure is the reverse of removal.
Finisher - Vent (Remove and Replace)
Remove
Remove the LH instrument panel end cap. See
End Cap - Instrument Panel - LH (Remove and Replace).
Remove both the LH and RH air wave end caps. See
End Cap - Air Wave - LH (Remove and Re
SEE MORE:
Keys
Three Types of Keys
Model 3 supports three types of keys:
Authenticated phone - You can set up
your personal smartphone to
communicate with Model 3 using
Bluetooth. Supports automatic locking
and unlocking as well as several other
functions using the Tesla mobile app.
Key card - Tesl
Headliner (Remove and Replace)
Remove
Remove the headliner. See
Headliner (Remove and Install).
Release the clips that attach the LH and RH headliner tweeter covers to
the headliner, and remove the tweeter covers from the headliner.
Disconnect the electrical harness from the front overhead console
connector.
© 2019-2026 Copyright www.tmodel3.com
