Tesla Model 3: Door - Rear - LH (Remove )
Tesla Model 3 2017-2024 Service Manual / Body / Body Panels / Door - Rear - LH (Remove and Replace) / Door - Rear - LH (Remove )
.jpg)
Remove
- Open the rear LH door, pass a shop towel halfway through the striker, and then close the door so that it rests against the shop towel.
- Remove the rear LH door glass.
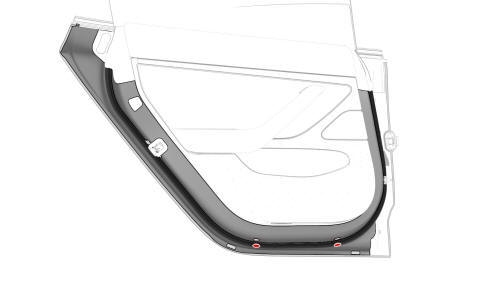
- Remove the LH rear door outer belt seal.
- Remove the LH rear window regulator. See Window Motor / Regulator Assembly - Rear - LH (Remove and Replace).
- Remove the LH rear door latch. See Latch - Door - Rear - LH (Remove and Replace).
- Remove the LH rear door exterior release handle. See Handle - Exterior Release - Door - Rear - LH (Remove and Replace).
- Remove the button plugs from the bottom of the door.
- Open the front LH door, and partially close the rear LH door.
.jpg)
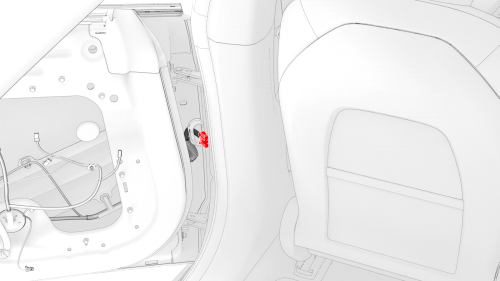
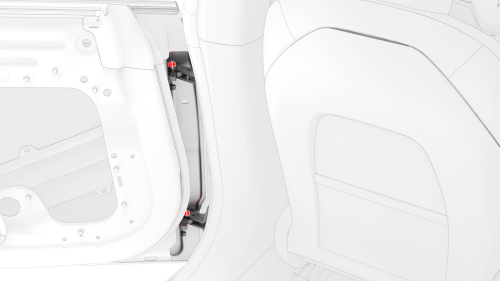
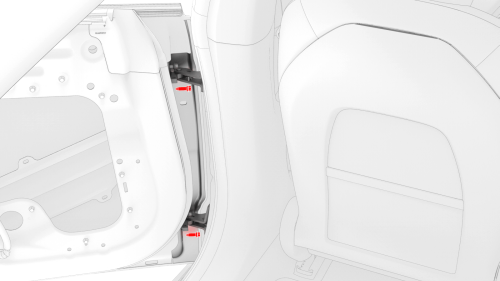
- Release the clips (x4) of the rear LH door electrical harness seal at the B-pillar, and pull the wiring harness out of the B-pillar bulkhead.
- Pull the rear LH door wiring harness connector out of the B-pillar, and then tuck the harness into the cavity at the front of the rear LH door.
- Carefully open the rear LH door, and then close the front LH door.
Caution:
Do not allow the leading edge of the rear LH door to crush the wiring harness or connector against the B-pillar.
- Disconnect the rear LH door electrical harness, and then rotate the connector exiting the B-pillar 90 degrees, so as to prevent the connector from falling back into the B-pillar.
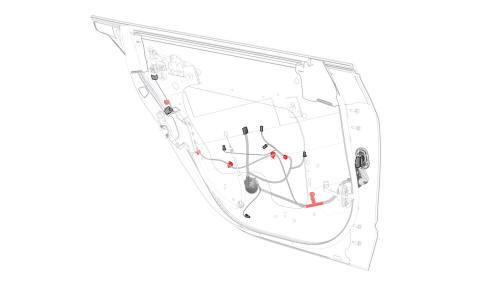
- Release all door electrical harness clips.
- Push the electrical harness out through the door bulkhead, and remove the electrical harness from the door.
- Remove the bolt that attaches the door check to the B-pillar.
Caution:
Unbolting the door check allows the door to swing freely beyond opening limits.

- Remove the nuts that attach the door check inside the door, and remove
the door check from the door.
 Torque 24 Nm
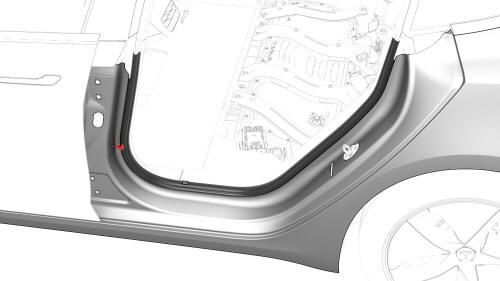
- Loosen the upper bolt of each hinge that attaches the rear LH door to the hinge by approximately 5 mm.
- With assistance, remove the lower bolt of each hinge, and then unhook
and lift the door away from the vehicle.

READ NEXT:
 Door - Rear - LH (Remove and Replace)- Install
Install
Install a new secondary door seal on the replacement door. See Seal -
Secondary - Rear Door - LH (Remove and Replace).
Make sure that the upper bolt for each door hinge is installed,
Fender Assembly - Front - LH (Remove and Replace)- Remove
This procedure assumes the cowl screen carrier bracket, headlight grommet,
and underhood storage unit clips on the fender assembly being replaced are
undamaged. Inspect these components and if ne
SEE MORE:
Applique - B-Pillar - LH (Remove and Replace) -
Remove
Remove
Open the LH front and rear doors.
Release the clips that attach the B-pillar applique fastener cover to
the vehicle, and then remove the cover.
Remove the bolts that attach the B-pillar applique to the body, but do
not remove the applique from the vehicle at this time.
Harness - Charge Port to HV Battery (Three-Phase) - Remove
Remove
Open all doors and windows.
Move the driver seat and front passenger seat fully
forward.
Remove the 2nd row lower seat cushion. See Seat
Cushion - Lower - 2nd Row (Remove and Replace).
© 2019-2024 Copyright www.tmodel3.com
