Tesla Model 3: Door - Rear - LH (Remove and Replace)- Install
Tesla Model 3 2017-2024 Service Manual / Body / Body Panels / Door - Rear - LH (Remove and Replace) / Door - Rear - LH (Remove and Replace)- Install
Install
- Install a new secondary door seal on the replacement door. See Seal - Secondary - Rear Door - LH (Remove and Replace).
- Make sure that the upper bolt for each door hinge is installed, and the bolt head extends approximately 10 mm from flush.
- With assistance, lower the rear LH door onto the door hinges, and engage the upper bolts into the hinges.
- Install the lower bolt of each hinge into the door and hand-tighten all bolts.
- Adjust the gap and flush of the door.
- Tighten the hinge bolts.
 Torque 24 Nm

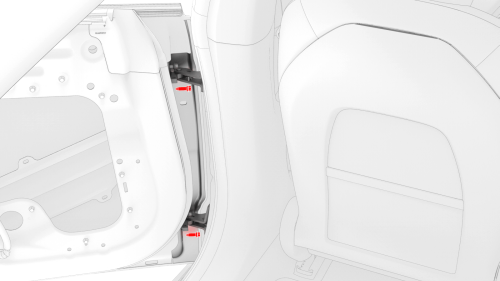
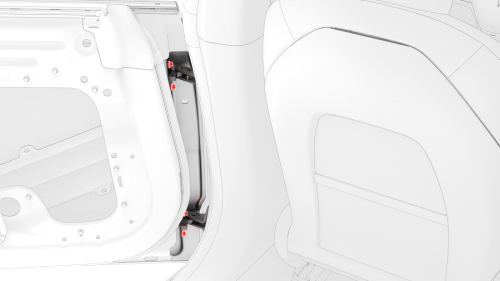
- Install the door check into the door, and then install the nuts that
attach the door check inside the door.
 Torque 24 Nm
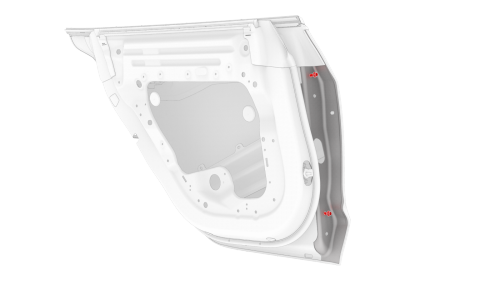
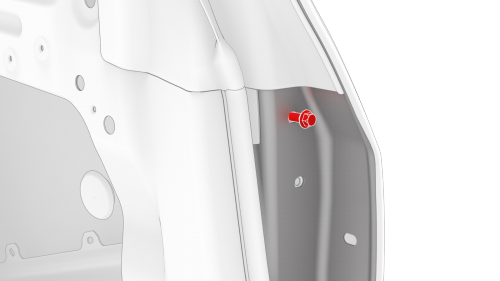
- Install the bolt that attaches the door check to the B-pillar.
 Torque 24 Nm
 - Push the electrical harness in through the door bulkhead, and install the electrical harness to the door.
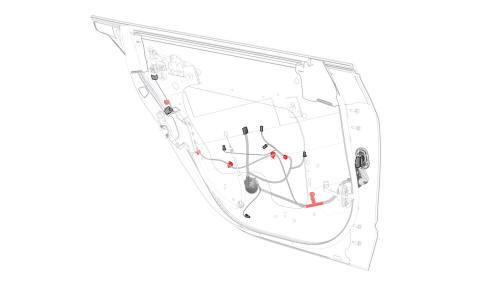
- Fasten all door electrical harness clips.
- Connect the rear LH door wiring harness and press the harness against the inside of the rear LH door.
- Open the front LH door and close the rear LH door.
.jpg)
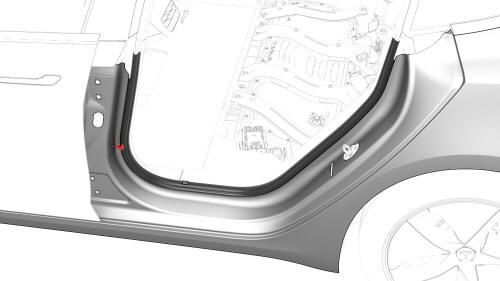
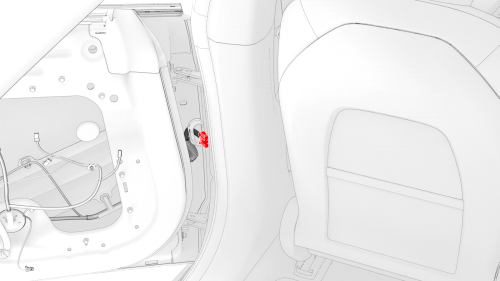
- Move the rear LH door electrical harness connector into the hole in the B-pillar, press the rear LH door wiring harness seal into the B-pillar, and fasten the clips (x4) that attach the seal to the B-pillar bulkhead.
Note: Make sure that the rear LH door wiring harness seal fits tightly against the B-pillar bulkhead.
- Open the rear LH door, and then close the front LH door.
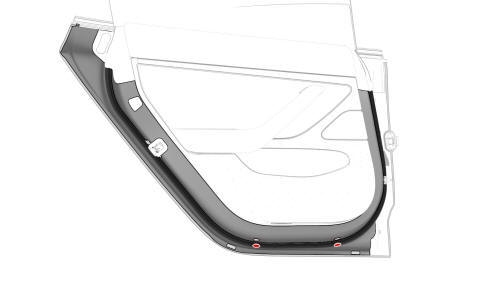
- Install the button plugs to the bottom of the door.
- Install the LH rear door exterior release handle. See Handle - Exterior Release - Door - Rear - LH (Remove and Replace).
- Install the LH rear door latch. See Latch - Door - Rear - LH (Remove and Replace).
- Install the LH rear window regulator. See Window Motor / Regulator Assembly - Rear - LH (Remove and Replace).
- Install the LH rear door outer belt seal. See Seal - Outer Belt - Rear Door - LH (Remove and Replace).
- Install the rear LH door glass. See Glass - Door - LH - Rear (Remove and Replace).
- Remove the shop towel from the striker.
- Adjust the gap and flush at the latch and striker.
- Use Toolbox to calibrate the RH rear window. See Window Regulator - Rear - LH (Recalibrate).
READ NEXT:
 Fender Assembly - Front - LH (Remove and Replace)- Remove
This procedure assumes the cowl screen carrier bracket, headlight grommet,
and underhood storage unit clips on the fender assembly being replaced are
undamaged. Inspect these components and if ne
Fender Assembly - Front - LH (Remove and Replace)- Install
Install
Install the underhood storage unit clips (3x) on the new LH front
fender.
Note: Replace any broken or damaged clips.
Install the headlight grommet on the new LH front fender.
SEE MORE:
OBSOLETE - Carpet - Interior Complete (Remove and Replace)
DRAFT
Warning:
This procedure was derived from pre-production computer models, and
might not reflect the real-world situation. Warnings and cautions might be
missing. Follow safety requirements and use extreme caution when working on or
near high voltage systems and components.
Do not redistr
Brake Caliper - Front - LH (Remove and Replace)
SPECIAL TOOLS
Skt, 1/2" Dr, E18 Torx
(1133187-00-A)
Skt, 1/2" Dr, E18 Torx
(1133187-XX-A & -01-A)
Remove
Note: This
procedure is applicable to both
Model 3 base and sport
© 2019-2024 Copyright www.tmodel3.com
