Tesla Model 3: Brake Caliper - Front - LH (Remove and Replace)
Tesla Model 3 2017-2026 Service Manual / Brakes / Brake Discs and Calipers / Brake Caliper - Front - LH (Remove and Replace)
SPECIAL TOOLS
Skt, 1/2" Dr, E18 Torx (1133187-00-A)
Skt, 1/2" Dr, E18 Torx (1133187-XX-A & -01-A)
Remove
Note: This procedure is applicable to both Model 3 base and sport brake calipers
- Remove the rear underhood apron. See Underhood Apron - Rear (Remove and Replace).
- Raise and support the vehicle. See Raise Vehicle - 2 Post Lift.
- Remove the LH front wheel. See Wheel (Remove and Install).
- Position the oil drain under the LH front brake caliper area.
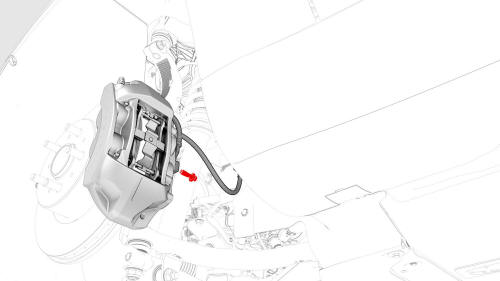
- Remove and discard the bolt and washers that attach the LH front brake caliper hose to the LH front brake caliper.
.jpg)
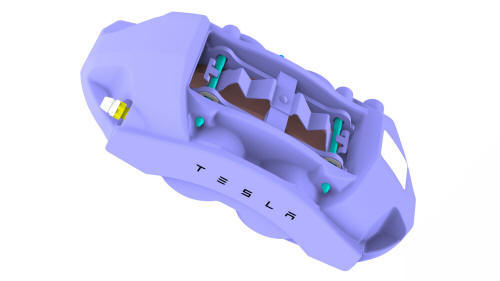
- Remove the bolts that
attach the LH front brake
caliper to the knuckle, and
then remove the caliper from
the vehicle.
Install
- Install new bolts to
attach the LH front brake
caliper to the knuckle.
.jpg) Torque 94 Nm
Torque 94 Nm - Install a new bolt and 2
new washers to attach the LH
front brake hose to the LH
front brake caliper.
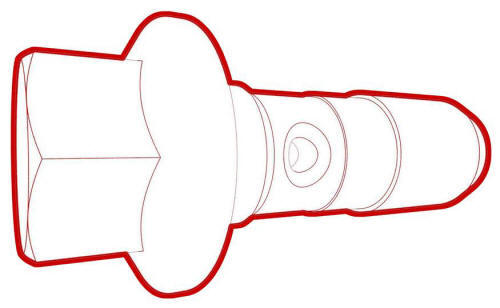 Torque 42 Nm
 - Remove the oil drain from underneath the vehicle.
- Lower the vehicle.
- Perform the bleed procedure for the LH front brake caliper. See Brake Fluid Bleed - One Caliper.
- Install the LH front wheel. See Wheel (Remove and Install).
- Install the rear underhood apron. See Underhood Apron - Rear (Remove and Replace).
- Perform the brake burnishing procedure. See Brake Pads - Burnishing.
- Perform vehicle road test using a series of ABS-active stops and make sure proper brake pedal feel and performance is achieved.
READ NEXT:
 Brake Caliper - Rear - LH (Remove and Replace)
Brake Caliper - Rear - LH - Remove
SPECIAL TOOLS
Kit, EPB Release, Handheld (1134520-00-A)
SEE MORE:
Hose - Heat Exchanger to Superbottle - Front Drive Unit (Remove and Replace)
Remove
Remove the superbottle. See
Superbottle (Dual Motor) (Remove and Replace).
Install
Installation procedure is the reverse of removal.
Caution:
Perform a push-pull test to verify that the hose is fully seated
Speaker - Dash - Center (Remove and Replace)
Remove
Remove the LH and RH instrument panel end caps. See End Cap - Instrument
Panel - LH (Remove and Replace).
Remove the LH and RH middle A-pillar trims. See Trim - A-Pillar - Middle
- LH (Remove and Replace).
Remove the LH and RH upper A-pillar trims. See Trim - A-Pillar - Upper -
LH
© 2019-2026 Copyright www.tmodel3.com
