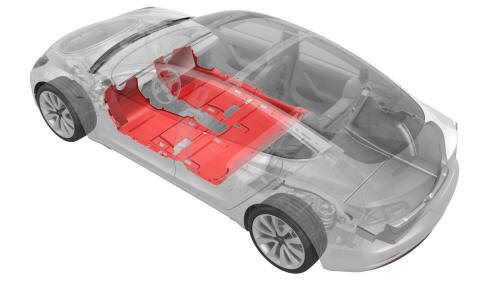
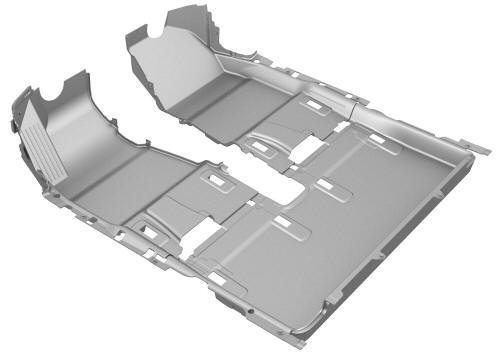
Tesla Model 3: OBSOLETE - Carpet - Interior Complete (Remove and Replace)
Tesla Model 3 2017-2026 Service Manual / Interior Trim / Carpeting and Mats / OBSOLETE - Carpet - Interior Complete (Remove and Replace)
DRAFT
Warning:
This procedure was derived from pre-production computer models, and might not reflect the real-world situation. Warnings and cautions might be missing. Follow safety requirements and use extreme caution when working on or near high voltage systems and components.
Do not redistribute this content.
Remove
- Open all doors.
- Roll down all the windows.
- Remove the driver knee airbag. See Airbag - Knee - Driver (Remove and Install).
- Remove the driver footrest. See Footrest - Driver (Remove and Replace).
- Remove the glove box. See Glove Box (LHD) (Remove and Replace).
- Remove the front passenger knee airbag. See Airbag - Knee - Front Passenger (Remove and Replace).
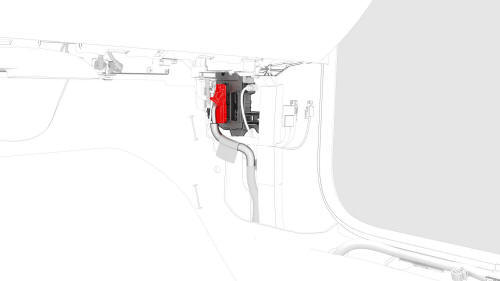
- Disconnect the front passenger seat wiring harness connectors from the RH body controller module.
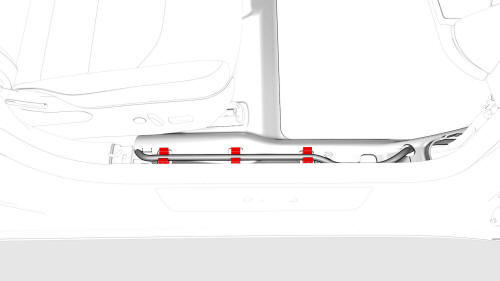
- Release the clips that secure the RH seat wiring harness to the sill trim.
- Remove the front passenger seat. See Seat - Driver (Remove and Replace).
.jpg)
- Disconnect the driver seat wiring harness connectors from the LH body controller module.
.jpg)
- Release the clips that secure the LH seat wiring harness to the sill trim.
- Remove the driver seat. See Seat - Driver (Remove and Replace).
- Remove the center console. See Center Console (Remove and Install).
- Remove the 2nd row lower seat cushion. See Seat Cushion - Lower - 2nd Row (Remove and Replace).
- Remove the LH 2nd row seat side bolster. See Bolster - Side - Seat - 2nd Row - LH (Remove and Replace).
- Remove the LH rear sill panel trim. See Trim - Sill Panel - Rear - LH (Remove and Replace).
- Remove the LH lower B-pillar trim. See Trim - B-Pillar - Lower - LH (Remove and Replace).
- Remove the RH 2nd row seat side bolster. See Bolster - Side - Seat - 2nd Row - LH (Remove and Replace).
- Remove the RH rear sill panel trim. See Trim - Sill Panel - Rear - LH (Remove and Replace).
- Remove the RH lower B-pillar trim. See Trim - B-Pillar - Lower - LH (Remove and Replace).
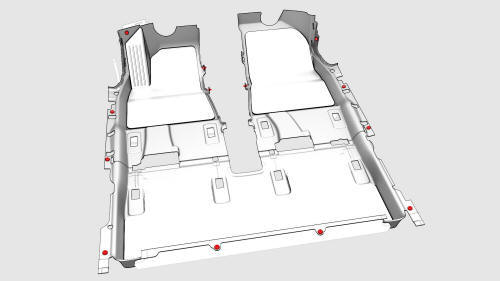
- Remove the clips that secure the carpet to the body.
- Remove the clips that secure the carpet to the LH and RH footwell ducts.
- Remove the carpet from the vehicle.
Install
Installation procedure is the reverse of removal.
READ NEXT:
 Carpet - Rear (Remove and Replace)
Remove
Open all doors.
Fully lower all windows.
Move the driver and front passenger seats fully forward.
Remove the 2nd row floor mat from the vehicle.
Remove the 2nd row lower seat cushion.
Carpet - Rear Trunk (Remove and Replace)
DRAFT
Warning:
This procedure was derived from pre-production computer models, and
might not reflect the real-world situation. Warnings and cautions might be
missing. Follow safety requirements
Carpet - Underhood Storage (Remove and Install)
Remove
Open the hood.
Remove the carpet from the underhood storage unit.
Install
Install the carpet into the underhood storage unit.
Close the hood.
SEE MORE:
HomeLink Universal Transceiver
About HomeLink
If your vehicle is equipped with the HomeLink
Universal Transceiver, you can operate up to
three Radio Frequency (RF) devices, including
garage doors, gates, lights, and security
systems.
Note: Depending on date of manufacture,
market region, and options selected at time of
p
How to Use this Manual
General
Caution:
Only qualified technicians should attempt to perform the procedures
contained within this manual.
This manual is organized by vehicle subsystem. Click on a subsystem in
the left hand menu see categories of repairs in that subsystem.
Actions within the service procedures als
© 2019-2026 Copyright www.tmodel3.com
