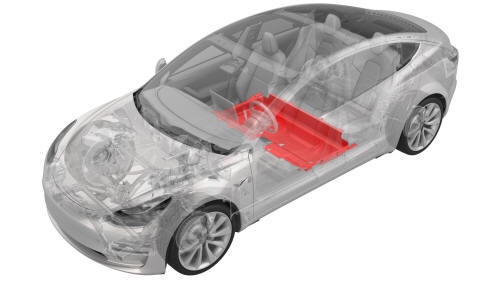
Tesla Model 3: Carpet - Rear (Remove and Replace)
Tesla Model 3 2017-2026 Service Manual / Interior Trim / Carpeting and Mats / Carpet - Rear (Remove and Replace)
Remove
- Open all doors.
- Fully lower all windows.
- Move the driver and front passenger seats fully forward.
- Remove the 2nd row floor mat from the vehicle.
- Remove the 2nd row lower seat cushion. See Seat Cushion - Lower - 2nd Row (Remove and Replace).
- Open the hood.
- Remove the rear underhood apron. See Underhood Apron - Rear (Remove and Replace).
- Remove the LH and RH instrument panel end caps. See End Cap - Instrument Panel - LH (Remove and Replace).
- Remove the LH and RH middle A-pillar trims. See Trim - A-Pillar - Middle - LH (Remove and Replace).
- Remove the LH and RH lower A-pillar trims. See Trim - A-Pillar - Lower - LH (Remove and Replace).
- Remove the driver and front passenger seats. See Seat - Driver (Remove and Replace).
- Remove the LH and RH 2nd row seat side bolsters. See Bolster - Side - Seat - 2nd Row - LH (Remove and Replace).
- Remove the LH and RH rear sill panel trims. See Trim - Sill Panel - Rear - LH (Remove and Replace).
.jpg)
- While wearing suitable gloves, spread the bottom of the LH upper B-pillar trim open, and then release the clips that attach the bottom of the trim to the LH lower B-pillar trim After setting aside the LH upper B-pillar trim, repeat this step on the RH upper B-pillar trim.
Caution:
Be careful not to pull the upper B-pillar trim too far, otherwise it might break the seat belt shoulder adjustment mechanism.
Note: Move the body seals to aid removal.
- Remove the LH and RH lower B-pillar trims. See Trim - B-Pillar - Lower - LH (Remove and Replace).
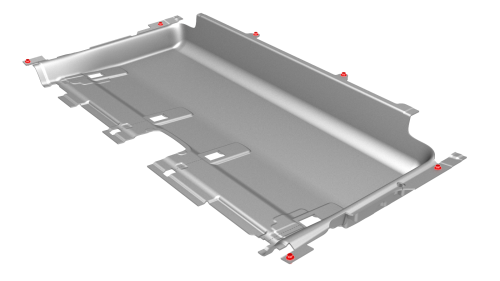
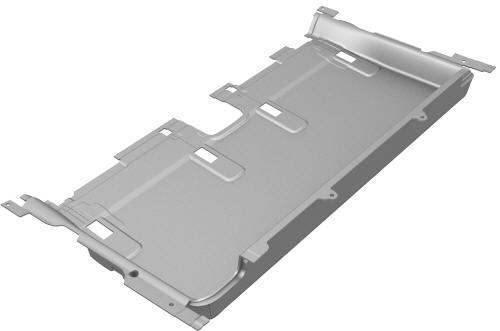
- Remove the clips (x6) and release the hook and loop strips that attach the rear carpet to the body.
- Remove the rear carpet from the vehicle.
Install
Installation procedure is the reverse of removal.
READ NEXT:
 Carpet - Rear Trunk (Remove and Replace)
DRAFT
Warning:
This procedure was derived from pre-production computer models, and
might not reflect the real-world situation. Warnings and cautions might be
missing. Follow safety requirements
Carpet - Underhood Storage (Remove and Install)
Remove
Open the hood.
Remove the carpet from the underhood storage unit.
Install
Install the carpet into the underhood storage unit.
Close the hood.
SEE MORE:
12V Power (Disconnect and Connect)
12V Power- Disconnect
SPECIAL TOOLS
Cap, Logic Conn, Inv, 3DU (1108272-00-B)
Warning: This procedure disables 12V power, but does not verify that
high voltage power is no longer available to high voltage components (PTC heater,
A/C compressor, inverters, etc). Perform
Vehicle Electrical Isolati
HV Battery (RWD) (Remove and Install)
HV Battery (RWD) (Remove and Install) - Remove
SPECIAL TOOLS
Adapter, Lift Pad, Model 3 (1453419-00-A)
Key, Seat Belt Release, Model 3 (1133787-00-A)
ASY, Battery Table, Manual Lift (1020566-00-F)
Top Plate, Battery Table, Manual Lift (1020566-99-A)
Hoist, H-Frame EMEA (1129166-00-A)
Kit, Alignment
© 2019-2026 Copyright www.tmodel3.com
