Tesla Model 3: Suspension - Rear (Check Torque)
SPECIAL TOOLS
Tool, Spring Compressor, Hook, Model 3 (1135103-00-A)
3/4 Ton Underhoist Stand (1081765-00-A)
1/2 Ton Economy Transmission Jack (1063141-00-A)
Tool, Rear Ride Height Torque, Model 3 (1137855-00-A)
Procedure
Note: This procedure must be performed on both sides of the vehicle. After the torque is checked on the LH side of the rear suspension, repeat these steps on the RH side of the rear suspension.- Remove both rear wheels. See Wheel (Remove and Install).
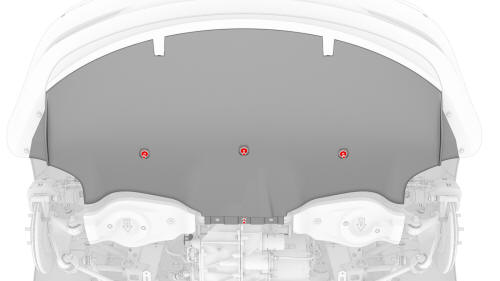
- Remove the mid aero shield panel. See Panel - Aero Shield - Mid (Remove and Replace).
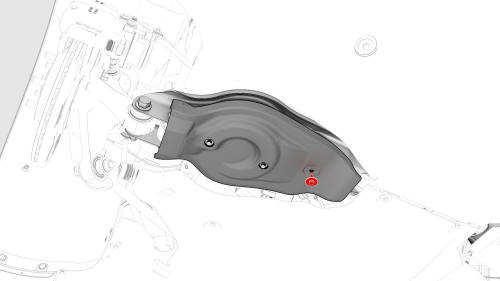
- Remove the bolts that attach the LH and RH rear suspension covers, and then remove the covers from the vehicle. Torque 6 Nm
- Remove the bolts (x4) that attach the front of the rear diffuser to the body.
- Position the transmission jack to support the front beam of the rear subframe.
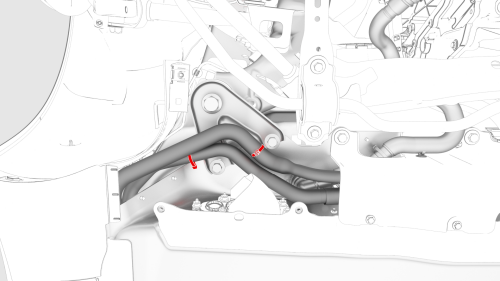
- Release the fir tree clips (x2) that attach the coolant hoses to the LH and RH shear plates.
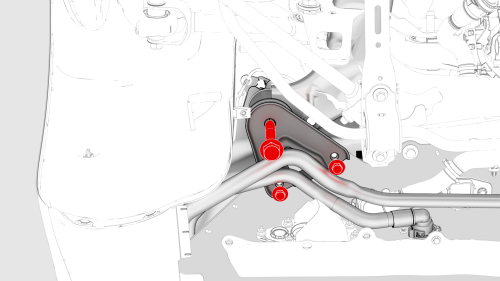
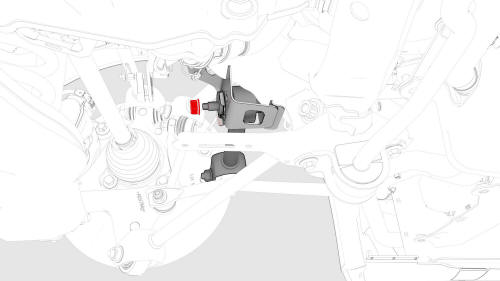
- Remove the bolts (x3) that attach the LH and RH
shear plates to the HV battery, remove the shear
plates, and then reinstall the long bolts directly
into the rear subframe.
 Torque 30 Nm
 Torque 128 Nm
 - Remove the transmission jack out from under the front beam of the rear subframe.
- Remove the center clip that attaches the LH and RH wheel liners to the body.
.png)
- Install the spring compressor to the rear LH spring and compress the spring so that is it loose in the suspension.
Note: The lowest hook of the spring compressor goes under the coil at the strut. The highest hook of the spring compressor goes over the coil at the HV battery. The spring compressor lead screw should center to, and pass through, the opening in the body.
.png)
- Position a support stand underneath the LH lower rear control arm, and then raise the support stand to simulate vehicle at ride height.
- Use the rear ride height torque gauge to verify that the suspension is set within ride height specification. Note: Might need to adjust the support stand or spring compressor tool slightly.
.jpg)
- Measure the distance between the bottom of the quarter panel to the center of the rear axle to make sure that the rear suspension is set to ride height: The distance should measure 378 mm.
.jpg)
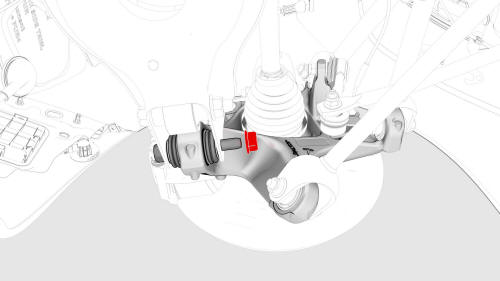
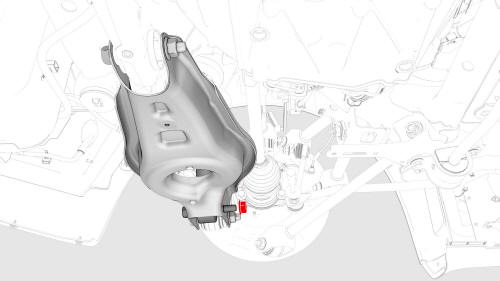
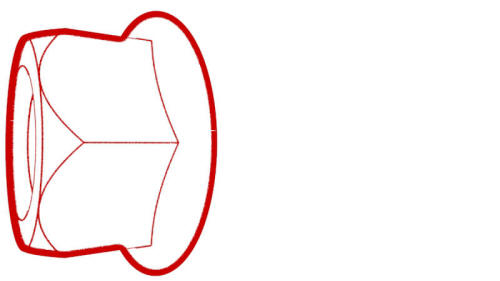
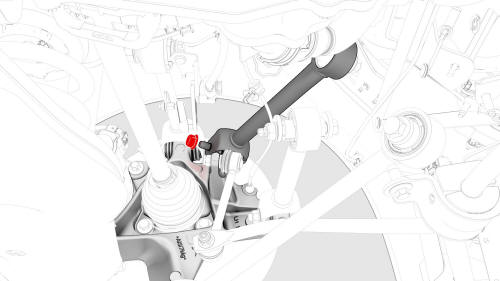
- Check the torque for the nut that attaches the LH rear lower fore link to the rear subframe, and then mark the nut with a paint pen. Torque 76 Nm
.jpg)
- Check the torque for the nut that attaches the LH rear lower fore link to the knuckle, and then mark the nut with a paint pen. Torque 76 Nm
- Check the torque for the nut that attaches the
rear stabilizer bar to the LH stabilizer bar link,
and then mark the nut with a paint pen.
 Torque 55 Nm

- Check the torque for the nut that attaches the LH stabilizer bar link to the knuckle, and then mark the nut with a paint pen. Torque 55 Nm
- Check the torque for the nut that attaches the LH toe link to the rear subframe, and then mark the nut with a paint pen. Torque 85 Nm
- Check the torque for the nut that attaches the LH toe link to the knuckle, and then mark the nut with a paint pen. Torque 76 Nm
 20
20
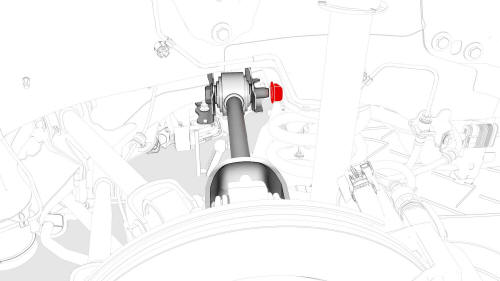
- Check the torque for the nut that attaches the LH rear lower aft link to the rear subframe, and then mark the nut with a paint pen. Torque 115 Nm
- Check the torque for the nut that attaches the LH rear lower aft link to the knuckle, and then mark the nut with a paint pen. Torque 115 Nm
- Check the torque for the nut that attaches the LH rear damper assembly to the LH lower aft link, and then mark the nut with a paint pen. Torque 115 Nm

- Check the torque for the nut that attaches the LH rear upper fore link to the rear subframe, and
then mark the nut with a paint pen.
 Torque 76 Nm
- Check the torque for the nut that attaches the LH rear upper fore link to the knuckle, and then mark the nut with a paint pen. Torque 76 Nm
- Check the torque for the nut that attaches the LH rear upper aft link to the rear subframe, and then mark the nut with a paint pen. Torque 134 Nm
.jpg)
- Check the torque for the nut that attaches the LH rear upper aft link to the knuckle, and then mark the nut with a paint pen. Torque 134 Nm
- Remove the rear ride height torque tool from the LH subframe.
- Remove the 3/4 ton underhoist stand from the LH suspension.
- Remove the spring compressor from the rear LH spring.
- Repeat step 3 through step 29 on the RH side of the rear suspension.
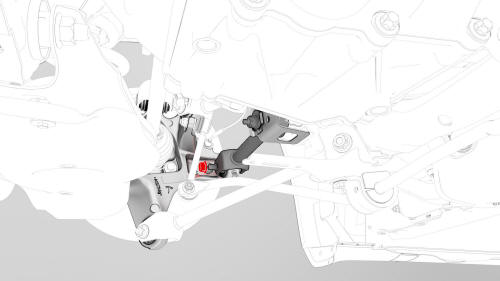
- Position the transmission jack to support the front beam of the rear subframe.
- Remove the long bolts (x2) from the front of the
rear subframe, install the LH and RH shear plates to
the subframe and HV battery, and then install the
bolts (x3) that attach the shear plates to the subframe and HV battery.
Torque 30 Nm
Torque 128 Nm
- Fasten the fir tree clips (x2) that attach the coolant hoses to the LH and RH shear plates.
- Remove the transmission jack out from under the front beam of the rear subframe.
- Install the center clip that attaches the LH and RH wheel liners to the body.
- Install the bolts (x4) that attach the front of
the rear diffuser to the body.
.png) Torque 4 Nm
Torque 4 Nm
- Install the LH and RH rear suspension covers. Torque 6 Nm
- Install the mid aero shield panel. See Panel - Aero Shield - Mid (Remove and Replace).
- Install both rear wheels. See Wheel (Remove and Install).
READ NEXT:
 Toe Link - Rear - LH (Remove and Replace)
Remove
Remove the LH rear wheel. See Wheel (Remove and
Install).
Damper - Rear - LH (Coil Suspension) (Remove and Replace)
Remove
Raise and support the vehicle on a 2 post lift. See
Raise Vehicle - 2 Post Lift.
SEE MORE:
Fuse - Cabin Heater - HV Battery (Remove and Replace)
Fuse - Cabin Heater - HV Battery- Remove
SPECIAL TOOLS
Ratchet, 1/4" Sq Dr, HV Insulated (1057602-00-A)
Ext Bar, Wobble, 1/4" Dr, HV Insulated (1057603-00-A)
Skt, 1/4" Sq Dr, 8mm, HV Insulated (1057604-00-A)
Magnet, Flexible, HV Insulated, 18" (1057607-00-A)
Asy, Service Cover, Penthouse, Model 3
Amplifier - Antenna - FM (Remove and Replace)
Remove
Remove the LH side rail trim. See Trim - Side Rail - LH (Remove and
Install).
Disconnect the electrical connector from the FM antenna amplifier.
Remove the bolt and release the clip that attach the FM antenna
amplifier to the C-pillar, and then remove the amplifier from the
