Tesla Model 3 Owners & Service Manuals

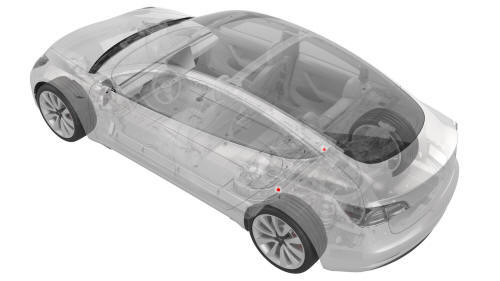
Tesla Model 3: Flood Ports - 2nd Generation (Remove and Replace)

Tesla Model 3 2017-2025 Service Manual / Battery System / HV Battery Enclosure / Flood Ports - 2nd Generation (Remove and Replace)

Flood Ports - 2nd Generation (Remove and Replace) - Remove

Flood Ports - 2nd Generation (Remove and Replace)

Remove

  1. Connect a laptop with Toolbox 3 to the vehicle.
  2. In Toolbox, click in the Search field, and then click Tools.
  3. From the Tools menu, click Active Alerts.
  4. Click Read Alerts and check for a BMS_a123, BMS_a151, or a BMS_a035 alert
  5. If:
  • Any of the alerts are present - Investigate and correct the low isolation condition before continuing with this procedure
  • None of the alerts are present - Continue to the next step.
  1. Disconnect the laptop from the vehicle.
  2. Perform the vehicle electrical isolation procedure. See Vehicle Electrical Isolation Procedure.
  3. Remove the rear HV battery skid plate. See Skid Plate - HV Battery - Rear (Remove and Replace).

Flood Ports - 2nd Generation (Remove and Replace)- Remove

  1. Release the clips that attach the HV battery coolant hoses to the LH shear plate.

Flood Ports - 2nd Generation (Remove and Replace)- Remove

  1. Release the clips that attach the HV battery coolant hoses to the RH shear plate.

Flood Ports - 2nd Generation (Remove and Replace)- Remove

  1. Remove the LH 2nd generation flood port from the LH underside of the HV battery penthouse.

Note: Twist the flood port while pulling down.

  1. Repeat step 11 to remove the RH 2nd generation flood port from the RH underside of the HV battery penthouse.

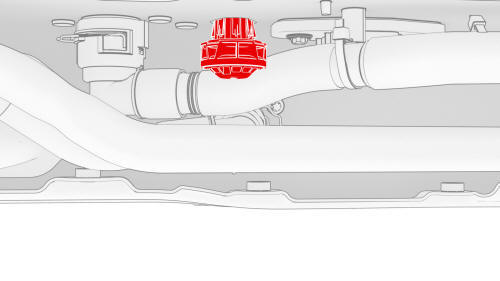
Flood Ports - 2nd Generation (Remove and Replace) - Install

Install

  1. Use an IPA wipe to clean the area around the openings where the flood ports were removed.

Flood Ports - 2nd Generation (Remove and Replace)- Install

  1. Install a 2nd generation flood port into the opening at the LH underside of the HV battery penthouse.

Note: Press up firmly to fully seat the flood port and fasten the clips (x8) internally.

  1. Repeat step 2 to install a 2nd generation flood port into the RH underside of the HV battery penthouse.

Flood Ports - 2nd Generation (Remove and Replace)- Install

  1. Fasten the clips that attach the HV battery coolant hoses to the RH shear plate.

Flood Ports - 2nd Generation (Remove and Replace)- Install

  1. Fasten the clips that attach the HV battery coolant hoses to the LH shear plate.
  2. Check that the HV connections at the rear of the HV battery are tight and secure.
  3. Install the rear HV battery skid plate. See Skid Plate - HV Battery - Rear (Remove and Replace).
  4. Perform a penthouse air leak test. See Penthouse Air Leak Test.

    READ NEXT:

     Flood Ports - 2nd Generation (Retrofit)

    Procedure Note: This procedure destructively removes the 1st generation flood ports and installs 2nd generation flood ports. Connect a laptop with Toolbox 3 to the vehicle. In Toolbox, click in

    SEE MORE:

     Light - Turn Signal / Fog - Front - LH (Remove and Replace)

    Remove Remove the LH front wheel. See Wheel (Remove and Install). Remove the LH front wheel arch liner. See Wheel Arch Liner - Front - LH (Remove and Replace). Disconnect the electrical connector from the LH front turn signal/fog light. Release the clips that attach the fascia elect

     Sensor - Airbag - C-Pillar - LH (Remove and Replace)

    Remove Open all doors. Lower all windows. Remove the 2nd row lower seat cushion. See Seat Cushion - Lower - 2nd Row (Remove and Replace). Remove the rear underhood apron. See Underhood Apron - Rear (Remove and Replace). Disconnect 12V power. See 12V Power (Disconnect and Connect). Remov

    © 2019-2025 Copyright www.tmodel3.com