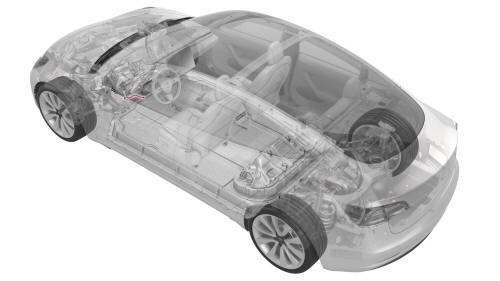
Tesla Model 3: Ground Strap - Front Drive Unit (Remove and Replace)
Remove
- Raise and support the vehicle. See Raise Vehicle - 2 Post Lift.
- Remove the 2nd row lower seat cushion. See Seat Cushion - Lower - 2nd Row (Remove and Replace).
- Remove the rear underhood apron. See Underhood Apron - Rear (Remove and Replace).
- Disconnect 12V power. See 12V Power (Disconnect and Connect).
- Perform the vehicle electrical isolation procedure. See Vehicle Electrical Isolation Procedure.
.png)
- Lift the high voltage (HV) cap straight up from over the DC input connector on the LH side of the penthouse, and then remove the HV cap from the vehicle.
- Remove the LH 2nd row seat side bolster. See Bolster - Side - Seat - 2nd Row - LH (Remove and Replace).
- Fold up the LH 2nd row seat.
- Remove the LH rear sill panel trim. See Trim - Sill Panel - Rear - LH (Remove and Replace).
.png)
- Release the clips that attach the low voltage electrical harness to the charge port high voltage (HV) battery harness bracket at the penthouse.
.jpg)
- Remove the bolts that attach the charge port HV
battery harness bracket to the penthouse, and then
remove the bracket from the vehicle.
.png) Torque 10 Nm
Torque 10 Nm
.jpg)
- Release the clip that attaches the charge port HV battery harness to the LH lower C-pillar.
.jpg)
- Raise the handle to disconnect the charge port HV battery harness from the penthouse, and then set the harness aside.
- Fully raise the vehicle.
- Remove the front aero shield panel. See Panel - Aero Shield - Front (Remove and Replace).
.png)
- Remove the bolt that attaches the front drive unit HV harness to the front drive unit.
.png) Torque 10 Nm
Torque 10 Nm
.png)
- Slide the red release tab to unlock the front drive unit HV harness connector.
.png)
- Slowly unlatch the release handle on the front drive unit HV harness connector, and then disconnect the connector from the front drive unit.
Caution: Do not apply excessive force to the handle; doing so could damage the connector alignment tabs.
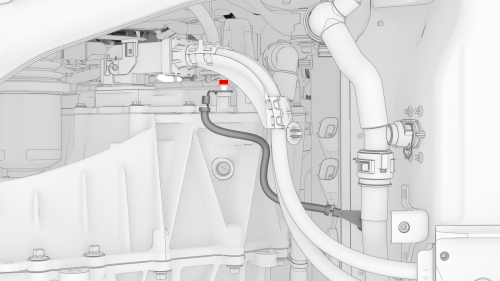
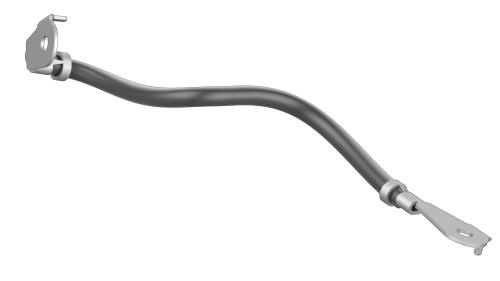
- Remove the bolt that attaches the front drive unit
ground strap to the front drive unit.
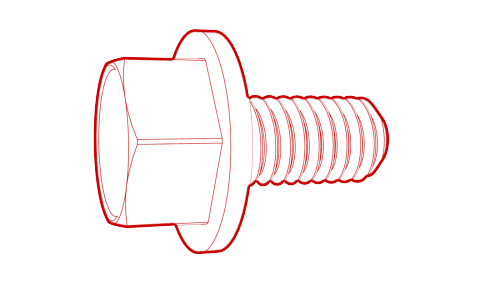 Torque 6 Nm
.png)
- Release the clip that attaches the front drive unit ground strap to the front drive unit.
- Remove the bolt that attaches the front drive unit
ground strap to the HV battery, and then remove the
ground strap from the vehicle.
Torque 10 Nm
Install
Installation procedure is the reverse of removal, except for the following:- Use the front drive unit HV harness connector
special tool when reinstalling the front drive unit HV
harness connector.
.png)
- When installing the front drive unit HV harness connector, slowly latch the release handle while pressing the front drive unit HV harness connector into the front drive unit. Note: The front drive unit alignment teeth and HV harness connector alignment teeth should be interlocked.
- Perform the penthouse air leak test after installing the front aero shield panel. See Penthouse Air Leak Test.
- The vehicle electrical isolation procedure does not need to be performed during installation.
READ NEXT:
 Mount - Front Drive Unit - LH (Remove and Replace)
Remove
Remove the front subframe assembly from the vehicle. See
Subframe Assembly - Front (Dual Motor) (Remove and Install).
Release the clips that attach the front drive unit harness to the
Hose - Inverter Inlet - Front Drive Unit (Remove and Replace)
Hose - Inverter Inlet - Front Drive Unit - Remove
Remove
Remove the 2nd row lower seat cushion. See Seat
Cushion - Lower - 2nd Row (Remove and Rep
SEE MORE:
Remove Dirt Inclusion
Apply isopropyl alcohol to the general area of the defect, and then wipe
the area with a clean microfiber towel.
While wearing a nitrile glove, run hand over the area around the dirt
inclusion and check for fine bumps in the paint.
If bumps are detected, perform clay treatment on the
Brake Lines - LH Sill (Remove and Replace)
SPECIAL TOOLS
Flare nut crowfoot set (1079041-00-A)
Remove
Caution:
Brake fluid dissolves paint. Have clean towels and plenty o
