Tesla Model 3: Harness - Windshield (Remove and Replace)
Harness - Windshield- Remove
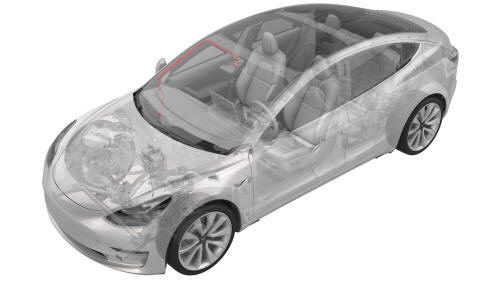
Remove
- Remove the LH instrument panel end cap. See End Cap - Instrument Panel -
LH (Remove and Replace).
- Remove the LH middle A-pillar trim. See Trim - A-Pillar - Middle - LH
(Remove and Replace).
- Remove the LH lower A-pillar trim. See Trim - A-Pillar - Lower - LH
(Remove and Replace).
- Remove the LH upper A-pillar trim. See Trim - A-Pillar - Upper - LH
(Remove and Replace).
- Remove the driver sun visor. See Sun Visor - Driver (Remove and
Replace).
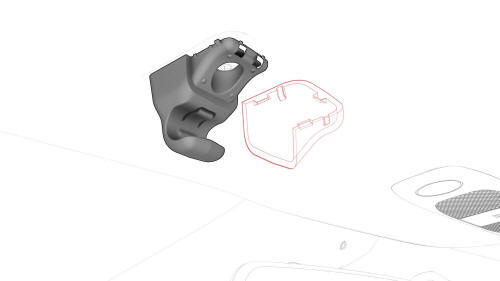
- Release the driver sun visor base cover clips, and then remove the base
cover from the vehicle.
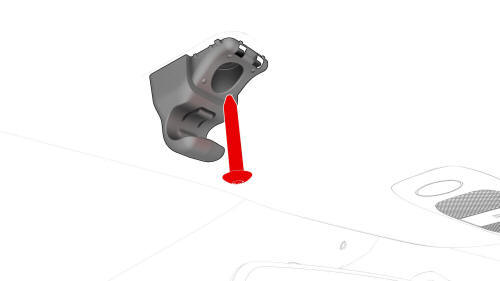
- Remove the bolt that attach the driver sun visor base to the body, and
remove the base from the vehicle.
- Remove the lower quad camera cover. See Quad Camera Cover - Lower
(Remove and Replace).
- Remove the rear view mirror. See Mirror - Rear View (Remove and
Replace).
- Remove the forward facing camera. See Camera - Forward Facing (Remove
and Replace).
- Repeat steps 1 through 7 on the RH side of the vehicle.
- Release the clips (x3) that attach the headliner by pulling downwards at
the front center of the headliner.
.jpg)
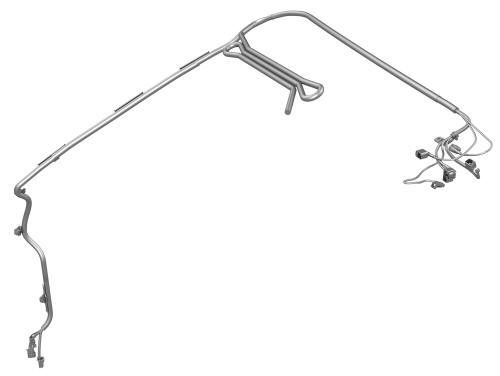
- Disconnect the windshield harness electrical connectors, and then pull
the windshield harness up through the opening on the instrument panel.
.jpg)
- Release the clips that attach the windshield harness to the RH A-pillar.
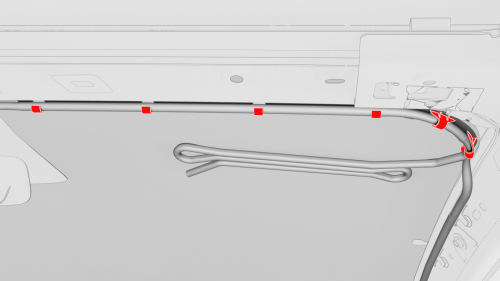
- Release the clips that attach the windshield harness along the top
portion the windshield, and then remove the harness from the vehicle.
Harness - Windshield- Install
Install
- Secure the clips that attach the windshield harness to the RH A-pillar.
- Connect the windshield harness electrical connectors.
- Install the forward facing camera. See Camera - Forward Facing (Remove
and Replace).
- Secure the windshield harness with the clips along the top of the
windshield.
- Install the clips (x3) that attach the front center of the headliner to
the body.
- Install the bolt that attach the front passenger visor base to the body.
 Torque 3 Nm
- Install the front passenger sun visor base cover clips.
- Install the front passenger sun visor. See Sun Visor - Driver (Remove
and Replace).
- Install the RH upper A-pillar trim. See Trim - A-Pillar - Upper - LH
(Remove and Replace).
- Install the RH lower A-pillar trim. See Trim - A-Pillar - Lower - LH
(Remove and Replace).
- Install the RH middle A-pillar trim. See Trim - A-Pillar - Middle - LH
(Remove and Replace).
- Install the RH instrument panel end cap. See End Cap - Instrument Panel
- LH (Remove and Replace).
- Repeat steps 6 through 12 on the LH side of the vehicle.
- Perform the forward facing camera target calibration procedure. See
Camera - Forward Facing (Target Calibration)
READ NEXT:
SEE MORE:
Remove
Remove the 2nd row lower seat cushion. See
Seat Cushion - Lower - 2nd Row (Remove and Replace).
Remove the LH and RH 2nd row seat side bolsters. See
Bolster - Side - Seat - 2nd Row - LH (Remove and Replace).
Remove the LH side rail trim. See
Trim - Side Rail - LH (Remove and Replace
Carrier - Front End (Remove and Replace)-
Remove
Remove
Raise and support the vehicle.
Remove the rear underhood apron.
Remove the cabin intake duct.
Remove the hood latch cover.
Remove the underhood storage unit.
Remove the front fascia assembly.
Remove the front bumper.
Discon
 Striker - Seat Back - 2nd Row - RH (Remove and Replace)
