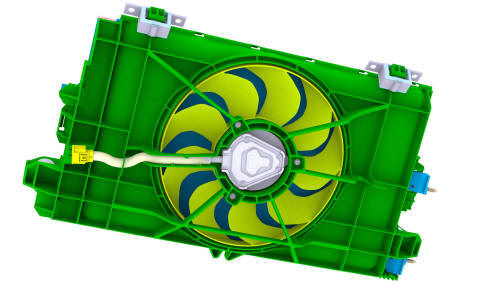
Tesla Model 3: Module - Cooling Fan (Remove and Replace)
Tesla Model 3 2017-2026 Service Manual / Thermal Management / Refrigerant System / Module - Cooling Fan (Remove and Replace)
.jpg)
Remove
- Remove the cooling fan module. See Module - Cooling Fan (Remove and Install).
.png)
.png)
- Release the clips (x14) that attach the active grille shutter to the cooling fan module, and then remove the active grille shutter from the module.
.png)
- Remove the screws (x2) that attach the radiator to the cooling fan
module.
.png) Torque
10 Nm
Torque
10 Nm
.png)
- Release the clip that attaches the radiator to the cooling fan module, and then remove the radiator from the cooling fan module.
.png)
- Release the clips (x2) that attach the condenser to the cooling fan
module, and then remove the condenser from the cooling fan module.

Install
Installation procedure is the reverse of removal.
READ NEXT:
 Mounting - A/C Compressor (Remove and Replace)
Remove
Remove the 2nd row lower seat cushion. See Seat Cushion - Lower - 2nd
Row (Remove and Replace).
Remove the rear underhood apron. See Underhood Apron - Rear (Remove and
Replace).
Remov
 Pipe - High Pressure - Compressor to Condenser (Remove and Replace)
Pipe - High Pressure - Compressor to Condenser- Remove
Remove
Raise and support the vehicle. See Raise Vehicle - 2 Post Lift.
Remove the 2nd row lower seat cushion. See Seat Cushion - Lower - 2nd
SEE MORE:
 Sensor - Temperature - Evaporator (Remove and Replace)
Remove
Remove the driver floormat.
Remove the LH center console side panel carpet. See
Carpet - Side Panel - Center Console - LH (Remove and Replace).
Disconnect the evaporator temperature sensor electrical connector.
Release the tabs that attach the evaporator temperature sensor ins
 Switch - Window - Front Passenger (Remove and Replace)
Switch - Window - Front Passenger (Remove and Replace) - Remove
Remove
Remove the RH front door trim panel. See
Panel - Door Trim - Front - LH (Remove and Install).
Remove the puddle light electrical connector from the RH front door trim
panel.
Release the clips that attach the fron
© 2019-2026 Copyright www.tmodel3.com

