Tesla Model 3: Parts and Accessories
Use only genuine Tesla parts and accessories.
Tesla performs rigorous testing on parts to
ensure their suitability, safety, and reliability.
Purchase these parts from Tesla, where they
are professionally installed and where you can
receive expert advice about modifications to
Model 3. Note: Some accessories may not be available
in your market region. Tesla is unable to assess parts manufactured
by other distributors and therefore accepts no
responsibility if you use non-Tesla parts on
Model 3. Warning: Installing non-approved parts
and accessories, or performing nonapproved
modifications, can affect the
performance of Model 3 and the safety of
its occupants. Any damage caused by
using or installing non-approved parts, or
by performing non-approved
modifications, is not covered by the
warranty. Warning: Tesla does not accept liability
for death, personal injury or damage that
occurs if you use or install non-approved
accessories or make non-approved
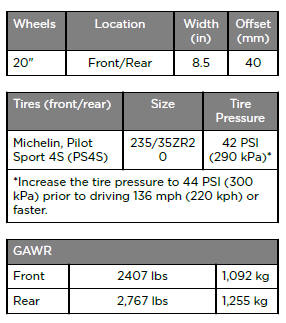
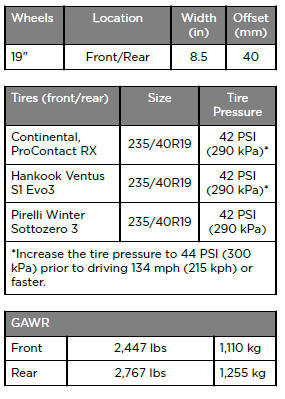
modifications. Accessory Wheels and Tires If your Model 3 is fitted with Tesla accessory
wheels or tires, the Gross Axle Weight Rating
(GAWR), wheel, tire, and loading information
may be different from the labels shown on the
vehicle. Refer to the relevant following section
for updated information. Note: If your vehicle is not fitted with Tesla
accessory wheels or tires (it is fitted with the
factory original wheels and tires, including
Tesla genuine replacement parts), refer to the
labels attached to the center door pillar for
the most accurate information for your Model
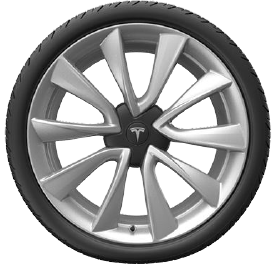
3. 20" Sport Wheels
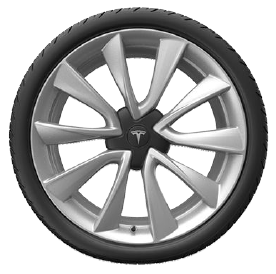
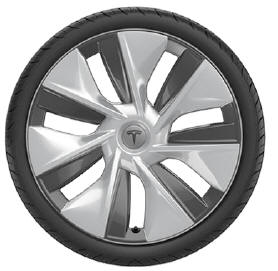
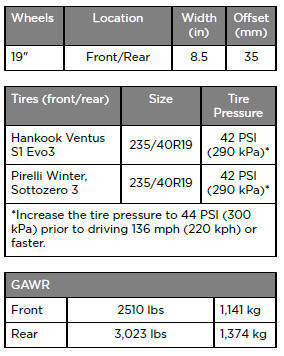
19" Sport Wheels
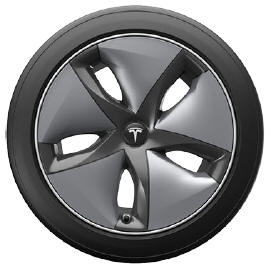
19" Gemini Wheels (Performance) See Removing and Installing Aero Covers for information on how to remove
and install Gemini wheel covers.
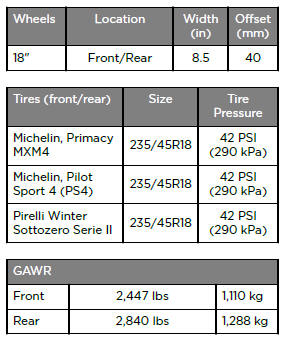
18" Aero Wheels
If your Model 3 is in a collision, contact Tesla
or a Tesla-approved Body Shop to ensure that
it is repaired with genuine Tesla parts. Tesla
has selected and approved body shops that
meet strict requirements for training,
equipment, quality, and customer satisfaction.
Some repair shops and insurance companies
might suggest using non-original equipment
or salvaged parts to save money. However,
these parts do not meet Tesla's high standards
for quality, fit and corrosion resistance. In
addition, non-original equipment and salvaged
parts (and any damage or failures they might
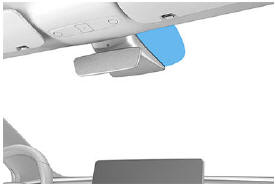
cause) are not covered by the warranty. Using RFID Transponders When attaching an RFID transponder (used by
many automated toll systems) inside Model 3,
place the transponder on the right side of the
rear view mirror as shown. This ensures best
results and minimizes any obstruction to your
driving view. Note: You can also attach a weather-proof
transponder to the front license plate.
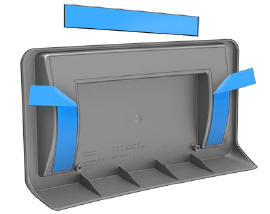
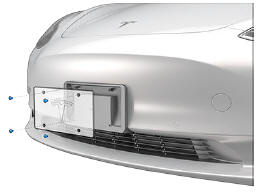
Installing Front License Plate Bracket To accommodate jurisdictions that require a
license plate on the front of your vehicle,
Model 3 is equipped with a license plate
bracket. This bracket conforms to the shape of
your vehicle's front bumper and is adhered to
it using strong adhesive.
Note: Tesla recommends performing this
procedure on a clean, dry vehicle during a
warm day. Cold and/or wet conditions may
result in reduced performance of the adhesive.
To install the front license plate bracket:
Note: Be as precise as possible when
aligning the bracket because you will be
unable to reposition it once adhered to
the bumper.
Parts, Accessories, and
Modifications
Body Repairs
READ NEXT:
 Specifications
Identification Labels
Vehicle Identification Number
You can find the VIN at the following
locations:
Touch the Tesla "T" at the top center of
the touchscreen. The popup window
dis
SEE MORE:
Buckle - 2nd Row - LH (Remove and Replace)
Note: This procedure was formulated using a release candidate or
production model. Follow safety requirements and use extreme caution when
working on or near high-voltage systems and components
SPECIAL TOOLS
Tool, Inductive Heating (1032900-00-A)
Remove
Remove the 2nd row lower seat cush
Light - Turn Signal / Fog - Front - LH (Remove and Replace)
Remove
Remove the LH front wheel. See
Wheel (Remove and Install).
Remove the LH front wheel arch liner. See
Wheel Arch Liner - Front - LH (Remove and Replace).
Disconnect the electrical connector from the LH front turn signal/fog
light.
Release the clips that attach the fascia elect
