Tesla Model 3: Pressure Transducer - Low Pressure (Remove and Replace)
Tesla Model 3 2017-2026 Service Manual / Thermal Management / Refrigerant System / Pressure Transducer - Low Pressure (Remove and Replace)
Remove
- Recover the A/C refrigerant. See A/C Refrigerant (Recovery and Recharge).
Note: Completely recover the refrigerant before continuing this procedure.
- Disconnect 12V power. See 12V Power (Disconnect and Connect).
.png)
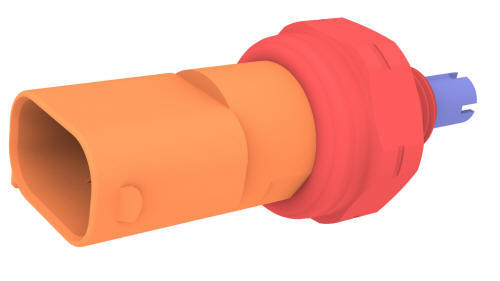
- Disconnect the electrical connector to the low pressure transducer.
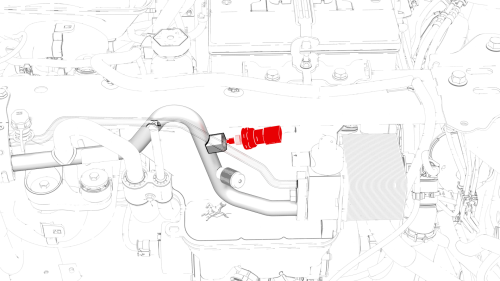
- Remove the transducer from the pipe.
.png) Torque 7 Nm
Torque 7 Nm
Install
Installation procedure is the reverse of removal, except for the following: After installing the transducer, refill the refrigerant. See A/C Refrigerant (Recovery and Recharge)
READ NEXT:
 Receiver Dryer and Desiccant (Remove and Replace)
Receiver Dryer and Desiccant- Remove
SPECIAL TOOLS
Remove
Perform the A/C refrigerant recovery. See A/C Refrigerant (Recovery and
Recharge).
Remove the bolts (x2) that attach the underhood
SEE MORE:
Tweeter - Front Door - LH (Remove and Replace)
Remove
Pull straight up to release the clips that attach the LH front door
tweeter assembly to the door.
Caution: Do not pull the tweeter assembly too far from the door panel,
as the tweeter electrical connector is still attached.
Disconnect the electrical connector from the tweeter, and
Window Regulator - Front - LH (Recalibrate)
Connect a laptop with Toolbox to the vehicle.
In Toolbox, select the connection status icon at the top right corner,
and then select Connect Locally.
Get into the driver seat, and then close the door.
In Toolbox, type window in the search field.
Note: Make sure that "Actions" is selected, if
© 2019-2026 Copyright www.tmodel3.com
