Tesla Model 3: Puddle Light - Rear Door - LH (Remove and Replace)
Tesla Model 3 2017-2026 Service Manual / Electrical / Interior Lighting / Puddle Light - Rear Door - LH (Remove and Replace)
Remove
.png)
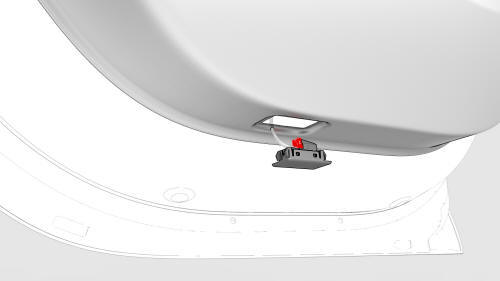
- Use a small screwdriver or pry tool in the slot at the front of the puddle light to pry the light out of the bottom of the rear LH door trim panel.
.jpg)
- Release the clips that attach the front of the puddle light to the bottom of the door trim panel, and then separate the light from the panel.
Caution:
The light electrical harness is very short. Do not pull on the harness.
- Disconnect the electrical harness from the puddle light connector, and then remove the light from the vehicle.
Install
Installation procedure is the reverse of removal, except for the following:
Align the slot of the light toward the front of the vehicle.
READ NEXT:
 ECU - Headlight (Remove and Replace)
ECU - Headlight - Remove
Remove
Raise and support the vehicle. See Raise Vehicle - 2 Post Lift.
Remove the rear underhood apron. See Underhood Apron - Rear (Remove and
Replace).
Remove the cab
SEE MORE:
Hose - Inverter Inlet - Front Drive Unit (Remove and Replace)
Hose - Inverter Inlet - Front Drive Unit - Remove
Remove
Remove the 2nd row lower seat cushion. See Seat
Cushion - Lower - 2nd Row (Remove and Replace).
Remove the rear underhood apron. See Underhood Apron
- Rear (Remove and Replace
Brake Lines - Rear - RH to Sill (Remove and Replace)
SPECIAL TOOLS
Flare nut crowfoot set (1079041-00-A)
Remove
Caution:
Brake fluid dissolves paint. Have clean towels and plenty o
© 2019-2026 Copyright www.tmodel3.com
