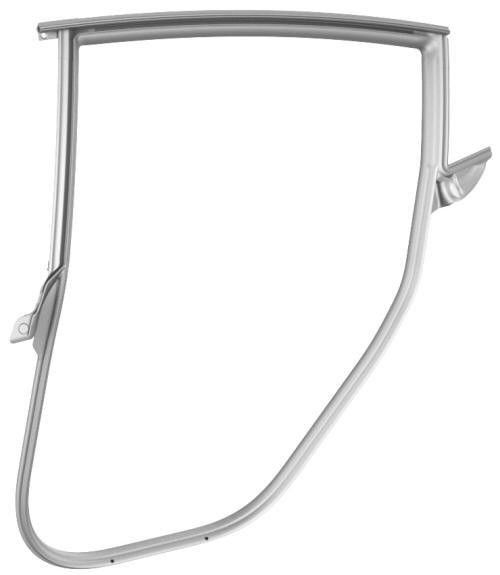
Tesla Model 3: Seal - Body - Side - Rear - Primary - LH (Remove and Replace)
Tesla Model 3 2017-2026 Service Manual / Closures / Seals Body Closures / Seal - Body - Side - Rear - Primary - LH (Remove and Replace)
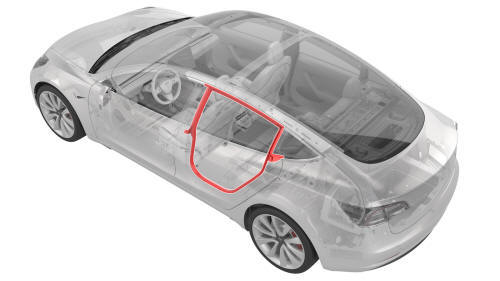
Remove
- Remove the LH B-pillar applique. See Applique - B-Pillar - LH (Remove and Replace).
- Release the clips (x3) that attach the rear LH primary body seal to the mid B-pillar, the upper B-pillar, and the mid C-pillar.
- Pull on the seal to remove it from the body.
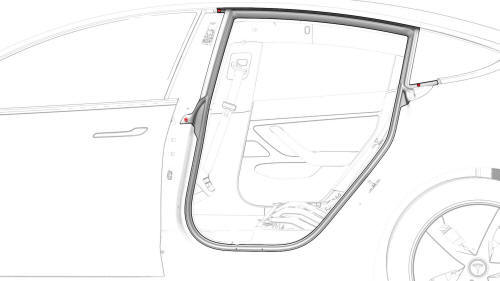
Install
- Loosely install the rear LH primary body seal to the body.
- Fasten the clips (x3) that attach the rear LH primary body seal to the mid C-pillar, the upper B-pillar, and the mid B-pillar.
- Pull the seal strings from the new seal.
- Tuck the seal into the bright molding, and make sure that it fits properly to the trim panels and the headliner
- Press the seal into the lower corners, and then install the rest of the seal to the body.
Note: Stretch and tuck the seal so that it is evenly distributed around the perimeter
- Install the LH B-pillar applique. See Applique - B-Pillar - LH (Remove and Replace).
READ NEXT:
 Seal - Glass Run - Front Door - LH (Remove and Replace)
Seal - Glass Run - Front Door - LH (Remove and Replace)- Remove
Remove
Remove the LH front door trim panel. See
Panel - Door Trim - Front - LH (Remove and Install).
Remove the LH front door inn
SEE MORE:
Maintenance
This section discusses several facets of car maintenance for long-term and optimal performance. This is a suggested maintenance plan for the Model 3, along with information on when to schedule frequent servicing and what has to be done at each visit. Owners can remain on top of routine maintenance w
Trim - A-Pillar - Lower - LH (Remove and Replace)
Remove
Open the LH front door.
Remove the LH instrument panel end cap. See
End Cap - Instrument Panel - LH (Remove and Replace).
Remove the LH middle A-Pillar trim panel. See
Trim - A-Pillar - Middle - LH (Remove and Replace).
Release the topmost clip on the LH lower A-pillar
© 2019-2026 Copyright www.tmodel3.com
