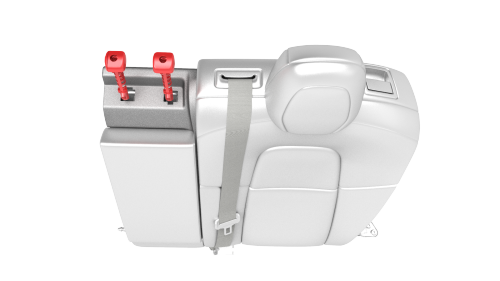
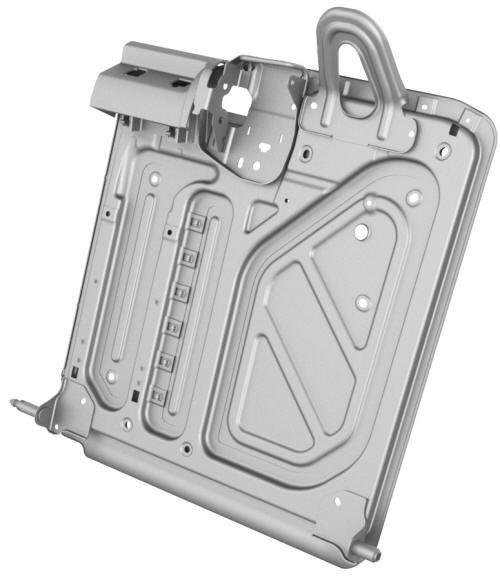
Tesla Model 3: Frame - Seat Back - 2nd Row - LH (Remove and Replace)
Tesla Model 3 2017-2026 Service Manual / Seats / 2nd Row Seat Assemblies and Hardware / Frame - Seat Back - 2nd Row - LH (Remove and Replace)
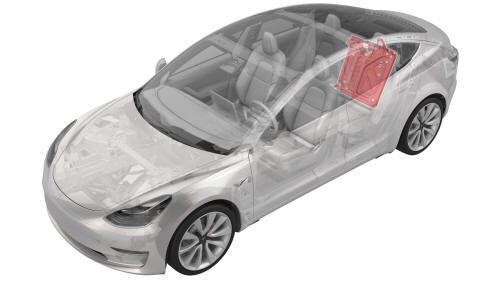
Remove
- Remove the 2nd row lower seat cushion. See Seat Cushion - Lower - 2nd Row (Remove and Replace).
- Remove the LH 2nd row seat side bolster. See Bolster - Side - Seat - 2nd Row - LH (Remove and Replace).
- Remove the rear LH sill panel trim. See Trim - Sill Panel - Rear - LH (Remove and Replace).
- Remove the LH 2nd row seat back. See Seat Back - 2nd Row - LH (Remove and Install).
- Remove the LH 2nd row seat back pivot sleeve. See Pivot Sleeve - Seat Back - 2nd Row - LH (Remove and Replace).
- Remove the LH 2nd row seat back hinge bracket. See Bracket - Hinge - Seat Back - 2nd Row - LH (Remove and Replace).
- Remove the 2nd row armrest. See Armrest - 2nd Row (Remove and Replace).
- Remove the Center 2nd row headrest. See Headrest - 2nd Row - Center (Remove and Replace).
- Remove the headrest guide locks.
- Remove the 2nd row armrest closeout. See Closeout - Armrest - 2nd Row (Remove and Replace).
- Remove the Center 2nd row seatbelt. See Seatbelt - 2nd Row - Center (Remove and Replace).
- Remove the LH 2nd row seat back latch. See Latch - Seat Back - 2nd Row - LH (Remove and Replace).
- Remove the LH 2nd row seat back handle. See
Handle - Seat Back - 2nd Row - LH (Remove and Replace).
Install
Installation procedure is the reverse of removal.
READ NEXT:
 Handle - Seat Back - 2nd Row - LH (Remove and Replace)
Remove
Remove the 2nd row lower seat cushion. See
Seat Cushion - Lower - 2nd Row (Remove and Replace).
Remove the rear underhood apron. See
Underhood Apron - Rear (Remove and Replace).
Discon
Headrest - 2nd Row - Center (Remove and Replace)
SPECIAL TOOLS
M3 1R Headrest Removal Tool (1132841-00-A)
Remove
Release the RH and LH center headrest clips simultaneously, and then pull the
headrest upwards to remove it.
Note: Use a pocket scr
Latch - Seat Back - 2nd Row - LH (Remove and Replace)
Remove
Remove the 2nd row center seatbelt assembly. See
Seatbelt - 2nd Row - Center (Remove and Replace).
Release the cable clip that attaches the latch bracket to the seat back.
Rele
SEE MORE:
Air Conditioning System Precautions
General
The air conditioning system contains fluids and components which could be
potentially hazardous to the technician or the environment if not serviced and
handled correctly. The following guidelines are intended to alert the technician
to potential sources of danger and emphasize the import
End Cap - Instrument Panel - LH (Remove and Replace)
Remove
Release the clips that attach the end cap
Remove the end cap from the vehicle.
Install
Installation procedure is the reverse of removal.
© 2019-2026 Copyright www.tmodel3.com
