Tesla Model 3: Seating and Safety Restraints
 Important information on seat positioning, seat adjustments, and in-car safety restraints is included in this section.
It offers guidance on how to properly modify the driver's and passengers' seats to ensure the best possible comfort and vision whether operating a vehicle or traveling in one. For optimal comfort, the takom comes with instructions for modifying the headrest position, lumbar support, seat height, and backrest angle.
It also highlights how to use seat belts correctly, including how to place and attach them. It provides instructions on how to utilize seat belt extenders as needed to keep everyone safe while driving as well as how to correctly buckle up kids in car seats.
The airbag systems of the car, including the frontal, side, and curtain airbags, are also covered in this section. This clarifies why it's crucial to keep your seat in the appropriate location in relation to the airbag deployment zones for maximum safety.
This section covers kid safety lock configurations, how to use and install child seats or booster seats, and how to make sure that young passengers are safely buckled up in the car.
READ NEXT:
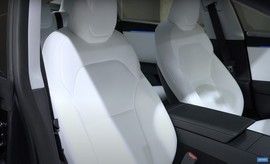
 Front and Rear Seats
Correct Driving Position
The seat, head support, seat belt and airbags
work together to maximize your safety. Using
these correctly ensures greater protection.
Position the seat so you can wear
SEE MORE:
Wiper Motor (Remove and Replace)
Wiper Motor- Remove
Remove
Remove the rear underhood apron. See
Underhood Apron - Rear (Remove and Replace).
Remove the cabin intake duct. See
Duct - Cabin Intake (Remove and Replace).
Remove the hood latch cover. See
Cover - Hood Latch (Remove and Replace).
Remove the underhood storage ca
Fluid Coupling (55 Degrees) - Rear Drive Unit (Remove and Replace)
SPECIAL TOOLS
Kit, Svc Plug, Cooling Hose, Model 3
(1135762-00-A)
Remove
Remove the mid aero shield panel. See Panel - Aero
Shield - Mid
