Tesla Model 3: Shield - Dust - Brake - Rear - LH and RH (Retrofit)
SPECIAL TOOLS
Card, Magnetic Field Viewer (1062500-00-A)
Tool, Hub Puller, Hydraulic (1096075-00-A)
Remove
Tip:
While holding the hub in position, turn the
hydraulic hub puller tool handle clockwise to
separate the LH rear drive unit halfshaft from
the hub splines.
Repeat steps 1 to 11 on the RH side of the vehicle.
Install
Caution:
Do not apply any lubricant to the halfshaft
splines. If lubricant is mistakenly applied,
wipe the splines clean with a shop towel.
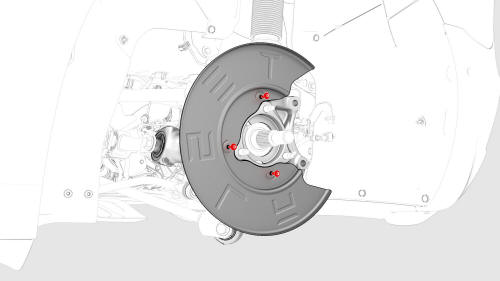
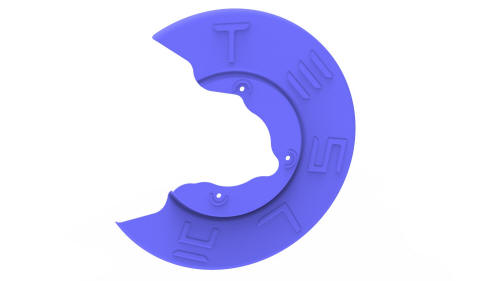
Shield - Dust - Brake - Rear - LH and RH (Retrofit) - Remove

.png)
.jpg)
.png)
Halfshaft hidden for clarity
Shield - Dust - Brake - Rear - LH and RH (Retrofit) - Install
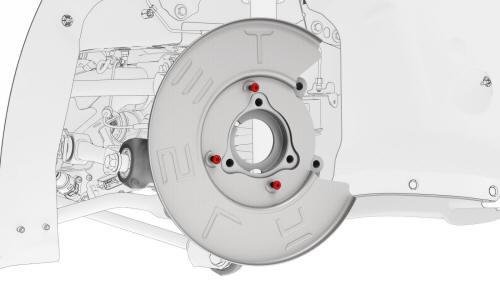
 Torque 8 Nm
 .jpg)
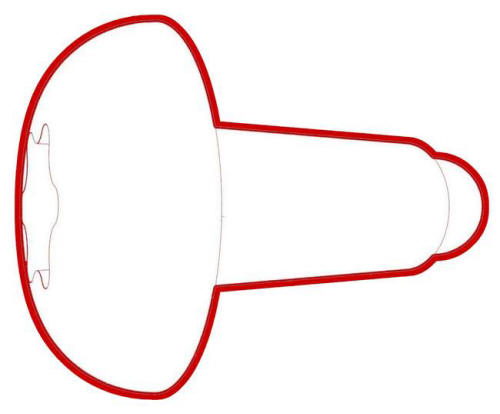
Lubricate the area highlighted red
Halfshaft hidden for clarity
.png) Torque 78 Nm
Torque 78 Nm .png) Torque 245 Nm
Torque 245 Nm
READ NEXT:
SEE MORE:
 Sensor - Radar - Front (Calibration)
Calibrate
Perform a 4-wheel alignment. See Four Wheel Alignment (Check and Adjust).
Connect a laptop with Toolbox to the vehicle.
With an assistant, use Toolbox to perform a radar drive cycle
calibration:
For new radar applications, proceed to step 4.
For existing radar applications,
Quad Camera Cover - Upper (Remove and Replace)
Remove
Remove the lower quad camera cover. See
Quad Camera Cover - Lower (Remove and Replace).
Remove the rear view mirror. See
Mirror - Rear View (Remove and Replace).
Release the clips that attach the upper quad camera cover, disconnect
the interior camera connector, and then remov
