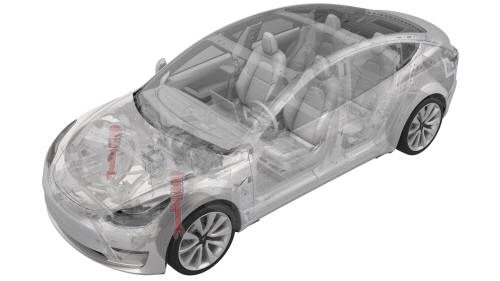
Tesla Model 3: Spring and Damper Assembly - Front - LH (Remove and Replace)
Remove
Install
Spring and Damper Assembly - Front - LH - Remove
.jpg)
.jpg)
.jpg)
.jpg)
.jpg)
.jpg)
.jpg)
.jpg)
.jpg)
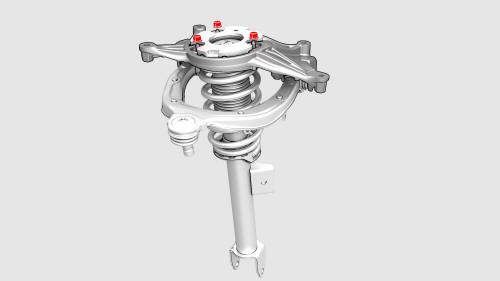

Spring and Damper Assembly - Front - LH -
Install
 Torque 23 Nm
.jpg) Torque 62 Nm
Torque 62 Nm
.jpg) Torque 35 Nm
Torque 35 Nm
.jpg) Torque 98 Nm
Torque 98 Nm
.jpg) Torque 180 Nm
Torque 180 Nm
.jpg) Torque 56 Nm
Torque 56 Nm
.png) Torque 6 Nm
Torque 6 Nm
READ NEXT:
SEE MORE:
 Ankle Catcher (Remove and Replace)
Remove
Remove the front fascia.
Remove the bolts that attach the bottom of the cooling fan module to the
ankle catcher
Note: Lift the condenser fan module up to ease removal of the bolts.
Loosen but do not remove the bolts that attach the upper section of the
front end carrier to
Applique - B-Pillar - LH (Remove and Replace)
Applique - B-Pillar - LH (Remove and Replace) -
Remove
Remove
Open the LH front and rear doors.
Release the clips that attach the B-pillar applique fastener cover to
the vehicle, and then remove the cover.
Remove the bolts that attach the B-pillar applique to the body, but do
