Tesla Model 3: Switch - Window - Driver (Remove and Replace)
Tesla Model 3 2017-2026 Service Manual / Closures / Door Glass and Regulators / Switch - Window - Driver (Remove and Replace)
Remove
- Remove the LH front door trim panel. See Panel - Door Trim - Front - LH (Remove and Install).
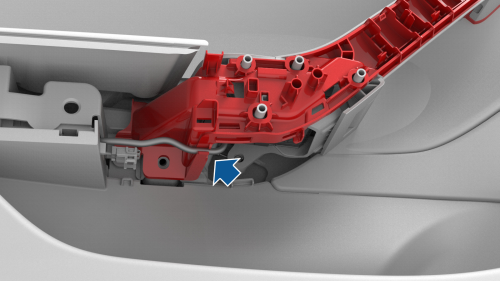
- Release the clip that attaches the driver window switch electrical harness to the door trim panel.
- Release the clips that attach the driver window switch to the door trim panel.
Tip: Release the outer clips first, and then release the inner clips while pushing the driver window switch to release from the door trim panel.
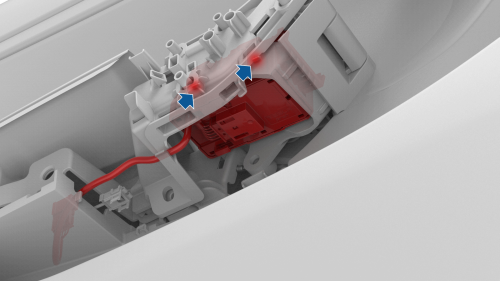
Note: Feed the electrical harness through the door trim panel hole to remove the electrical harness from the driver window switch.
Note: Replace any broken door panel clips
- Remove the driver window switch from the vehicle.
Install
- Install the electrical harness connector to the driver window switch.
- Secure the clips that attach the driver window switch to the door trim panel.
- Install the LH front door trim panel. See Panel - Door Trim - Front - LH (Remove and Install).
READ NEXT:
 Switch - Window - Front Passenger (Remove and Replace)
Switch - Window - Front Passenger (Remove and Replace) - Remove
Remove
Remove the RH front door trim panel. See
Panel - Door Trim - Front - LH (Remove and Install).
Remove the puddle light el
SEE MORE:
Link - Lateral - Lower - Front - LH (Remove and Replace)
Remove
Raise and support the vehicle. See
Raise Vehicle - 2 Post Lift.
Remove the LH front wheel. See
Wheel (Remove and Install).
Remove and discard the nut that attaches the LH front lower lateral link
to the knuckle.
Raise the vehicle fully.
Remove the front aero shield. See
Panel
Knuckle - Suspension - Rear - LH (Remove and Replace)
Knuckle - Suspension - Rear - LH - Remove
SPECIAL TOOLS
Tool, Spring Compressor, Hook, Model 3
(1135103-00-A)
Card, Magnetic Field Viewer (1062500-00-A)
© 2019-2026 Copyright www.tmodel3.com
