Tesla Model 3: Trim - Floor - Trunk (Remove and Replace)
Tesla Model 3 2017-2026 Service Manual / Interior Trim / Luggage Compartment Trim / Trim - Floor - Trunk (Remove and Replace)
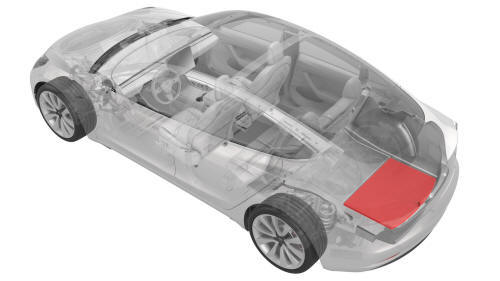
Remove
- Open the rear trunk.
.jpg)
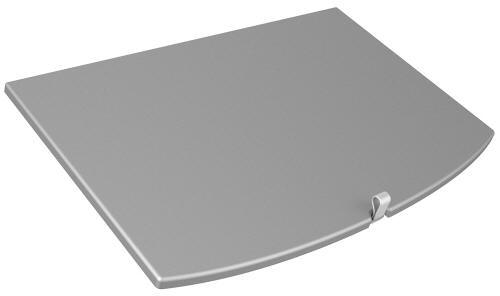
- Lift up the trunk floor trim and remove it from the vehicle.
.png) Tip:
Use the pull tab located at the rear edge of the trunk floor trim.
Tip:
Use the pull tab located at the rear edge of the trunk floor trim.
Install
Installation procedure is the reverse of removal.
READ NEXT:
 Trim - Side - Trunk - LH (Remove and Replace)
Trim - Side - Trunk - LH (Remove and Replace) - Remove
Remove
Remove the 2nd row lower seat cushion. See
Seat Cushion - Lower - 2nd Row (Remove and Replace).
Remove the LH 2nd row seat side bol
SEE MORE:
Garnish - Trunk (Remove and Replace)
Remove
LH shown, RH similar
Open the trunk.
Release the clips (x2) that attach the ends of the trunk garnish to the
body.
Release the tabs (x10) that attach the trunk garnish to the body, and
then remove the trunk garnish from the vehicle.
Install
Installation procedure is the
Seal - Oil - Differential to Halfshaft - Front Drive Unit - LH (Remove and
Replace)
SPECIAL TOOLS
Tool, Axle Extraction, Model 3 (1133386-00-A)
Tool, Hub Puller, Hydraulic (1096075-00-A)
Install Tool, Output Seal, Model 3 (1131206-00-A)
Tool, Seal Puller, Adjustable (1052583-00-A)
Remove
Remove the LH front drive unit halfshaft. See
Halfshaft - Front Drive Unit - LH (Remove an
© 2019-2026 Copyright www.tmodel3.com
