Tesla Model 3: Wiper Motor (Remove and Replace)
Remove
Warning: Do not place limbs within the motor linkage area as the
wiper arms will automatically transition to Parking Mode.
Install
Warning: Do not place limbs within the motor linkage area as the
wiper arms will automatically transition to Parking Mode.
Wiper Motor- Remove
.jpg)
LH shock tower cover shown, RH similar
.png)
.jpg)
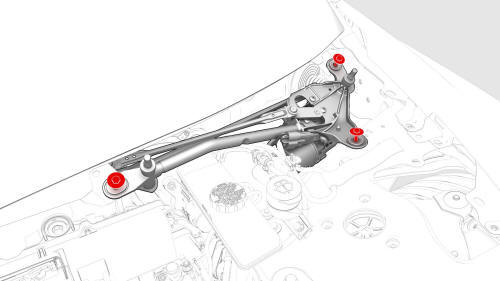
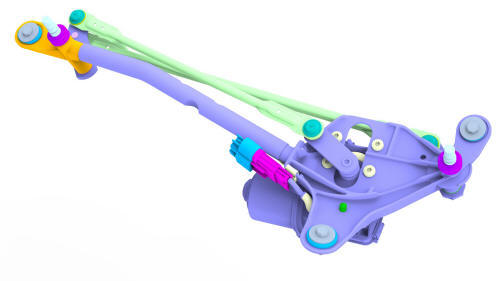
Wiper Motor- Install
 Torque 7 Nm
LH shock tower cover shown, RH similar
READ NEXT:
 Wiper Arms (Remove and Replace)
Remove
Remove the rear underhood apron. See
Underhood Apron - Rear (Remove and Replace).
Remove the wiper arm nut covers.
Release the LH and RH wiper arm hoses from the Y-tube.
Release
SEE MORE:
Switch - Steering Wheel - LH (Remove and Replace)
Remove
Remove the driver airbag. See Airbag - Driver (Remove and Replace).
Disconnect the steering wheel electrical wiring harness from the
connector.
Disconnect the electrical harness from the LH steering wheel switch
connector.
Disconnect the electrical harness from the RH s
Evaporator (Remove and Replace)
Evaporator- Remove
Remove
Remove the HVAC assembly. See
HVAC Assembly (Remove and Replace).
Put the HVAC assembly on a working surface. Make sure that the HVAC
assembly is on its side with the HVAC inlet facing up.
Remove the TXV O-ring seals (x2) from the HVAC assembly.
Release the cl
