Tesla Model 3: Wiper Arms (Remove and Replace)
Tesla Model 3 2017-2026 Service Manual / Electrical / Wipers and Washers / Wiper Arms (Remove and Replace)
Remove
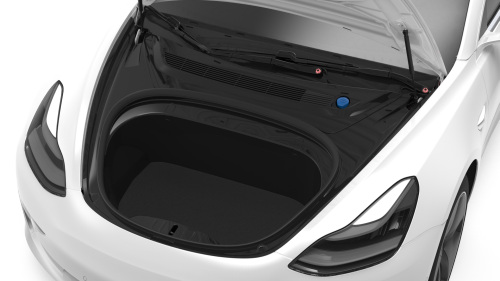
- Remove the rear underhood apron. See Underhood Apron - Rear (Remove and Replace).
- Remove the wiper arm nut covers.
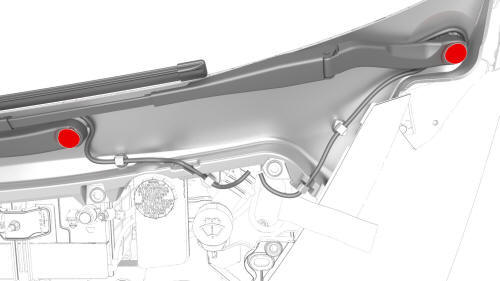
- Release the LH and RH wiper arm hoses from the Y-tube.
- Release the clips (x2 for each arm) that attach the LH and RH wiper arm hoses to the vehicle.
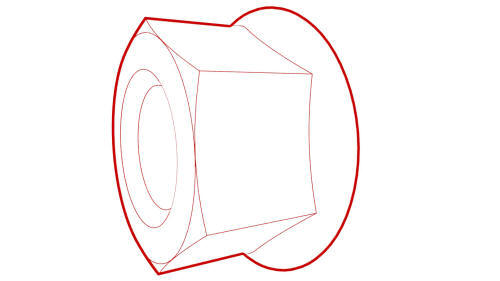
- Remove the nuts that attach the wiper arms to the wiper motor assembly.
- Remove the wiper arms from the vehicle

Install
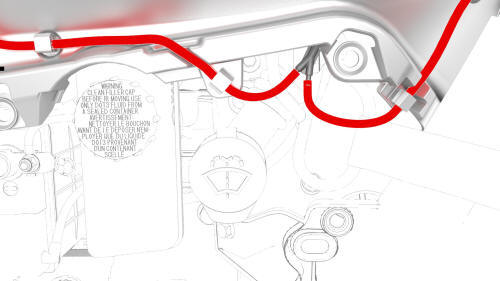
Note: Make sure to route the hoses behind the wiper arm pivot joint.
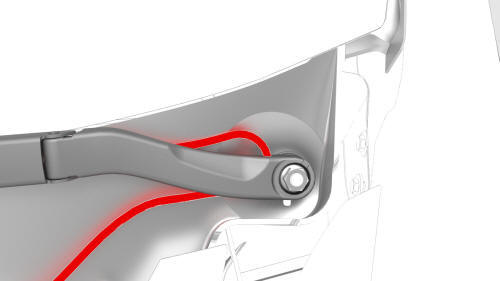
Incorrect hose routing
- Position the LH and RH wiper arms onto the vehicle.
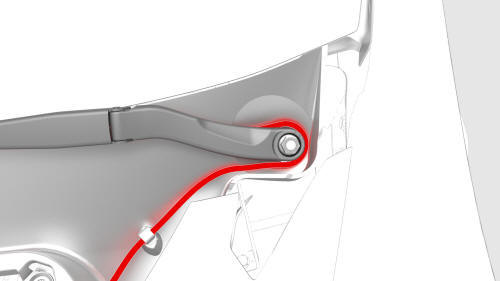
Correct hose routing
- Install and hand-tighten the nuts that attach the wiper arms to the wiper motor assembly.

- Align the tip of the RH wiper blade between the two arrows on the windshield.
- Tighten the nut to attach the RH wiper arm.
 Torque 25 Nm
 - Align the tip of the LH wiper blade between the two arrows on the windshield.
Note: The LH wiper blade should be approximately 5 - 10mm from, and parallel to, the front edge of the windshield.
- Tighten the nut to attach the LH wiper arm.
Torque 25 Nm
- Connect the LH and RH wiper arm hoses to the Y-tube fitting.
- Connect the clips (x2 for each arm) that attach the LH and RH wiper arm hoses to the vehicle.
- Install the wiper arm nut covers.
- Install the rear underhood apron. See Underhood Apron - Rear (Remove and Replace).
READ NEXT:
 Wiper Blades (Adjust)
SPECIAL TOOLS
Adjustment
Using the touchscreen, put the wipers in "Service Mode".
Clean the wiper blades and the windshield thoroughly with isopropyl
alcohol wipes, or equivalent.
Spray the
Wiper Blades (Remove and Replace)
Note: This procedure was formulated
using a release candidate or production model. Follow safety requirements and
use extreme caution when working on or near high-voltage systems and compone
SEE MORE:
Brake Hose - Flexible - Rear - LH (Remove and Replace)
SPECIAL TOOLS
Flare nut crowfoot set (1079041-00-A)
Remove
Caution:
Brake fluid dissolves paint. Have clean towels and plenty o
Wipers and Washers
Wipers
To perform a single wipe with the windshield
wipers, press and immediately release the
button on the end of the left-hand steering
column lever.
To adjust the continuous wiper settings, touch
the windshield wiper icon located in the
"Cards" area on the touchscreen. The wipe
© 2019-2026 Copyright www.tmodel3.com
