Tesla Model 3: Actuator - Upper Mode (Remove and Replace)
Actuator - Upper Mode- Remove
Remove
- Remove the 2nd lower seat cushion. See
Seat Cushion - Lower - 2nd Row (Remove and Replace).
- Remove the rear underhood apron. See
Underhood Apron - Rear (Remove and Replace).
- Disconnect 12V power. See
12V Power (Disconnect and Connect).
- Remove the LH instrument panel end cap. See
End Cap - Instrument Panel - LH (Remove and Replace).
- Remove the LH air wave end cap. See
End Cap - Air Wave - LH (Remove and Replace).
- Remove the RH instrument panel end cap. See
End Cap - Instrument Panel - LH (Remove and Replace).
- Remove the front passenger floormat.
- Remove the RH center console side panel carpet. See
Carpet - Side Panel - Center Console - LH (Remove and Replace).
- Remove the passenger footwell cover. See
Cover - Footwell - Passenger (LHD) (Remove and Replace).
- Remove the front passenger knee airbag. See
Airbag - Knee - Front Passenger (Remove and Replace).
- Remove the RH air wave end cap. See
End Cap - Air Wave - LH (Remove and Replace).
- Remove the main instrument panel decor trim. See
Decor Trim - Instrument Panel - Main (Remove and Replace).
- Remove the glove box. See
Glove Box (LHD) (Remove and Replace).
- Remove the RH footwell duct. See
Duct - Footwell - RH (Remove and Replace).
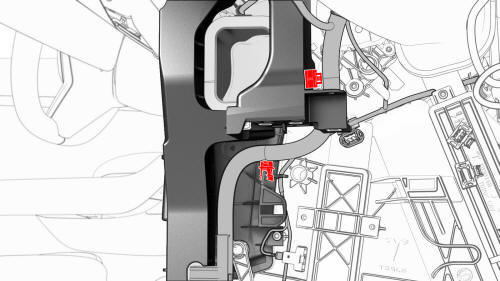
- Release the clips that attach the instrument panel harness to the RH
side of the HVAC assembly.

- Disconnect the electrical connector from the upper mode actuator.
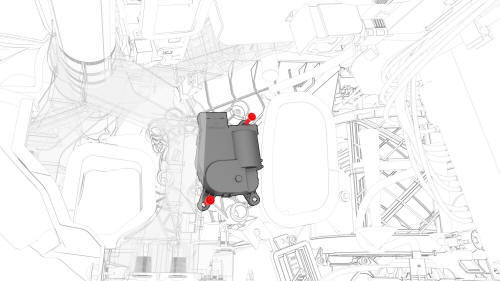
- Remove the bolts that attach the upper mode actuator to the HVAC
assembly, and then remove the upper mode actuator.
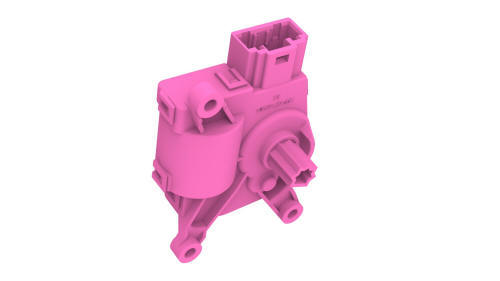
Actuator - Upper Mode- Remove
Install
- Position the upper mode actuator onto the HVAC assembly; align the guide
and push the actuator towards the left to install.
- Install the bolts that attach the upper mode actuator to the HVAC
assembly.
 Torque 1.2 Nm
- Connect the upper mode actuator electrical connector.
- Install the clips that attach the instrument panel harness to the RH
side of the HVAC assembly.
- Install the RH footwell duct. See
Duct - Footwell - RH (Remove and Replace).
- Install the glove box. See
Glove Box (LHD) (Remove and Replace)
- Install the main instrument panel decor trim. See
Decor Trim - Instrument Panel - Main (Remove and Replace).
- Install the RH air wave end cap. See
End Cap - Air Wave - LH (Remove and Replace).
- Install the front passenger knee airbag. See
Airbag - Knee - Front Passenger (Remove and Replace).
- Install the passenger footwell cover. See
Cover - Footwell - Passenger (LHD) (Remove and Replace).
- Install the RH center console side panel carpet. See
Carpet - Side Panel - Center Console - LH (Remove and Replace).
- Install the front passenger floormat.
- Install the RH instrument panel end cap. See
End Cap - Instrument Panel - LH (Remove and Replace).
- Install the LH air wave end cap. See
End Cap - Air Wave - LH (Remove and Replace).
- Install the LH instrument panel end cap. See
End Cap - Instrument Panel - LH (Remove and Replace).
- Reconnect 12V power. See
12V Power (Disconnect and Connect).
- Install the rear underhood apron. See
Underhood Apron - Rear (Remove and Replace).
- Install the 2nd lower seat cushion. See
Seat Cushion - Lower - 2nd Row (Remove and Replace).
READ NEXT:
Remove
Remove the LH front vent. See
Vent - Front - LH (Remove and Replace).
Remove the bolts that attach the LH vent actuator to the vent, and then
remove the LH vent actuator.
Install
I
SEE MORE:
Remove
Remove the subwoofer. See Subwoofer (Remove and Replace).
Remove the screws that attach the audio amplifier to the subwoofer
assembly, and remove the amplifier from the subwoofer.
Torque 4.4 Nm
Install
Installation procedure is the reverse of removal.
Remove
Remove the 2nd row lower seat cushion. See Seat Cushion - Lower - 2nd
Row (Remove and Replace).
Remove the rear underhood apron. See Underhood Apron - Rear (Remove and
Replace).
Remove the cabin intake duct. See Duct - Cabin Intake (Remove and
Replace)
Disconnect 12V power. See 12V
 Actuator - Vent - LH (Remove and Replace)
