Tesla Model 3: Actuator - Vent - LH (Remove and Replace)
Tesla Model 3 2017-2026 Service Manual / Thermal Management / Cabin HVAC / Actuator - Vent - LH (Remove and Replace)
Remove
- Remove the LH front vent. See Vent - Front - LH (Remove and Replace).
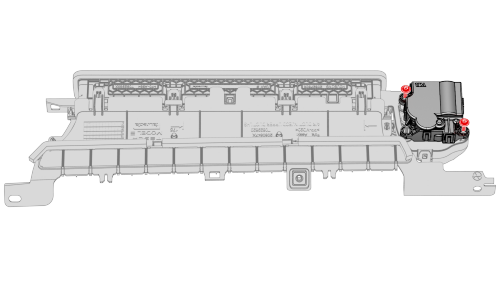
- Remove the bolts that attach the LH vent actuator to the vent, and then
remove the LH vent actuator.
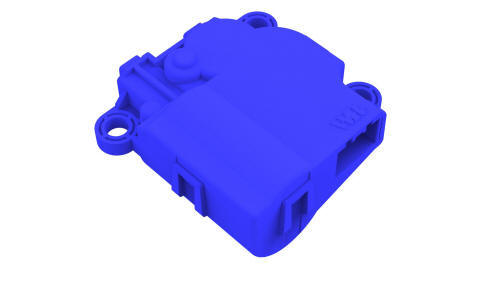
Install
Installation procedure is the reverse of removal.
READ NEXT:
 Actuator - Vent - RH (Remove and Replace)
Remove
Remove the RH front vent. See
Vent - Front - RH (Remove and Replace).
Remove the screws that attach the RH vent actuator to the RH front vent,
and then remove the actuator from the
Air Extractor - LH (Remove and Replace)
Remove
Remove the rear fascia. See
Fascia - Rear (Remove and Install).
Press downward at the top to release the tabs that attach the air
extractor to the body, then swing the upper portion
Duct - Air Wave - LH (Remove and Replace)
Remove
Remove the IP carrier. See
IP Carrier (Remove and Replace).
Remove the screws (x2) that attach the LH air wave duct to the cross bar
beam, and then remove the duct from the vehicle.
SEE MORE:
Striker - Door - Front - LH (Remove and Replace)
Remove
Open the LH front door.
Mark the position of the LH front door striker using masking tape.
Remove the bolts that attach the LH front door striker to the body, and
then remove the striker from the vehicle.
Install
Hand-tighten the bolts that attach the LH front door st
Powertrain Coolant (Drain and Refill)
Powertrain Coolant - Drain
SPECIAL TOOLS
Drive Unit Pressure Test Fixture (1053600-00-C)
Kit, Coolant Leak Test Adapters, Model 3
(1132185-00-B)
Kit, Coola
© 2019-2026 Copyright www.tmodel3.com
