Tesla Model 3: Air Extractor - LH (Remove and Replace)
Tesla Model 3 2017-2026 Service Manual / Thermal Management / Cabin HVAC / Air Extractor - LH (Remove and Replace)
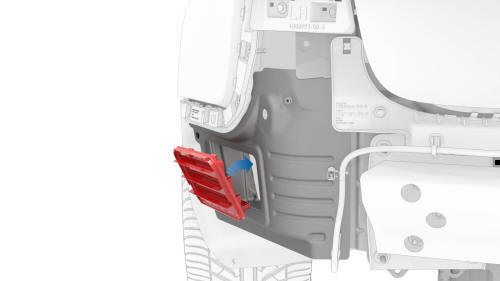
Remove
- Remove the rear fascia. See Fascia - Rear (Remove and Install).
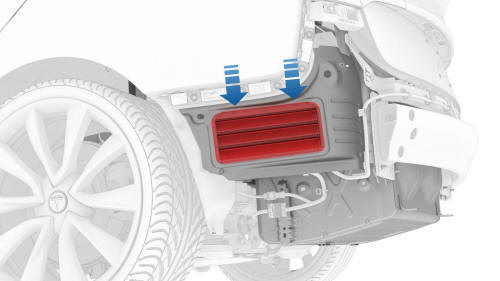
- Press downward at the top to release the tabs that attach the air
extractor to the body, then swing the upper portion of the air extractor
outwards, and then remove the air extractor from the vehicle.
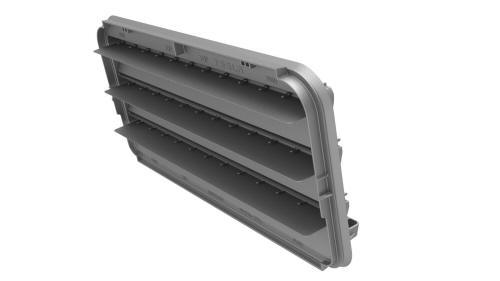
Install
- Position the bottom edge of the air extractor, and then swing the top portion of the air extractor until is attached firmly by the 4 clips.
- Install the rear fascia. See Fascia - Rear (Remove and Install).
READ NEXT:
 Duct - Air Wave - LH (Remove and Replace)
Remove
Remove the IP carrier. See
IP Carrier (Remove and Replace).
Remove the screws (x2) that attach the LH air wave duct to the cross bar
beam, and then remove the duct from the vehicle.
Duct - Air Wave - RH (Remove and Replace)
Remove
Remove the glove box. See
Glove Box (LHD) (Remove and Replace).
Remove the RH footwell air duct from the HVAC module, and then remove
the duct from the vehicle.
Release the cli
Duct - Cabin Intake (Remove and Replace)
Remove
Remove the rear underhood apron. See
Underhood Apron - Rear (Remove and Replace).
Release the clips (x4) that attach the cabin intake duct to the cowl
screen panel, and then remove
SEE MORE:
Airbag - Knee - Driver (Remove and Install)
Remove
Remove the LH center console side panel carpet. See Carpet - Side Panel
- Center Console - LH (Remove and Replace).
Disconnect 12V power. See 12V Power (Disconnect and Connect).
Remove the driver footwell cover. See Cover - Footwell - Driver (Remove
and Replace).
Remove the T20
Brake Pad Kit - Rear (Base Brakes) (Remove and Replace)
SPECIAL TOOLS
Kit, EPB Release, Handheld (1134520-00-A)
XP-10 Power Supply, XP-10 (1129348-00-A)
Remove
Remove the LH rear wheel. See Wheel (Re
© 2019-2026 Copyright www.tmodel3.com
