Tesla Model 3: Adjust Front Toe
Tesla Model 3 2017-2025 Service Manual / Suspension / Adjustment / Four Wheel Alignment (Check and Adjust) / Adjust Front Toe
- If the front toe is within specification and does not require adjustment, complete the alignment. See Complete the Alignment.
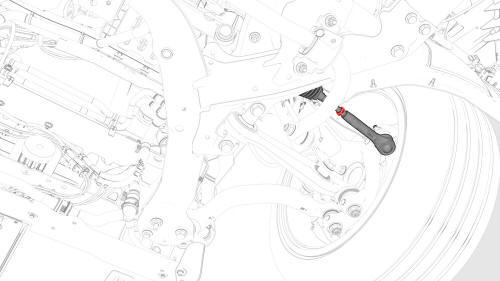
- Loosen the jam nut on the LH inner tie rod.
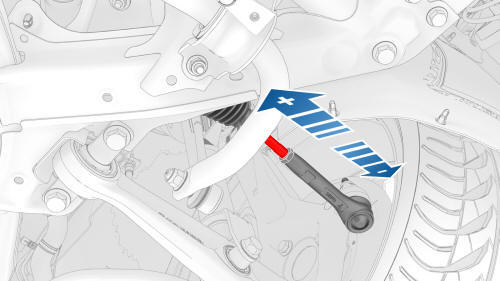
- Rotate the LH inner tie rod to adjust the front LH toe to 0.05º OUT +/- 0.15º (+/- 0.10º split).
- To add positive toe in, move the tie rod end in toward the centerline.
- To add negative toe out, move the tie rod end out from the centerline.
- When the front LH toe is correct, tighten the jam nut on the LH inner
tie rod.
.png) Torque 80 Nm
Torque 80 Nm - Perform step 2 through step 4 for the RH side of the vehicle if necessary.
- Complete the alignment. See Complete the Alignment.
Complete the Alignment
- Print the vehicle summary and verify that the alignment parameters are within specifications.
Repeat the adjustment for any parameter that is not within specification.
- Adjust Rear Camber
- Adjust Rear Toe
- Adjust Front Camber and Caster
- Adjust Front Toe
- Install the mid aero shield panel. See Panel - Aero Shield - Mid (Remove and Replace).
- Lower the alignment rack to a working height and lock.
- Remove the alignment heads from the wheels.
- Remove the brake pedal depressor.
- Install the alignment slip/turn plate pins.
- Lower the alignment rack to the ground.
- Unlatch the driver's door, shift into Park, and remove the steering wheel bubble leveler.
- Unbuckle the seat belts and remove the ballast bags from the vehicle.
- Remove the seat covers from the seats.
- Connect a laptop with Toolbox 3 to the vehicle.
- In Toolbox, click Actions, type "angle" in the search field, click Play to the left of "PROC_EPAS3X_X_CLEAR-APPLIED-ANGLE-OFFSET", and then select Run.
- Click Actions, type "angle" in the search field, click Play to the left of "TEST_EPAS3P_X_CHECK-APPLIED-ANGLE-OFFSET", and then select Run.
- Disconnect the laptop from the vehicle.
- Remove the wheel chocks.
- Install the cowl screen panel. See Panel - Cowl Screen (Remove and Replace).
- Remove the vehicle from the alignment rack.
- Perform a test drive and verify vehicle operation.
READ NEXT:
 Front Upper Control Arm (FUCA) Mount - LH - Remove
SPECIAL TOOLS
Tool, FUCA Ride Height, Model 3 (1450399-00-A)
Remove
Raise and support the vehicle. See
Raise Vehicle - 2 Post Lift.
Remove the LH front wheel. See
Wheel (Remove and Install).
R
SEE MORE:
Easter Eggs
But wait, there's more! Below is a list of the Easter Eggs that have been
discovered so far and how
to access them. Alternatively, touch the Tesla "T" (top center of the
touchscreen) then drag the
About Your Tesla box downwards for one-touch access to all discovered Easter
Eggs
Drive Unit - Front - Remove
SPECIAL TOOLS
Tool, Axle Extraction, Model 3 (1133386-00-A)
Lifting Sling, Drive Unit, Model 3 (NA, APAC)
(1130279-00-A)
Li
© 2019-2025 Copyright www.tmodel3.com
