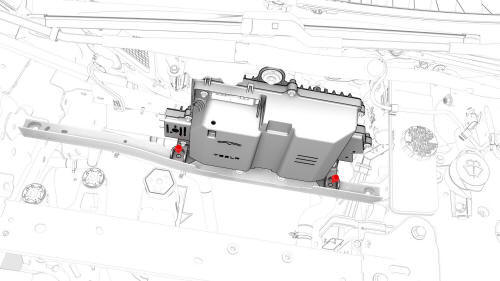
Tesla Model 3: Beam - 12V Battery (RWD) (Remove and Replace)
Remove
Note: Maneuver the 12V battery bracket beam to ease removal from
the vehicle.
Install Caution: Keep the 12V battery ground terminal away to avoid catching between the
beam and the bracket.
Beam - 12V Battery (RWD) - Remove
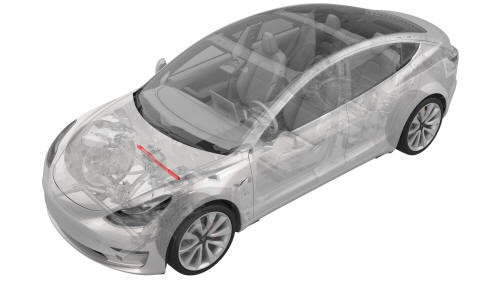
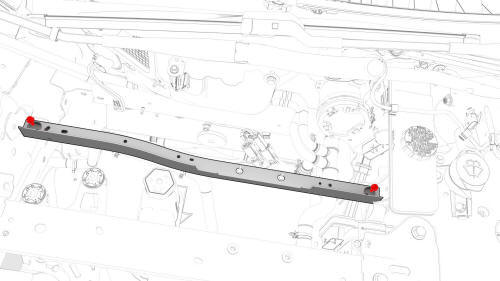
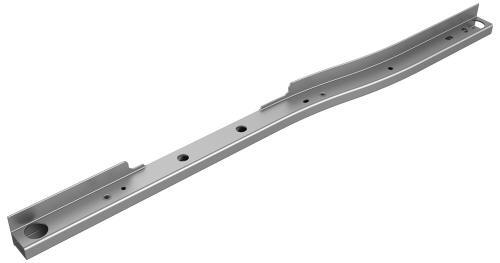
Beam - 12V Battery (RWD) - Install
 Torque 9 Nm
 Torque 10 Nm
READ NEXT:
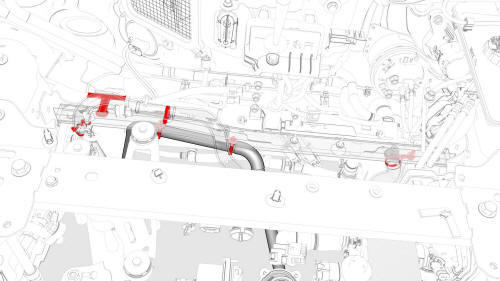
 Bracket - 12V Battery (Dual Motor) (Remove and Replace)
Remove
Remove the 2nd row lower seat cushion. See
Seat Cushion - Lower - 2nd Row (Remove and Replace).
Remove the rear underhood apron. See
Underhood Apron - Rear (Remove and Replace).
Remove
SEE MORE:
Summon
Before Using Summon
Summon (if equipped) allows you to
automatically park and retrieve Model 3 while
you are standing outside the vehicle. Summon
uses data from the ultrasonic sensors to move
Model 3 forward and reverse up to 39 feet (12
meters) in, or out of, a parking space.
To move Model
Child Safety Seats
Guidelines for Seating Children
Your Model 3 seat belts are designed for adults and larger children. You must
restrain infants and
small children in the second row seats only, and you must use a suitable child
safety seat
appropriate for the child's age, weight, and size.
Warning: Never seat
