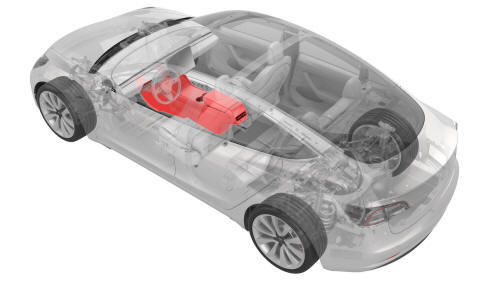
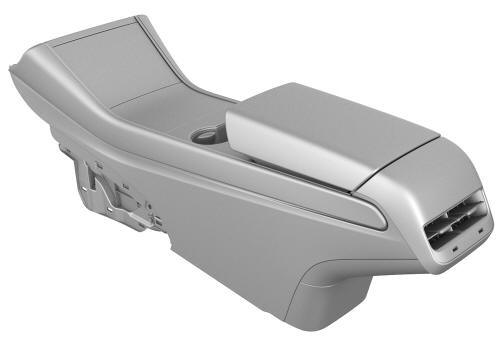
Tesla Model 3: Center Console (Remove and Install)
Center Console (Remove and Install) - Remove
Remove
- Remove and attach the customer's belongings from the center console, if
needed.
- Remove the 2nd row lower seat cushion. See
Seat Cushion - Lower - 2nd Row (Remove and Replace).
- Remove the rear underhood apron. See
Underhood Apron - Rear (Remove and Replace).
- Remove the driver floormat.
- Remove the LH center console side panel carpet. See
Carpet - Side Panel - Center Console - LH (Remove and Replace).
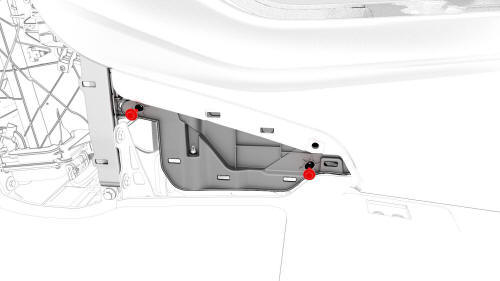
- Remove the bolts that attach the LH front of the center console to the
body.
- Remove the front passenger floormat.
- Remove the RH center console side panel carpet. See
Carpet - Side Panel - Center Console - LH (Remove and Replace).
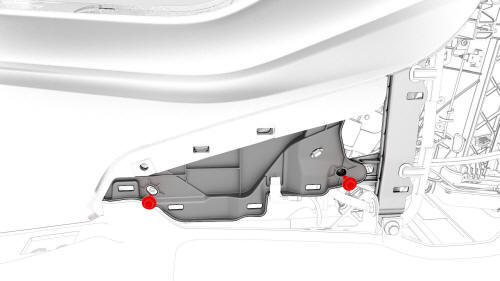
- Remove the bolts that attach the RH front of the center console to the
body.
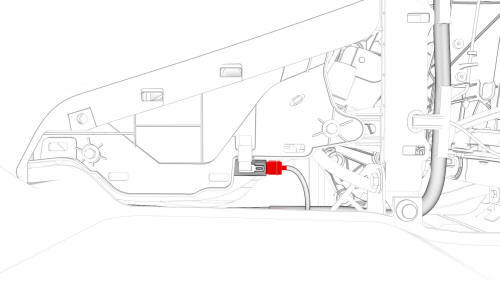
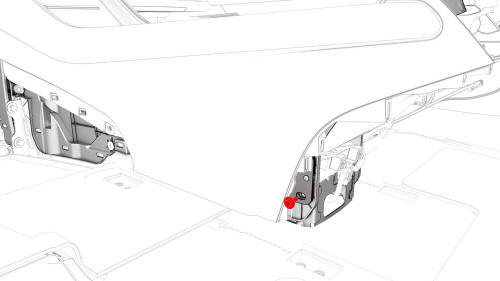
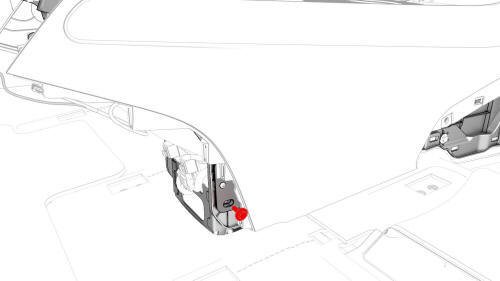
- Disconnect the electrical connector that is located at the RH front of
the center console.
- Remove the phone tray. See
Phone Tray - Center Console (Remove and Replace).

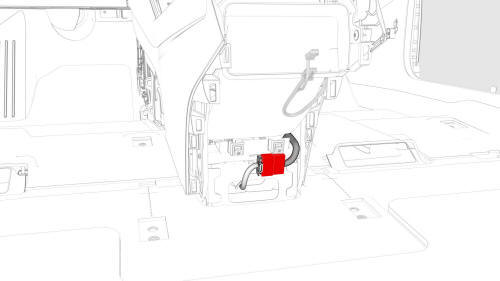
- Remove the bolts that attach the front of the center console to the body.
- Remove the center console lower rear panel. See
Panel - Lower Rear - Center Console (Remove and Replace).
- Remove the bolt that attaches the LH rear of the center console to the
body.
- Remove the bolt that attaches the RH rear of the center console to the
body.
- On the touchscreen, select Control > Safety & Security > Vehicle Power >
Power Off to power off the vehicle.
- Disconnect 12V power. See
12V Power (Disconnect and Connect).
- Disconnect the electrical connector from the rear of the center console.
- Close the center console rotating lid to prevent it from getting stuck
on the center display upon removal of the center console from the vehicle.
- With an assistant, remove the center console from the vehicle as follows:
- Tilt the rear of the center console upwards.
- Pull the center console towards the rear of the vehicle.
- Tilt the front of the center console upwards.
- Remove the center console through the passenger front door.
Center Console (Remove and Install) - Install
Install
- With an assistant, install the center console into the vehicle as
follows:
- Tilt the front of the center console downwards.
- Slide the center console towards the front of the vehicle.
- Tilt the rear of the center console downwards until it is in place.
- Open the center console rotating lid.
- Connect the electrical connector in the rear of the center console.
Caution: Ensure the connector is properly installed. Perform a
push-pull test before continuing this procedure.
- Install the bolt that attaches the RH rear of the center console to the
body.
 Torque 7 Nm
- Install the bolt that attaches the LH rear of the center console to the
body.
Torque 7 Nm
- Install the center console lower rear panel. See
Panel - Lower Rear - Center Console (Remove and Replace).
- Install the bolts that attach the front of the center console to the
body.
 Torque 1.7 Nm
- Install the phone tray. See
Phone Tray - Center Console (Remove and Replace).
- Connect the electrical connector that is located at the RH front of the
center console.
Caution:
Ensure the connector is properly installed. Perform a push-pull test
before continuing this procedure.
- Install the bolts that attach the RH front of the center console to the
body.
Torque
7 Nm
- Install the RH center console side panel carpet. See
Carpet - Side Panel - Center Console - LH (Remove and Replace).
- Install the front passenger floormat.
- Install the bolts that attach the LH front of the center console to the
body.
Torque 7 Nm
- Install the LH center console side panel carpet. See
Carpet - Side Panel - Center Console - LH (Remove and Replace).
- Install the driver floormat.
- Install the rear underhood apron. See
Underhood Apron - Rear (Remove and Replace).
- Install the 2nd row lower seat cushion. See
Seat Cushion - Lower - 2nd Row (Remove and Replace).
- Restore the customer's belongings into the center console, if needed.
READ NEXT:
Remove
Remove the center console assembly. See
Center Console (Remove and Install).
Install
With an assistant, install the center console into the vehicle as
follows:
Tilt the front of th
SEE MORE:
A/C Refrigerant- DRAFT
Warning:
This procedure was derived from pre-production computer models, and
might not reflect the real-world situation. Warnings and cautions might be
missing. Follow safety requirements and use extreme caution when working on or
near high voltage systems and components
Procedure
Special tools required for this procedure:
SPECIAL TOOLS
Pliers, Clip Removal (1133569-00-A)
On a wall, measure 14.5 in (36.8 cm) from the floor, and then apply a
length of 1-inch masking tape horizontally to the wall to mark the
measurement.
Measure 25 ft (7.62 m) from the wall,
 Center Console (Remove and Replace)
