Tesla Model 3: Duct - HVAC Plenum - Outer (Remove and Replace)
Tesla Model 3 2017-2026 Service Manual / Thermal Management / Cabin HVAC / Duct - HVAC Plenum - Outer (Remove and Replace)
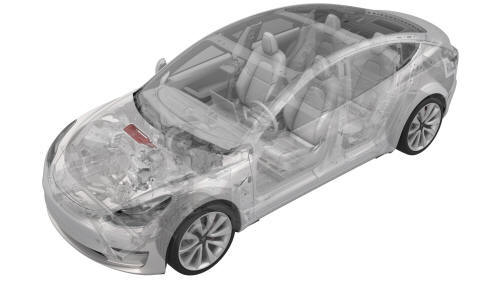
Remove
- Remove the rear underhood apron. See Underhood Apron - Rear (Remove and Replace).
- Remove the cabin intake duct. See Duct - Cabin Intake (Remove and Replace).
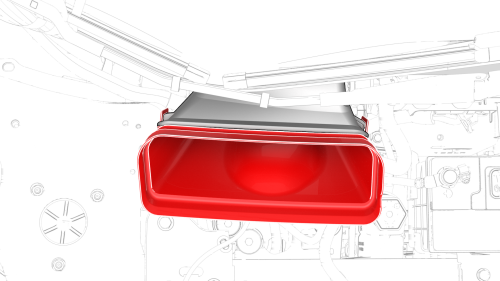
- Release the clips that attach the outer HVAC plenum duct to the inner
HVAC plenum duct, and then remove the outer HVAC plenum duct from the
vehicle.
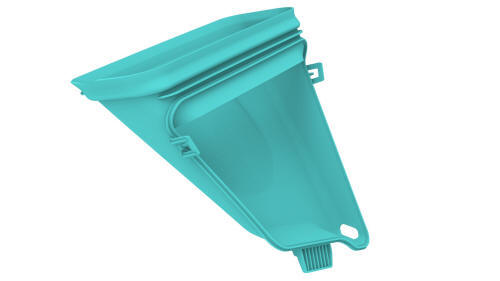
Install
Installation procedure is the reverse of removal, except for the following: Align the tab at the bottom of the outer HVAC plenum duct before attaching the clips.
READ NEXT:
 Filter - Cabin (Remove and Replace)
Remove
Animated demonstration
Turn off the climate control system.
Remove the RH side center console side panel carpet. See
Carpet - Side Panel - Center Console - LH (Remove and Replace).
Rem
Heater - PTC (Remove and Replace)
Heater - PTC- Remove
Remove
Raise and support the vehicle on a 2 post lift. See
Raise Vehicle - 2 Post Lift.
Remove the rear underhood apron. See
Underhood Apron - Rear (Remove and Replace).
R
SEE MORE:
Halfshaft - Rear Drive Unit - LH (Remove and
Replace)
Halfshaft - Rear Drive Unit - LH - Remove
SPECIAL TOOLS
Kit, EPB Release, Handheld (1134520-00-A)
XP-10 Power Supply, XP-10 (1129348-00-A)
Hose - Return - Powertrain (Remove and Replace)
Remove
Remove the HV battery. See HV Battery (RWD) (Remove and Install).
Release the clips (x5) that attach the powertrain return (lower) hose to
the RH side of the HV battery, and remove the hose from the HV battery.
Remove the plugs from the powertrain return hose, if installed.
Install
© 2019-2026 Copyright www.tmodel3.com
