Tesla Model 3: ECU - Charge Port (Remove and Replace)
Tesla Model 3 2017-2026 Service Manual / High Voltage System / Charge System Inlet / ECU - Charge Port (Remove and Replace)
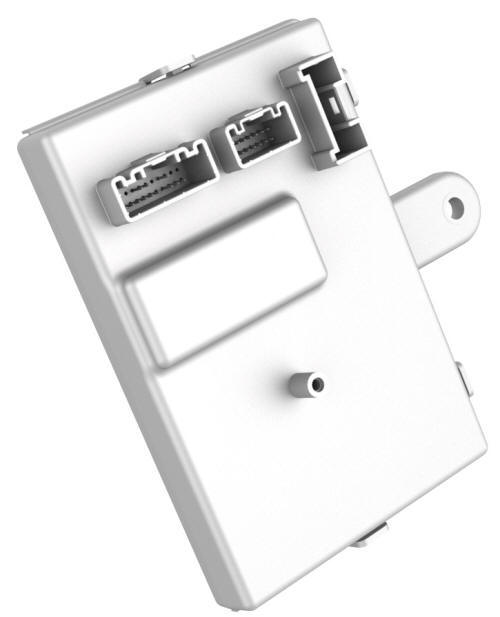
Remove
- Open the trunk.
- Remove the LH trunk side trim. See Trim - Side - Trunk - LH (Remove and Replace).
- Disconnect 12V power. See 12V Power (Disconnect and Connect).
.jpg)
- Disconnect the electrical harnesses from the 3 charge port ECU connectors.
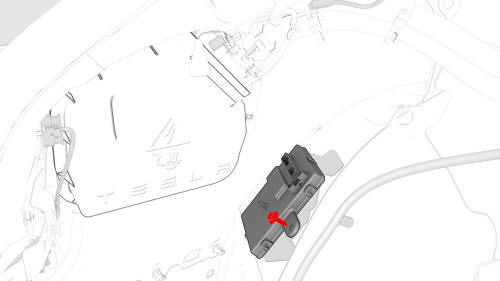
- Remove the bolt that
attaches the charge port ECU
to the body.
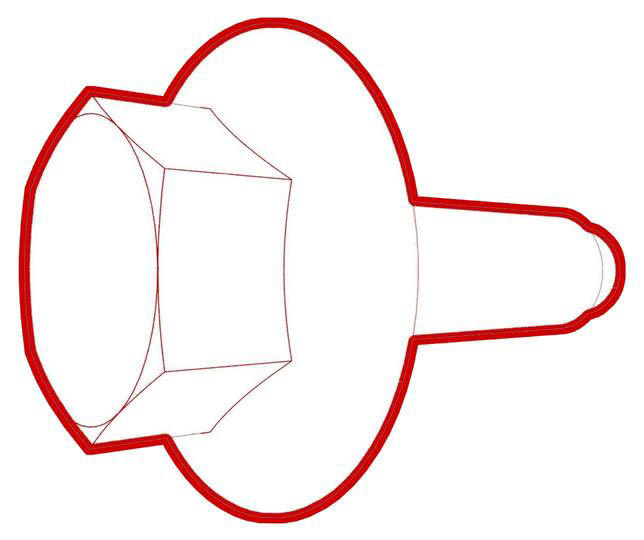 Torque 5.5 Nm
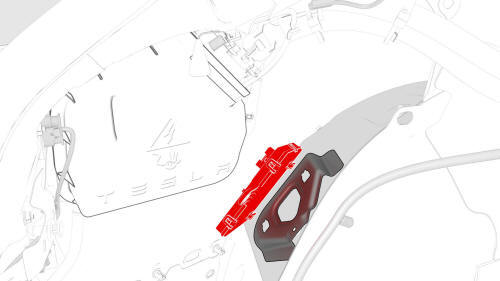
- Slide the charge port
ECU to the right to release
the tabs that attach the ECU
to the body, and then remove
the ECU from the vehicle.
Install
Installation procedure is the reverse of removal, except for the following: Update the firmware.
READ NEXT:
 Latch Actuator - Charge Port (Remove and Replace)
Latch Actuator - Charge Port - Remove
Remove
Perform the vehicle electrical isolation procedure.
See Vehicle Electrical Isolation Proce
SEE MORE:
Strap - 12V Battery (Remove and Replace)
Remove
Remove the rear underhood apron. See
Underhood Apron - Rear (Remove and Replace).
Remove the cabin intake duct. See
Duct - Cabin Intake (Remove and Replace).
Loosen the nut that attaches the 12V battery upper tie down bracket to
the 12V battery strap. Torque 5 Nm
Push down and s
Trim - Sill Panel - Rear - LH (Remove and Replace)
Remove
Open all doors.
Lower all windows.
Remove the 2nd row lower seat cushion. See
Seat Cushion - Lower - 2nd Row (Remove and Replace).
Remove the LH 2nd row seat side bolster. See
Bolster - Side - Seat - 2nd Row - LH (Remove and Replace).
Pull upward at the lower corner of the rea
© 2019-2026 Copyright www.tmodel3.com
