Tesla Model 3: Fascia - Front (Remove and Install)
Tesla Model 3 2017-2026 Service Manual / Body / Bumper / Fascia / Fascia - Front (Remove and Install)
Remove
- Remove the rear underhood apron.
- Remove the cabin intake duct.
- Remove the hood latch cover.
- Remove the underhood storage unit carpet
- Remove the underhood storage unit.
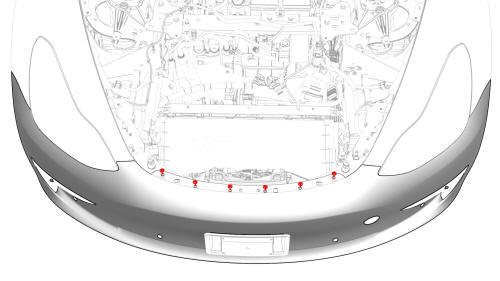
- Remove the bolts that attach the top of the front fascia to the vehicle.
 Torque
4 Nm
Torque
4 Nm - Remove the front wheels.
- Remove the front aero shield panel.
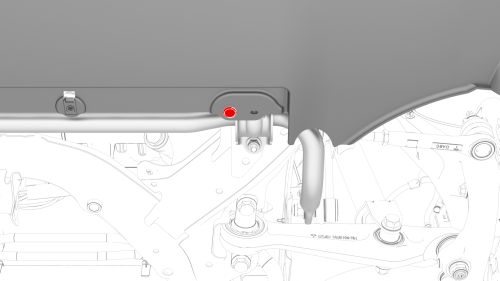
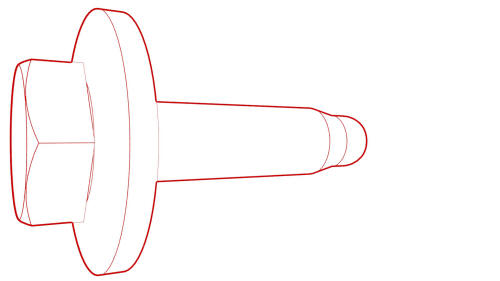
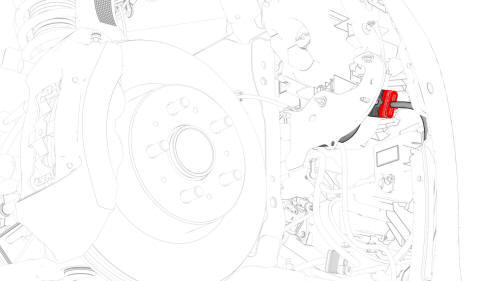
- Remove the clips (x1 on each side) that attach the lower valance to the front sway bar brackets.
- Lower the vehicle partially.
.png)
LH shown, RH similar; one clip is behind the knuckle
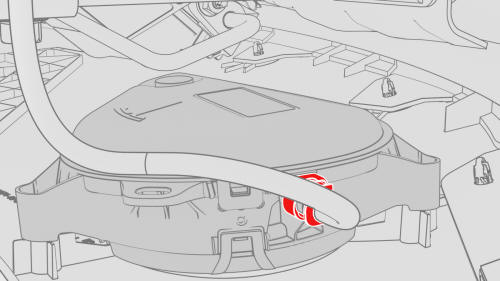
- Release the clips (x9) that attach the front portion of the LH and RH front wheel arch liners to the vehicle, and then move the wheel arch liners aside to perform the following steps.
.png)
- On both sides of the vehicle, loosen the bolts that attach the front
fascia to the fender.
.jpg) Torque 4 Nm
Torque 4 Nm
.jpg)
- On both sides of the vehicle, remove the bolt that attaches the front
fascia to the fender.
Torque 3 Nm
- Disconnect the electrical connector from the front fascia in the RH wheel well.

- If present, release the clip that attaches the electrical harness to the pedestrian warning speaker assembly.
- If present, slide the locking tab away from the connector, and then press down on the locking tab to disconnect the connector from the pedestrian warning speaker assembly.
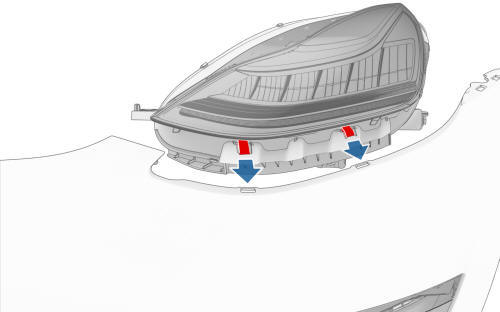
- With an assistant, release both corners of the front fascia, and then carefully pull the fascia forward to remove it from the vehicle. Place the fascia on a padded surface.
Caution:
Carefully release the tabs that attach the lower headlight bracket to the front fascia, otherwise the tabs can be broken.
Tip: Perform this step with the help of another technician.

Install
Installation procedure is the reverse of removal, except for the following:
- Align the fascia to the fender before tightening the bolts that attach the fascia to the fender.
READ NEXT:
 Fascia - Front (Remove and Replace)
Fascia - Front (Remove)
Remove
Remove the front license plate bracket.
Remove the front fascia.
Disconnect the electrical harness from the RH front turn signal/fog
light connector.
Rel
SEE MORE:
Coat Hook - Rear - LH (Remove and Replace)
Remove
Remove the headliner. See
Headliner (Remove and Install).
Release the clips that attach the bezel to the LH rear coat hook, and
then remove the coat hook from the headliner.
Install
Installation procedure is the reverse of removal.
Trim - Lid - Trunk (Remove and Replace)
Remove
Open the trunk.
Release the clips at the upper corners, then work around the trim to
release the clips that attach the trunk trim to the trunk lid.
Note: The clips (x4) closest to the rear window have a higher
retention force; use a clip prytool, if necessary. Remove any broken
© 2019-2026 Copyright www.tmodel3.com
