Tesla Model 3: Fluid Coupling (Straight) - Rear Drive Unit (Remove and Replace)
Tesla Model 3 2017-2026 Service Manual / Rear Drive Unit / Rear Drive Unit Assembly / Fluid Coupling (Straight) - Rear Drive Unit (Remove and Replace)
SPECIAL TOOLS
Kit, Svc Plug, Cooling Hose, Model 3 (1135762-00-A)
Remove
- Remove the LH rear drive unit mount. See Mount - Rear Drive Unit - LH (Remove and Replace).
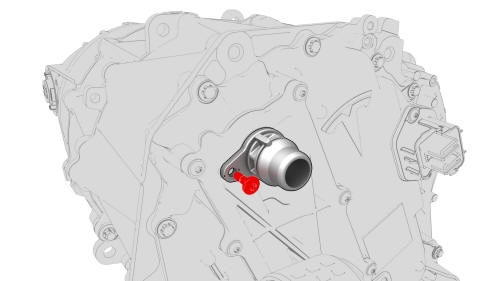
- Remove the bolt that attaches the straight fluid
coupling to the rear drive unit inverter.
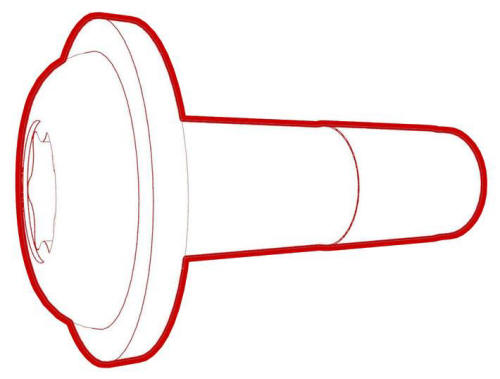 Torque 6 Nm
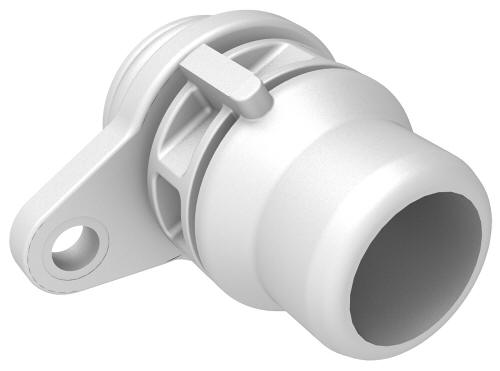
 - Remove the straight fluid coupling.
Install
Installation procedure is the reverse of removal, except for the following:Caution: Replace all patchbolts.
- Perform an inverter coolant leak test. See Inverter Coolant Leak Test.
- Refill the coolant. See Powertrain Coolant (Drain and Refill).
READ NEXT:
 Drive Unit - Rear (Remove and Install)
Drive Unit - Rear- Remove
SPECIAL TOOLS
Fixture, Subframe, Model 3 (1099645-00-B)
Li
SEE MORE:
Pressure Transducer - High Pressure (Remove and Replace)
Remove
Remove the underhood storage unit. See Underhood Storage Unit (Remove
and Replace).
Perform the A/C refrigerant recovery. See A/C Refrigerant (Recovery and
Recharge).
Remove the outer HVAC plenum duct. See Duct - HVAC Plenum - Outer
(Remove and Replace).
Disconnect the electrical
Decor Trim - Center Console (Remove and Replace)
Remove
Open the LH front door.
Move the LH front seat to the lowest and most rearward position.
Clip Locations on Center Console
Clip Locations on Decor Trim
Release the clips (x9) that attach the LH center console decor trim to
the center console, and then remove the decor trim.
© 2019-2026 Copyright www.tmodel3.com
