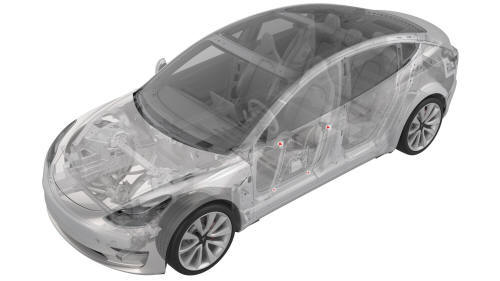
Tesla Model 3: Glass - Door - LH - Front (Adjust)
Tesla Model 3 2017-2026 Service Manual / Closures / Door Glass and Regulators / Glass - Door - LH - Front (Adjust)
DRAFT
Warning:
This procedure was derived from pre-production computer models, and might not reflect the real-world situation. Warnings and cautions might be missing. Follow safety requirements and use extreme caution when working on or near high voltage systems and components.
Do not redistribute this content.
SPECIAL TOOLS
Tool, Window Switch, Model 3 (1135305-00-A)
Procedure
- Remove the front LH door trim panel. See Panel - Door Trim - Front - LH (Remove and Install).
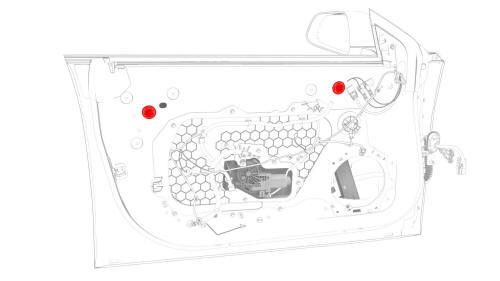
- Remove the plugs (x2) to access the regulator isolation clamps.
- Connect the window switch special tool and lower the window to access the regulator isolation clamps.
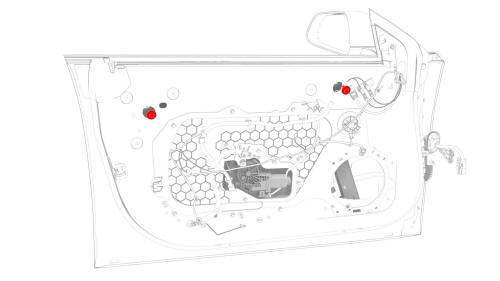
- Loosen the nuts that secure the window glass to the clamps, but do not remove the nuts.
- Adjust the window glass position and hand tighten the nuts.
- If the window angle needs adjustment, continue to the next step. Otherwise, skip to step 9.
- Remove the LH front door speaker. See Speaker - Front Door - LH (Remove and Replace).
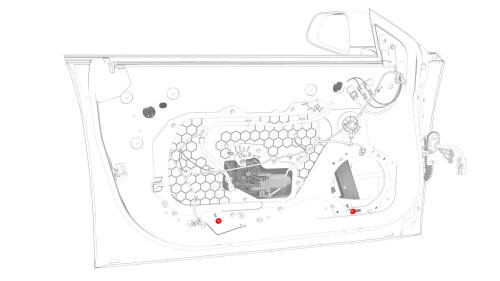
- Loosen the lower regulator mounting bolts, and then adjust the regulator angle by turning the mounting stud. After the window angle adjustment is complete, hand tighten the lower regulator bolts.
- Fully raise the window glass.
- Close the front LH door and verify window fitment. Adjust the window glass, if necessary.
- Lower the window glass to access the regulator isolation clamps.
- Tighten the nuts that secure the glass to the clamps.
 Torque 10 Nm
 - Tighten the bolts that secure the window regulator to the inner door
 Torque 10 Nm
 - Install the LH front door speaker, if removed. See Speaker - Front Door - LH (Remove and Replace).
- Fully raise the window.
- Disconnect the window switch special tool.
- Install the plugs that cover access to the regulator isolation clamps
- Install the front LH door trim panel. See Panel - Door Trim - Front - LH (Remove and Install).
READ NEXT:
 Glass - Door - LH - Front (Remove and Replace)
SPECIAL TOOLS
TOOLKIT, WINDOW SWITCH (1454796-00-A)
Warning: The side impact airbag deployment depends on the front door
sensor's ability to detect a side impact from air pressure. Make sure that
Glass - Door - LH - Rear (Adjust)
DRAFT
Warning:
This procedure was derived from pre-production computer models, and
might not reflect the real-world situation. Warnings and cautions might be
missing. Follow safety requirements
Glass - Door - LH - Rear (Remove and Replace)
SPECIAL TOOLS
Tool, Window Switch Bypass, Model 3 (1135305-00-A)
XP-10 Power Supply, XP-10 (1129348-00-A)
Warning: The side impact airbag deployment depends on the front door
sensor's ability to d
SEE MORE:
TXV Valve - Evaporator (Remove and Replace)
TXV Valve - Evaporator- Remove
Remove
Disconnect 12V power. See 12V Power (Disconnect and Connect).
Remove the underhood storage unit. See Underhood Storage Unit (Remove
and Replace).
Recover the A/C refrigerant. See A/C Refrigerant (Recovery and
Recharge).
Note: The following steps can b
Tire Care and Maintenance
Maintaining Tire Pressures
Keep tires inflated to the pressures shown on
the Tire and Loading Information label, even if
it differs from the pressure printed on the tire
itself. The Tire and Loading Information label is
located on the center door pillar and is visible
when the front door is ope
© 2019-2026 Copyright www.tmodel3.com
