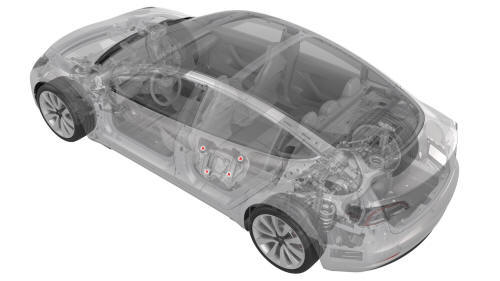
Tesla Model 3: Glass - Door - LH - Rear (Adjust)
Tesla Model 3 2017-2026 Service Manual / Closures / Door Glass and Regulators / Glass - Door - LH - Rear (Adjust)
DRAFT
Warning:
This procedure was derived from pre-production computer models, and might not reflect the real-world situation. Warnings and cautions might be missing. Follow safety requirements and use extreme caution when working on or near high voltage systems and components.
Do not redistribute this content.
- Place 2 pieces of masking tape vertically across the moving glass and outer belt, and cut the tape near the edge where the glass meets the seal.
- Remove the LH rear door trim panel. See Panel - Door Trim - Rear - LH (Remove and Install).
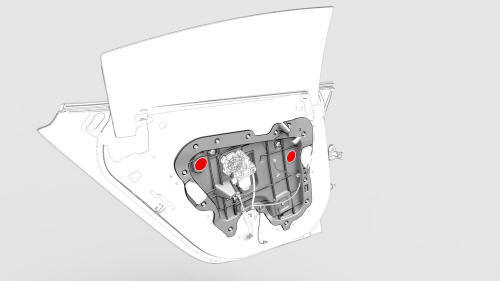
- Remove the plugs (x2) that cover the openings in the door to gain access to the bolts that secure the window glass.
.jpg)
- If available, connect the window switch special tool. Otherwise, support the door trim panel and reconnect the door trim panel harness.
- Lower the window for access to the regulator isolation clamps.
- Loosen the fasteners that secure the window glass to the window regulator clamps about 1/2 turn to maintain the position of the window but still allow adjustment.
- Adjust the window glass position to achieve the gap target, and then hand tighten the fasteners.
- Close the LH rear door.
- Raise the LH rear window using the driver's master switch.
- Check the gap and flush on the LH rear window and adjust it, if necessary.
- Open the LH rear door.
- Loosen the lower regulator mounting nuts. Adjust the window regulator angle by turning the mounting stud.
Note: One turn of the lower regulator nut equals 1 mm adjustment; clockwise turns adjusts the window angle outwards and counterclockwise adjusts the window inwards.
- Hand tighten the regulator fasteners.
- Hand tighten the lower regulator mounting nuts.
- Close the LH rear door.
- Raise the LH rear window fully using the driver's master switch.
- Check the LH rear window for gap and flush and re-adjust, if necessary.
- Open the LH rear door.
- Lower the window for access to the regulator isolation clamps.
- Tighten the fasteners that secure the window glass to the window regulator. Torque 12 Nm
- Tighten the fasteners that secure the window regulator to the closeout panel. Torque 10 Nm
- If installed, disconnect the window switch special tool and reconnect the window switch electrical connector.
- Install the plugs (x2) that cover the openings in the door for access to the fasteners securing the glass.
- Install the LH rear door trim panel. See Panel - Door Trim - Rear - LH (Remove and Install).
- Get inside the LH 2nd row seat and close the LH rear door.
- Lower the LH rear window fully.
- Raise the LH rear window fully and continue to hold the window switch for 10 seconds after the window stops.
- Press the window switch down to the second position to activate the auto down function, and then activate the auto raise function of the window. If the window does not lower completely, repeat the previous step.
- Exit the vehicle and close the LH front and rear doors.
- Remove the masking tape from the vehicle.
READ NEXT:
 Glass - Door - LH - Rear (Remove and Replace)
SPECIAL TOOLS
Tool, Window Switch Bypass, Model 3 (1135305-00-A)
XP-10 Power Supply, XP-10 (1129348-00-A)
Warning: The side impact airbag deployment depends on the front door
sensor's ability to d
Switch - Window - Driver (Remove and Replace)
Remove
Remove the LH front door trim panel. See
Panel - Door Trim - Front - LH (Remove and Install).
Release the clip that attaches the driver window switch electrical
harness to the doo
Switch - Window - Front Passenger (Remove and Replace)
Switch - Window - Front Passenger (Remove and Replace) - Remove
Remove
Remove the RH front door trim panel. See
Panel - Door Trim - Front - LH (Remove and Install).
Remove the puddle light el
SEE MORE:
Software Updates
Loading New Software
Tesla updates your vehicle's software
wirelessly, constantly providing new features.
Tesla recommends you install software
updates as soon as they are available on your
vehicle. To ensure the fastest and most reliable
delivery of software updates, leave Wi-Fi
turned
Duct - HVAC Plenum - Inner (Remove and Replace)
Remove
Remove the rear underhood apron. See
Underhood Apron - Rear (Remove and Replace).
Remove the outer HVAC plenum. See
Duct - HVAC Plenum - Outer (Remove and Replace).
Remove the hood latch cover. See
Cover - Hood Latch (Remove and Replace).
Remove the underhood storage unit. See
Unde
© 2019-2026 Copyright www.tmodel3.com
